Building a PC is a great way to get a custom configuration, save some money and have some fun. Watch our how-to video to learn how to do it in less than two minutes:


Building a computer is a great way to get a custom configuration, save some money and have fun. In a how-to video, we'll show you how to build one in less than two minutes.
PC components
Asus Z87-A motherboard - $140
Intel Core i5-4430 Haswell 3.0GHz quad-core processor - $190
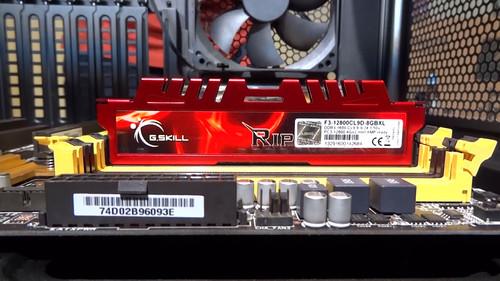
G.SKILL Ripjaws X Series 8GB DDR3 SDRAM - $80
Radeon HD 5450 graphics card - $30
Rosewill wireless card - $10
Seagate Barracuda 1TB hard drives (x2) - $70 each
Optical drive - $20
Antec 550W power supply - $65
Corsair 400R mid tower - $100
Asus PB278Q 27" LED monitor with speakers - $550
Logitech M705 wireless mouse - $40
Logitech K120 keyboard - $11
Windows 7 Home Premium - $75
Total - $1,451
First, lay the case on its side and install the motherboard. It may require spacing screws in order to make it level with the cutouts on the back of the case, but either way be sure to secure the motherboard to the case using the supplied screws.
Put the memory into the slots recommended in the motherboard's manual. Make sure the memory clicks into place and is secure.
Add the CPU, which is the most important and most delicate part of the computer. Handle it by its sides and then add the processor to the motherboard and secure it using the clamp.
Add some thermal paste which will help transfer heat from the CPU to the heat sink. Then add the heat sink and fan. Check the motherboard's manual on where to plug the fan into for power.
Add any PCI cards into the corresponding slots. We'll install a wireless card and a graphics card. Those can go into any of the empty slots, just make sure they're accessible from the back of the case.
All of the components will need power so connect the power supply, which typically goes at the bottom of the case. Tighten the screws to hold it in place. Then connect the power supply to the various components.
Then add the hard disk drives and optical drive. Those will usually slide into the bays and either click into place or need to be secured using screws.
Hard drives and optical drives will need both data and power cables. Power cables will come from the power supply and data from the motherboard.
After installing all of the components, connect the monitor, keyboard and mouse and then hit the power button on the case. Keep the cover off the case to monitor the start up.
If it's all installed correctly the BIOS screen should appear. Choose the option to boot from the optical drive. Insert the Windows disc and restart the computer.
Nick Barber covers general technology news in both text and video for IDG News Service. E-mail him at [email protected] and follow him on Twitter at @nickjb.


