
Well, you did it. You pulled the trigger on a shiny (or matte) new iPhone 7 or 7 Plus. Nice! Before you head out to take a squillion 15-megapixel photos to fill up the super-sized storage, there are a few housekeeping details you should tend to first.
1. Back up and restore
This isn’t poor planning, I swear—I like to back up my old phone after I have my new iPhone in hand, so the backup is as up-to-date as it can possibly be. While you can back up via iCloud or iTunes, I prefer the faster iTunes method. Connect your old iPhone to your Mac, launch iTunes, select your iPhone by clicking the little phone icon in the toolbar, and under Backups, choose This Computer. Checking Encrypt local backup is a good idea, so your account passwords and Health data gets backed up too—just choose a password you won’t forget. Click the button to Back up now.
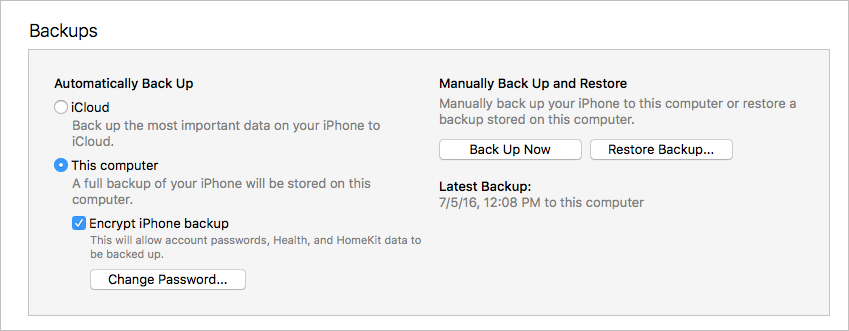
Because I encrypted my backup, the Activity progress I made was synced over to my new iPhone 7. That progress was wiped out on my Apple Watch during the process of pairing it to the 7, but when I opened the Activity app on the iPhone 7, that progress was sent back over to the Apple Watch. Ta-da!
When the backup is done, connect your new iPhone 7, then tell iTunes you want to restore from the backup you just made. Later, you can switch back to iCloud backups if you prefer, in Settings > iCloud > Backup. But it never hurts to run a backup on your own Mac every now and then.
If you happen to be coming from an Android phone (hey, welcome to the garden!), there’s a Move from iOS Android app that can assist you with setting up your Google account data in Mail, Calendars, and Contacts, moving your camera roll over, even transfering your Chrome bookmarks to Safari.
2. Finish the setup
There are a few remaining steps to finish up the setup process. You’ll enter your iCloud account password, along with a second security code if you’re using two-factor authentication on said iCloud account (tiny moment of delight: I told it to send the code to my phone number, and because my iPhone 7 was already activated on that phone number, it entered the code for me). Then you’ll agree to the iCloud terms and conditions, and set up how people can reach you over iMessage and FaceTime.
3. Set up Touch ID and Apple Pay
Yes, you should use Touch ID for maximum security—it’s the quickest way to unlock your iPhone, and will let you set a more complicated passcode, since you don’t have to type it in every time. So you so take the few moments to repeatedly press a finger on the Home button to register it. If you trust another human to unlock your phone, you can add their finger (or more of your own digits) by going to Settings > Passcode.

For best results, do not cover your debit card with a banana. Unless you’re taking a screenshot to post on the Internet, and then by all means, banana it up.
Since you need to have Touch ID enabled in order to use Apple Pay, this would be a good time to jump into Apple’s Wallet app to set that up. If you’re new to Apple Pay, just follow the instructions within Wallet to add a credit card or two. If you already had Apple Pay on an iPhone 6, 6s, or SE, you’ll notice that your credit cards have disappeared on your new iPhone. Why? For your security, of course. Your Wallet history will still be there, but you’ll have to re-enter any payment cards you’d like to use with Apple Pay.
4. Choose the Home button’s feel
The iPhone 7’s Home button is less of a button than it used to be. Now it’s not a separate cut-out button that moves down when you press it. It’s completely fused with the rest of the iPhone’s chin, so it no longer physically moves up and down. You can still find it with your thumb thanks to the metal Touch ID ring that surrounds it.
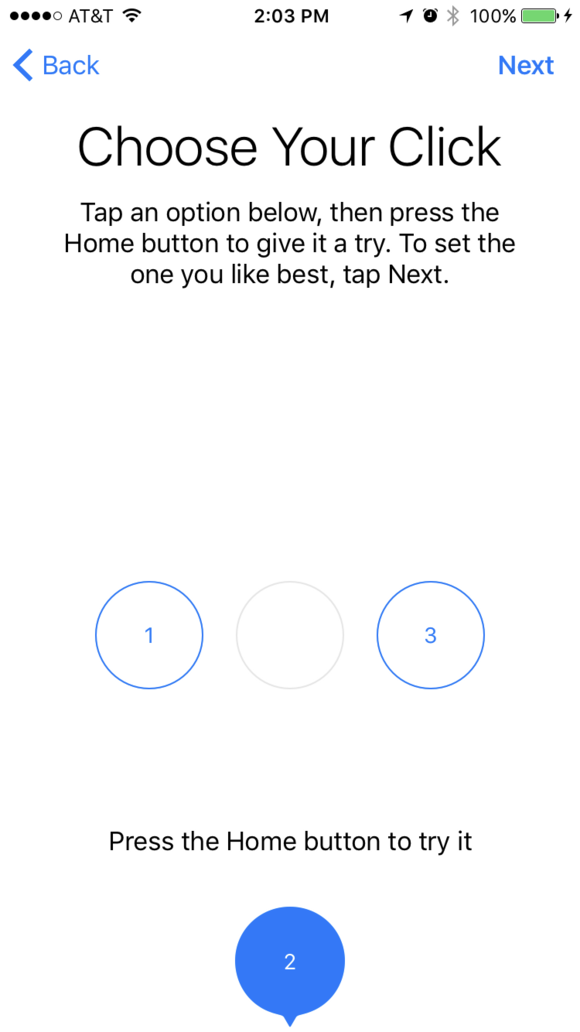
Pick a click, any click.
When you press the Home button, however, you’ll still feel a vibration from the Taptic Engine, so it feels like you’re clicking. (If you’ve used the Force Touch trackpads, it’s the same effect—those don’t physically click either, but a little vibration fools your mind into thinking they do.) It still takes a little getting used to the new feel, but to help the adjustment period, iOS 10 offers three click “feels” you can choose from. On this screen, tap the 1, the 2, or the 3, and then press the Home button to feel the difference between those clicks. Pick the one you like the best, and then tap Next at the top-right. If you want to change it up later, just visit Settings > General > Home Button.
5. Update your apps
Great, now you should be on your home screen at last. I like to hit up the App Store first—you’ll want the latest versions of all of your apps in order to take advantage of all the new abilities Apple has given developers in iOS 10. (Your new iPhone 7 ships with iOS 10.0.1.) Adobe Lightroom, for example, now supports DNG, Adobe’s RAW format. Drafts has an iMessage app that lets you share your notes in Apple’s Messages app. And if you update Uber, you’ll be able to have Siri order you up a car. We’ve got a list of some early iOS 10-ready apps for your convenience.
Don’t forget you can have your apps auto-update by flipping the Updates switch in Settings > iTunes & App Stores > Automatic Downloads. Or, you can manually update your apps and just check out the “What’s New” release notes to see what changed.
6. Pair your Apple Watch
If you use an Apple Watch, you’ll need to pair it to your new iPhone, to keep the Activity data flowing to your Health database, and keep your new phone’s notifications flowing to your watch. First you have to unpair your watch from your old iPhone, either in the Apple Watch app on your old iPhone (tap your watch, then the “i” icon, then Unpair Apple Watch, then enter your iCloud password when prompted), or on the watch itself (Settings > General > Reset).
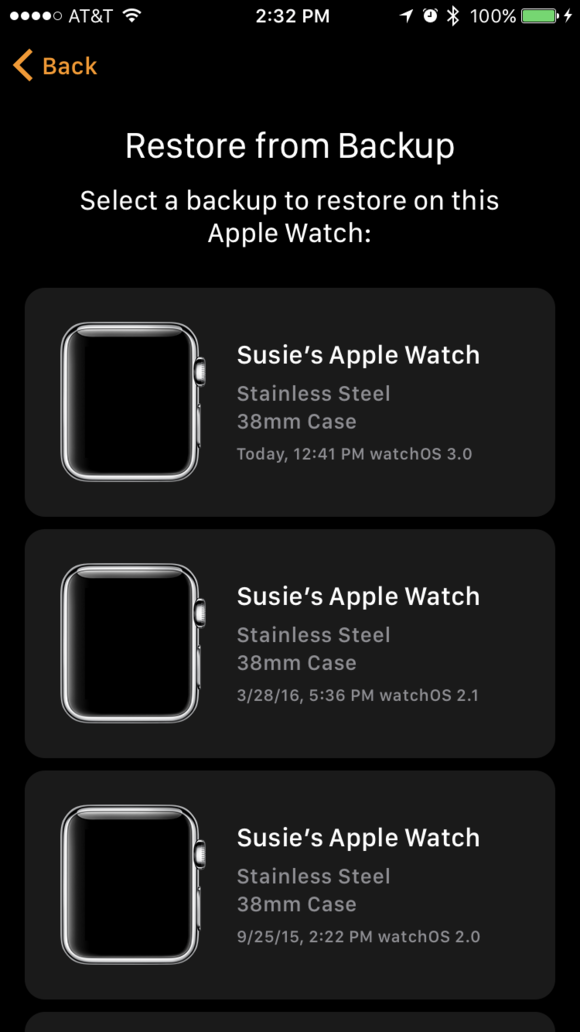
I don’t recall telling my iPhone to back up my Apple Watch. But what do you know—it did. It’s nice not to have to set up my favorite watch faces again!
Then, launch the Apple Watch app on your new iPhone 7, which will walk you through the pairing process including setting a passcode, unlocking behavoior, and Apple Pay. If you’re new to iOS 10, the Apple Watch app looks a little different, but it’s still easy to use—the new Faces Gallery is especially nice.
You need iOS 10 to upgrade your watch to watchOS 3, which I definitely recommend—read more about watchOS 3 and iOS 10’s Apple Watch app here. To upgrade, your Apple Watch needs to be connected to its charger, in range of your iPhone, and at least 50 percent charged. Then look for the Software Update option in the Apple Watch app.
7. Try the new camera
If you were lucky enough to snag an iPhone 7 Plus, you’ve got the most advanced iPhone camera ever in your hot little hand, and you’re probably going to want to put it through its paces. Be sure to test the zoom feature, which switches between the wide angle camera (1x) and the telephoto camera (2x) when you tap the 2x or 1x button right above the shutter button. Unfortunately, the bokeh-friendly Portrait mode that Apple previewed at the September even isn’t live yet—iPhone 7 Plus owners will get that as a software update later this year.
But the iPhone 7 camera is nothing to sneeze at! It’s now 15 megapixels, with better low-light performance. Take some photos in a dark setting and in bright outdoor conditions, and they should both have more detail. Be sure to snap a few shots of the brightest colors you can find—a flower garden, for example—to admire the true, vibrant colors on the iPhone 7’s screen, which has a wider color gamut than ever before.

Tap the little firework-looking thing in the top toolbar to toggle Live Photos on and off. On is more fun, Off saves storage.
8. Edit a Live Photo
Apple introduced Live Photos with the iPhone 6s and 6s Plus, and the 4-inch iPhone SE supports them too. If your last iPhone didn’t have this feature, you should definitely check it out. In the Camera app, turn on Live Photos by tapping the little icon that looks like a firework, in the middle of the top toolbar when you’re in regular Photo mode. It’ll glow yellow when it’s enabled. Then when you take a photo, the iPhone will capture 1.5 seconds of video before and after it, so hold the phone steady for best results.
To see your Live Photos in action, you’ll find them among your regular photos in the Photos app. When you swipe through your pics, the Live Photo animation will show for a split second, and then stop. To see the whole thing, 3D Touch on the Photo by pressing firmly and holding on the pic.
In iOS 9, you couldn’t edit Live Photos. If you tried to edit one, you’d see a warning that proceding with an edit would change the Live Photo to a static image that you could then crop, recolor, or whatever. But in iOS 10, Apple added the ability to edit Live Photos directly. You can crop them, add a filter, adjust colors and lighting, or even use the magic-wand auto-adjuster at the top-right. So far there’s still no way to trim a little bit off the front or back of a Live Photo’s video, nor to select the exact video frame you want as the still image.
Several apps now support Live Photos too—Google Photos can keep them backed up, Facebook lets you post them, and Motion Stills can turn them into GIFs.
9. Add widgets to the Today view
iOS 10 got rid of the slide-to-unlock feature, because now you can swipe right on the lock screen to see your Today widgets, or swipe left to quickly open the Camera app. (Swiping up still shows your Control Center, which is now split into two panes—three if you have HomeKit—and swiping down opens Notification Center.) Once your phone is unlocked, those Today widgets are never more than a couple of swipes away. From the home screen, you can swipe right, and if you’re in an app, just pull down the Notification Center, which has the Today widgets in a second pane.
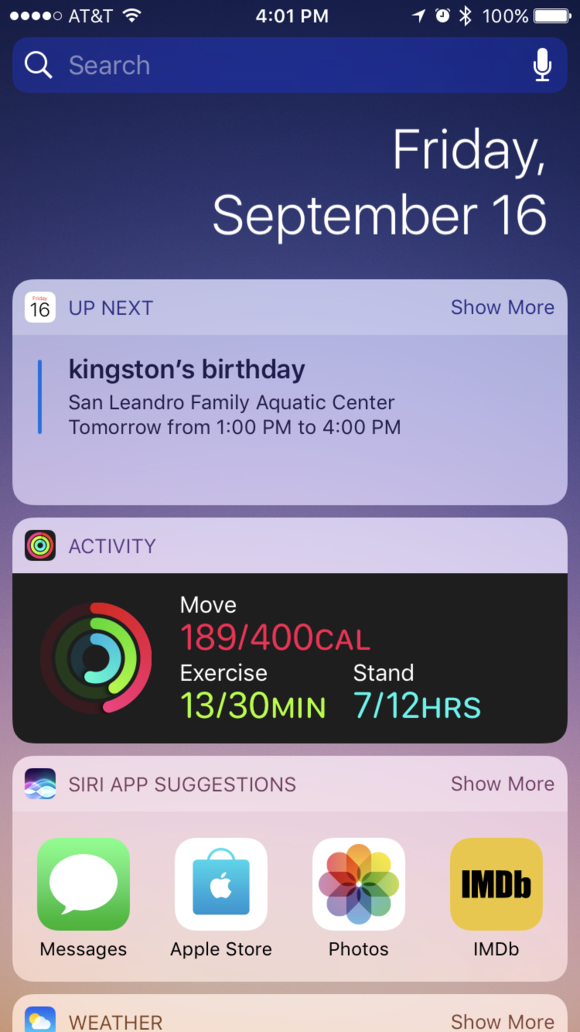
The widgets can be very handy for getting quick info without having to open apps. (Happy birthday, Kingston!)
You can add new widgets by scrolling to the bottom of the Today screen and tapping the Edit button. There you can reorder the widgets you have, remove them from the list, or add new ones to the list by tapping the plus button next to their names. But there’s an even more fun way new to iOS 10: 3D Touch. From any of your home screens, just hard-press an app’s icon to see if it has a widget. You’ll get a little peek at what it offers, with a plus button at the upper-right to tap if you want it permanently added to the Today widgets screen.
10. Figure out your headphone situation
Your iPhone 7 comes with a Lightning-to-3.5mm adapter that lets you plug in any standard headphones you already own, as well as a set of EarPods with a Lightning plug instead of a 3.5mm plug. You can also pair a set of Bluetooth headphones, but that requires opening Settings > Bluetooth.

As the Ghostbusters once said, “Two in the box, ready to go.”
The AirPods ship in late October, so I don’t have a pair yet, but I liked them a lot in my short testing time after the Apple event. Until I get my own, I’ll be using the Lightning EarPods, so I can better compare the experience later. (I admit it: I haven’t worn EarPods faithfully in years.) They do work with older iPhones too, but if you plug in both Lightning headphones and 3.5mm analog headphones, the audio always defaults to analog. If you yank the analog headphones, the audio goes back to the Lightning pair. Of course there’s no real reason to use Lightning EarPods with an iPhone that has a headphone jack. But you could.
11. Call your mom
Or someone else you love. I’m sure they’d be glad to hear from you.
What did I leave out? What’s the first thing you’re always itching to do with a pretty new iPhone? Let us know, and have fun with your new phone.


