Credit: Apple
So you have a Mac but also want to run Windows? You’re in luck: shortly after the first Intel-based Macs arrived on the market in 2009, Apple released a tool called Boot Camp, which lets Mac owners install and start their machines natively in Microsoft Windows. With the press of a button, you can switch between Mac and Windows every time your computer turns on.
Probably the most common reason Mac owners use Boot Camp is to play Windows-only games. For instance, PC MMOs such as Star Trek Online, Tera, and Star Wars: The Old Republic only run on Windows. Boot Camp is also better at running Windows software than virtual machines like Parallels or VMWare Fusion, which are programs that simultaneously run Windows inside Mac’s operating system. Without further ado, here’s how to set up Boot Camp and install Windows.
Check system requirements, then buy Windows
First off, you’ll need a 64-bit edition of Windows. Which version depends on your Mac’s age: Those from mid-2012 and newer support Windows 8 and 10, while models from early-2012 only support Windows 7 and 8.
For Windows 10, you can get a copy of the Home version as either a USB stick or download from Microsoft for $119. For older versions of Windows, you’ll have to go through retailers like Best Buy.
Since different versions of Windows have different system requirements for the amount of RAM, hard drive space, and processor speed, you’ll want to double-check to make sure your system can run that edition comfortably. Here’s how:
- Examine the system requirements for the version of Windows you plan on buying: Windows 10, Windows 8, or Windows 7.
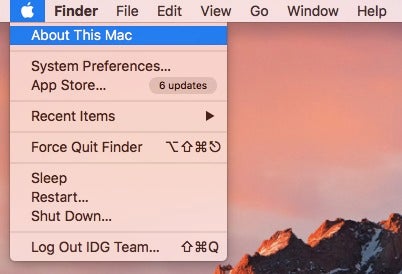
- Next, click on the Apple menu in the upper left and choose About This Mac.

- Compare your Mac’s specs for Processor and Memory (RAM) against those listed in the Windows system requirements.
- If your Mac doesn’t meet the criteria, you’ll need to choose a version of Windows with lower system requirements.
Make sure your Mac has enough hard drive space
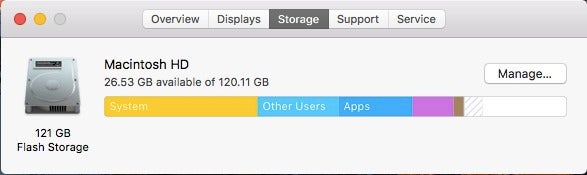
To use Boot Camp, you’ll need at least 55 GB of free space on your Mac’s hard drive. Boot Camp says it only needs 50 GB, but Apple’s own online support document recommends 55GB. Play it safe and go with the large allocation.
- To see available hard drive space, click on the Apple menu in the upper left and then select About This Mac.
- Click Storage so you can see how much free space on your hard drive.

- If you don’t have 55 GB free, you’ll have to delete or transfer files until you do. Here’s a list of some of the best tools to free up space on your Mac.
Check for updates and backup
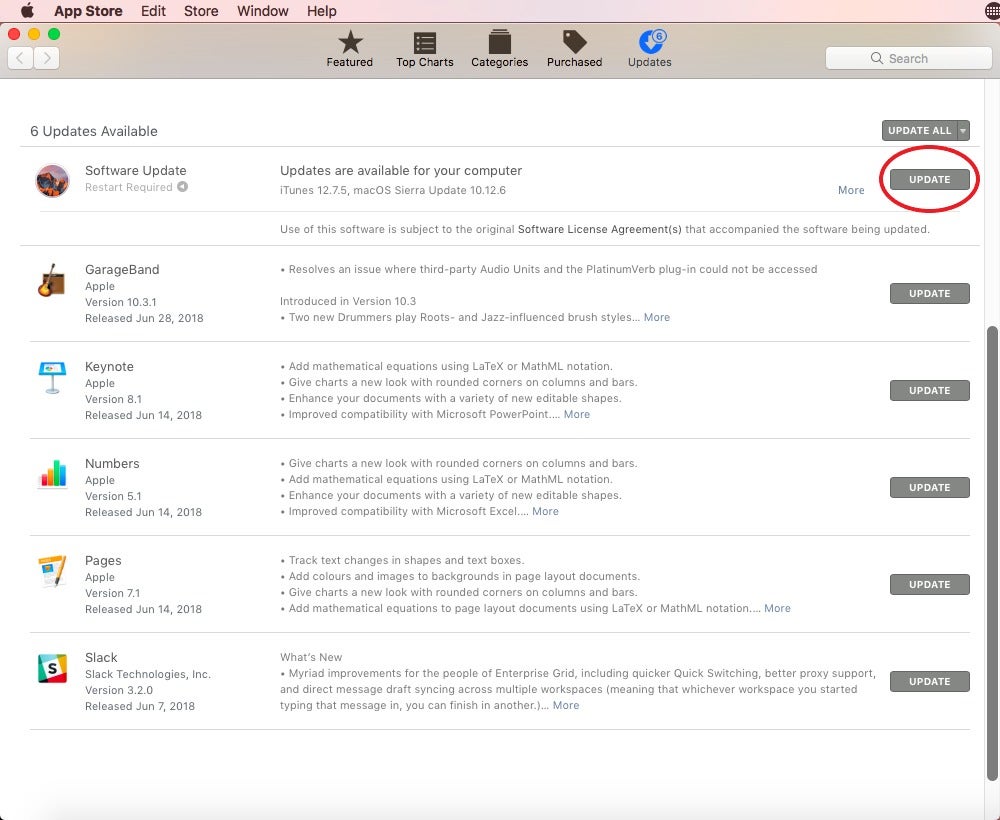
Before you run Boot Camp, Apple recommends you have the latest software update and that you backup your important files. (Need help backing up your data? Our sister site Macworld has put together the best software for backing up your files.)
- Click the Apple menu in the upper left and then hit App Store. Go to Updates and install any software updates for macOS.

- Restart your computer if prompted. After restarting, check for software updates again until no new ones are available.
- Because Boot Camp will be moving and re-allocating space on your hard drive, you should back up any important data before you continue, in case anything becomes corrupted during the process.
Install Windows
Time for the main event. If you have a Mac from 2015 or later, the process is a bit simpler. Have an older Mac or a copy of Windows on a DVD or flash drive? Skip to “Installing Windows on pre-2015 Macs” or “Install Windows from flash drive or external optical drive,” below.
Post-2015 Macs: Install Windows from an ISO file
This method is probably the easiest way to install Windows, but it only works for Macs from 2015 and up.
- Download a 64-bit Windows ISO from Microsoft or another licensed distributor.
- Quit all open applications and then open up a Finder window. Click on Applications and then go into the Utilities folder.

- Open Boot Camp Assistant, then click Continue.
- Now select Choose to the right of the ISO Image box to locate your Windows ISO file.
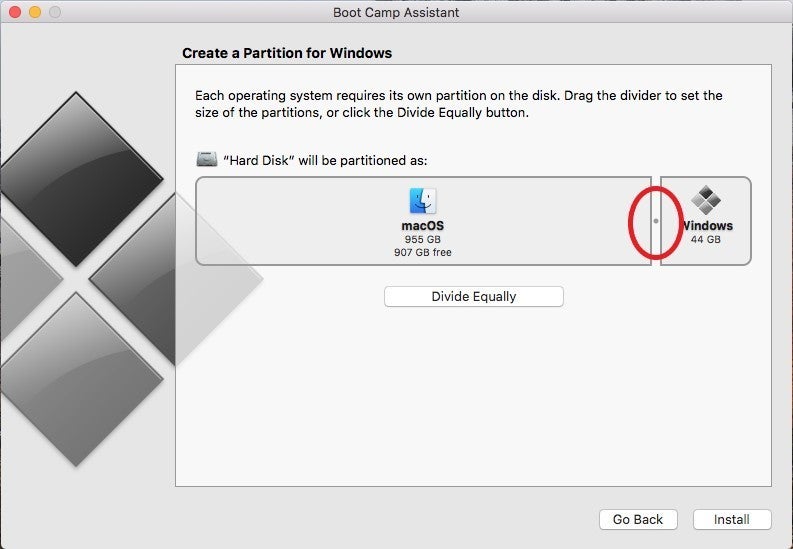
- The next step is to partition your hard drive. You’ll see a slider representing your hard drive, which lets you decide how much hard-drive space to allocate to your Windows partition.
 IDG
IDG
- Move the slider to give your Windows partition more or less space. Remember that any space you assign will be taken from the available space for your Mac, and that macOS will run more efficiently if you leave at least 30 to 40GB of space free on its partition. Equally, keep in mind that you’ll need enough space for Windows’ system files, any software you plan on installing, and a buffer of free space. (We recommend a 5GB margin at minimum.)
- Once you’re satisfied with your partition, hit Install. Your Mac will eventually boot into Windows’ setup.
- When the installation process asks to install Windows, be sure to select the drive labelled BOOTCAMP.
- Windows will now start to install. You’ll then need to make some selections for things like language, keyboard layout, and account details. It’ll take several minutes to finish the setup process.
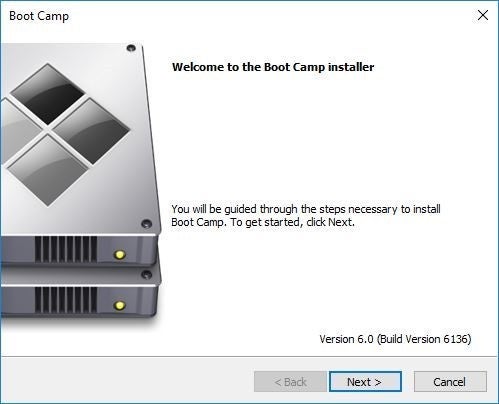
- Eventually, you’ll reach the Windows desktop. The Boot Camp Installer should then appear in a new window. Accept the terms of the license agreement and it will start installing any necessary drivers. After it’s finished installing, you’ll be asked to restart the system, click Yes.
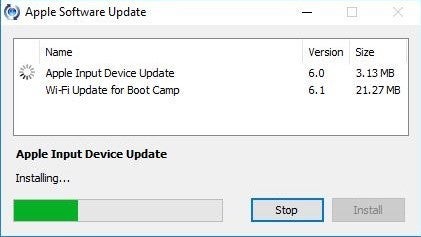
- If you installed Windows 10, you should also use Apple Software Update to prevent known driver issues. Make sure you’re connected to the internet and then click the Start button in the bottom left and open Apple Software Update.
 IDG
IDG
- In the top box, select all of the available updates and then click Install items. (You can also choose to install New Software, like iCloud, if you want.) Windows will ask if you want to allow Apple Software Update to make changes, click Yes.
- After the installations complete, you’ll be asked to restart. Click OK and your Mac should now reboot into a fully functioning version of Windows 10!
 IDG
IDG
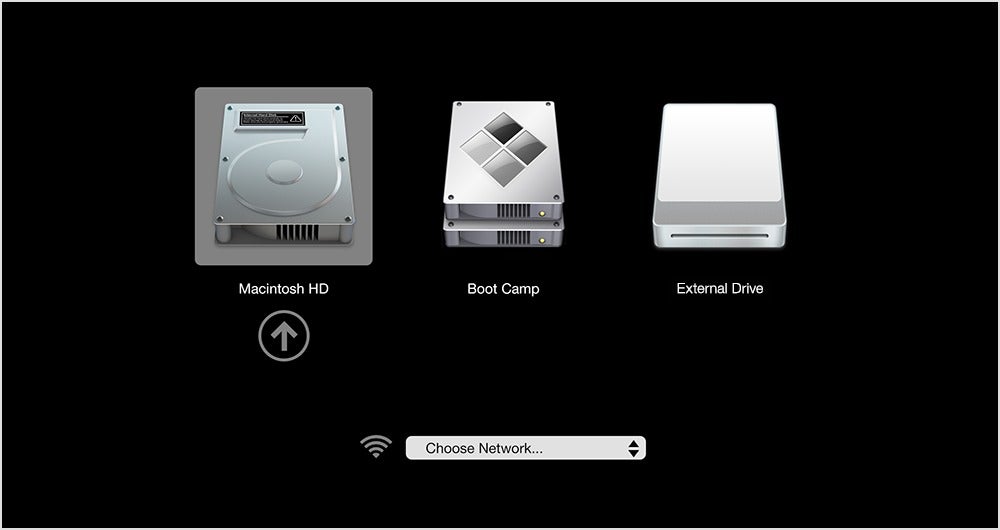
To switch between your Mac and Windows partition, hold down the Option key during a boot or reboot sequence to bring up the OS-selection menu.
Installing Windows on pre-2015 Macs
While Macs from pre-2015 can still run Windows, the installation process is slightly more complex. The more straightforward method (and our preferred option) is to use Boot Camp Assistant, but you can also do it from a flash drive or disc.
Run Boot Camp Assistant
- Quit all open applications and then open up a Finder window. Click Applications and then go into Utilities.
IDG - In the Utilities folder, double-click Boot Camp Assistant to launch. Click Continue to begin setup.
 IDG
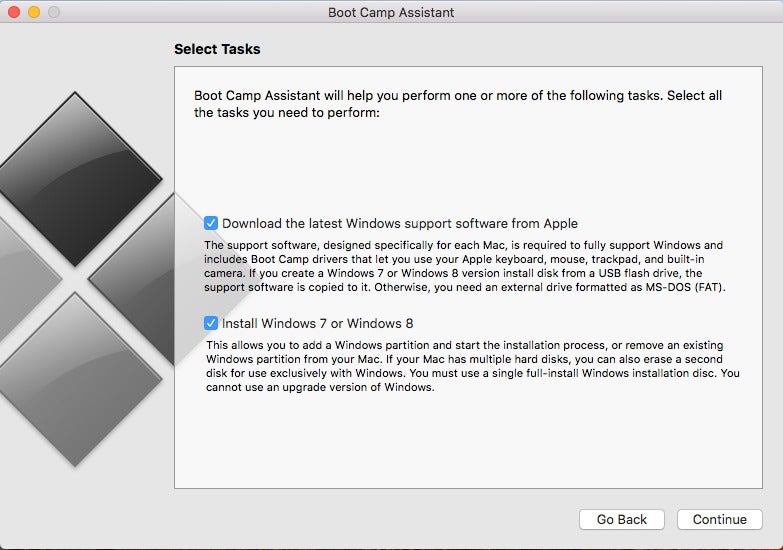
IDG - Make sure Download the latest Windows support software from Apple is checked. This software will allow you to install the most current drivers for Windows. Now click Continue.
 IDG
IDG
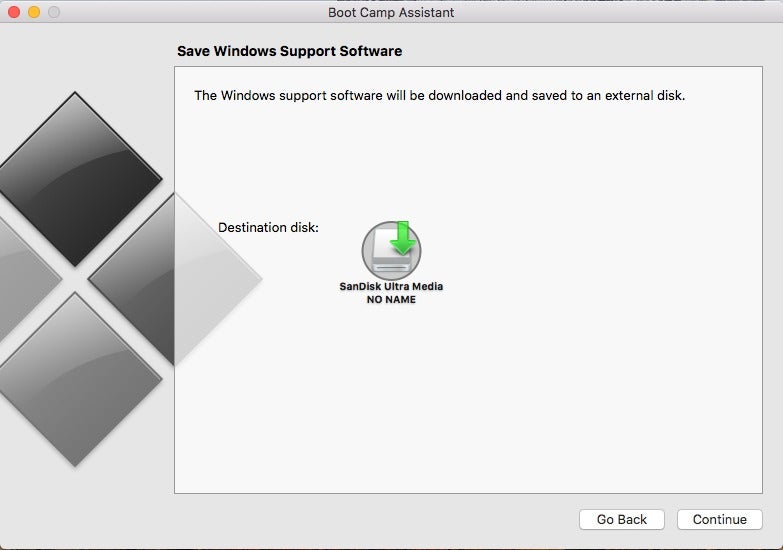
- If asked for your administrative credentials, fill them in. Then press Enter to start downloading the software. You’ll need to install the Windows support software to a USB drive that you’ve plugged into the Mac.
 IDG
IDG
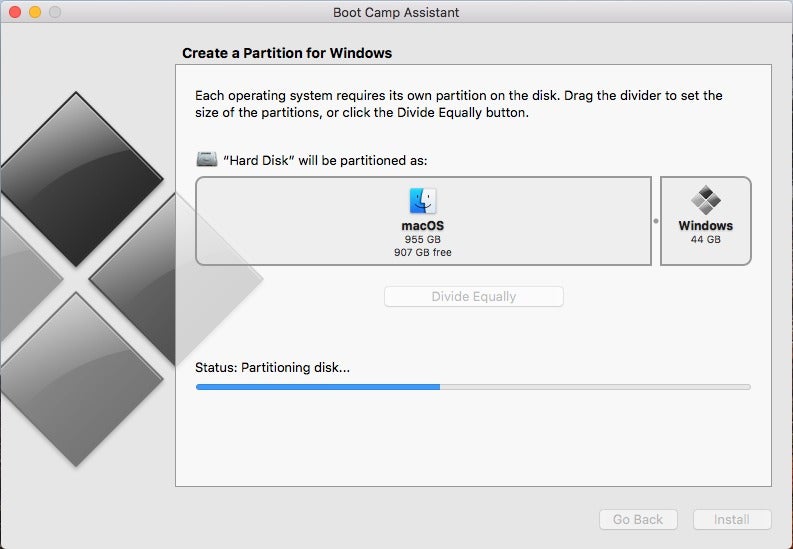
- After the download finishes, the assistant will prompt you to create a Windows partition on your hard drive. This action segments your drive to devote free space only for Windows, without interfering with or erasing your existing macOS installation.
- At this point, you’ll see a slider representing your hard drive. Here you can decide how much hard-drive space to allocate to your Windows partition.
 IDG
IDG - Adjust the slider to give your Windows partition more or less free space. Remember that any space you assign will be taken from the available space for your Mac, and that macOS will run more efficiently if you leave at least 30 to 40GB of space free on its partition. Equally, keep in mind that you’ll need enough space for Windows’ system files, any software you plan on installing, and a buffer of free space. (We recommend a 5GB margin at minimum.)
- When you’re satisfied with your partitioning scheme, click Partition. OS X will begin partitioning and rearranging your hard-drive data, a process that may take some time.
 IDG
IDG


Install Windows from flash drive or external optical drive
This method takes a bit of patience so bear with us. (An easier alternative is using an ISO management software like Toast Titanium to mount a downloaded Windows ISO without a flash drive or DVD.)
- Insert your Windows installation DVD into an external USB optical drive. Or if your version of Windows came with a flash drive, insert that.
- Once the media comes up in Finder, hit Go, then select Utilities > Disk Utility.
 IDG
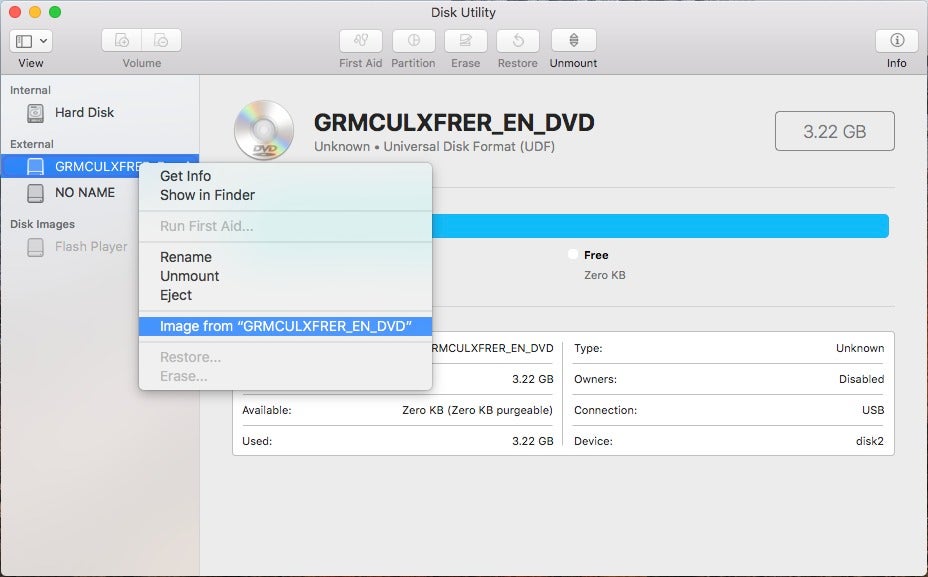
IDG - In Disk Utility, select the USB optical drive or the flash drive so it’s highlighted.
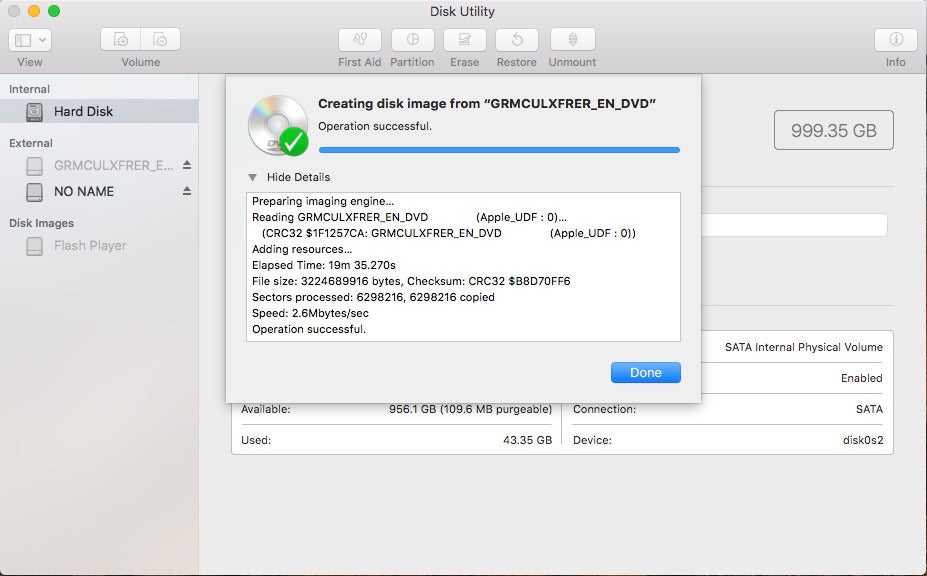
- Under File, select New Image and choose the Windows DVD or flash drive.
 IDG
IDG - From the Image Format menu, select DVD/CD and choose None for encryption.
 IDG
IDG - Save the file with a name and enter your username and password if prompted. A progress bar will appear, and it may take awhile to complete.
- Once it’s done saving, eject your Windows DVD or flash drive. If you used an external USB drive, disconnect it after the DVD is ejected.
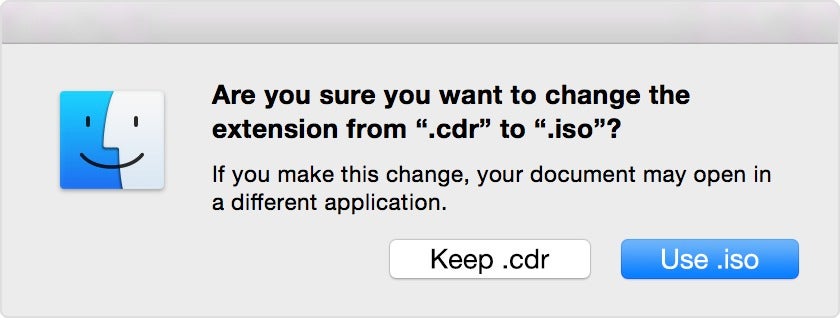
- With Finder, locate the disk image you saved in step 6. Click on it just once to select it and then choose Enter to rename the file. You’ll want to rename it with the file extension “.iso” at the end. A window will appear where you should select “Use .iso”.
 Apple
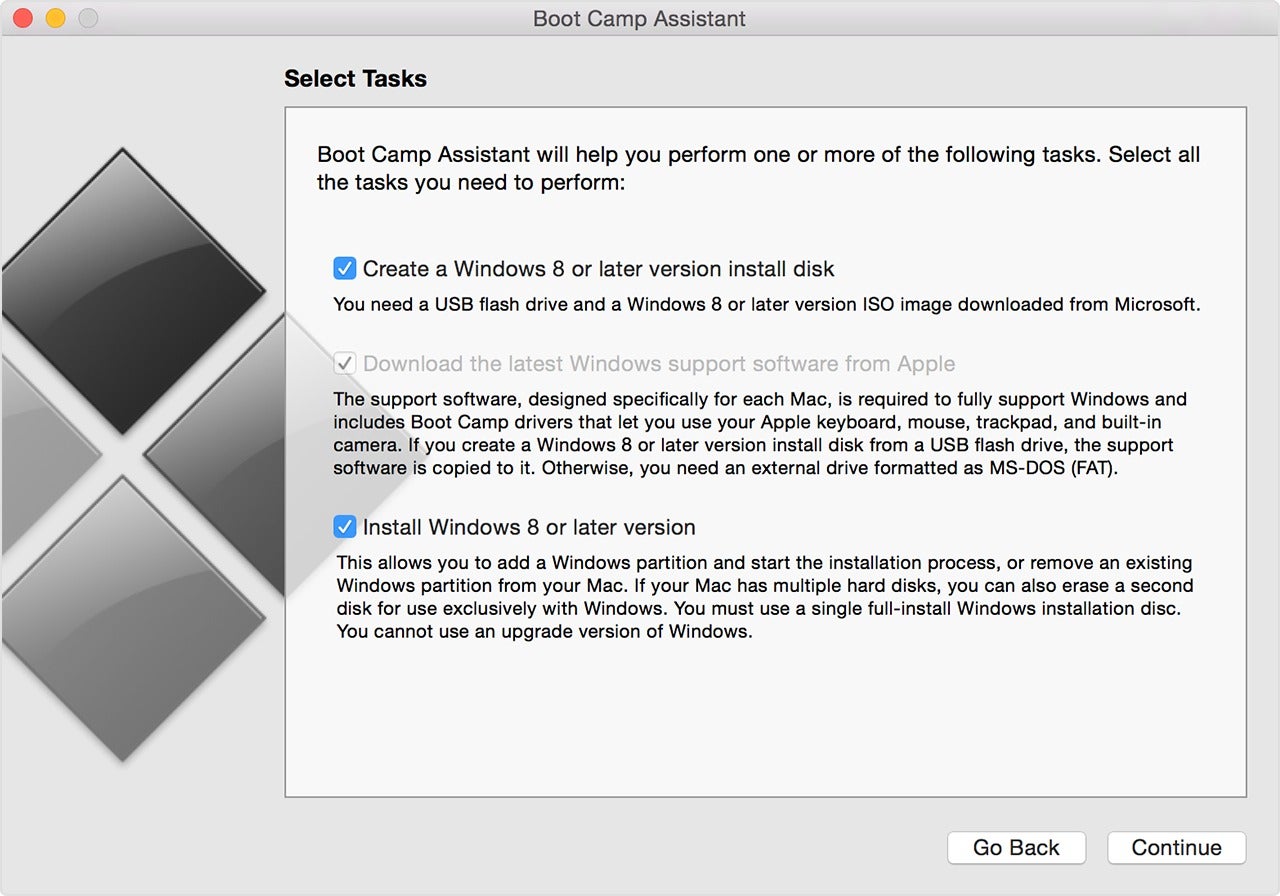
Apple - Go back to Applications > Utilities, and then open Boot Camp Assistant. Make sure the boxes following boxes are checked: Create a Windows 8 or later version install disk; Download the latest Windows support software from Apple; and Install Windows 8 or later version.
 Apple
Apple - Locate your renamed ISO file when prompted and click OK to begin installing Windows.
Still having trouble installing Windows? Refer to your Windows documentation for more help.
How to choose your operating system at startup
Now that you have both macOS and Windows installed and functioning on your Mac, you can choose which operating system to launch at startup.
- When you turn on or restart your computer, hold down the Option key to bring up the OS-selection menu.
 Apple
Apple - Make your choice by double-clicking either OS X or Windows.