 Credit: Mark Hachman / IDG
What makes your house your home? Is it the furniture? The art? A few favorite collectibles arranged on the shelves? Your PC doesn’t have to be any different. If you’re new to Windows 10, we’ll show you how to personalize your PC to make it feel, well, yours.
From the moment you first power on your PC, you’ll be asked to choose how to manage your privacy and security. But once you complete that short process, the fun begins: you’ll be able to select backgrounds, configure your Start menu, and select apps and shortcuts. Think of this story as a complement to our previous tutorial on how to set up your new PC efficiently and effectively. This is the fun stuff.
The Windows 10 Out of the Box Experience
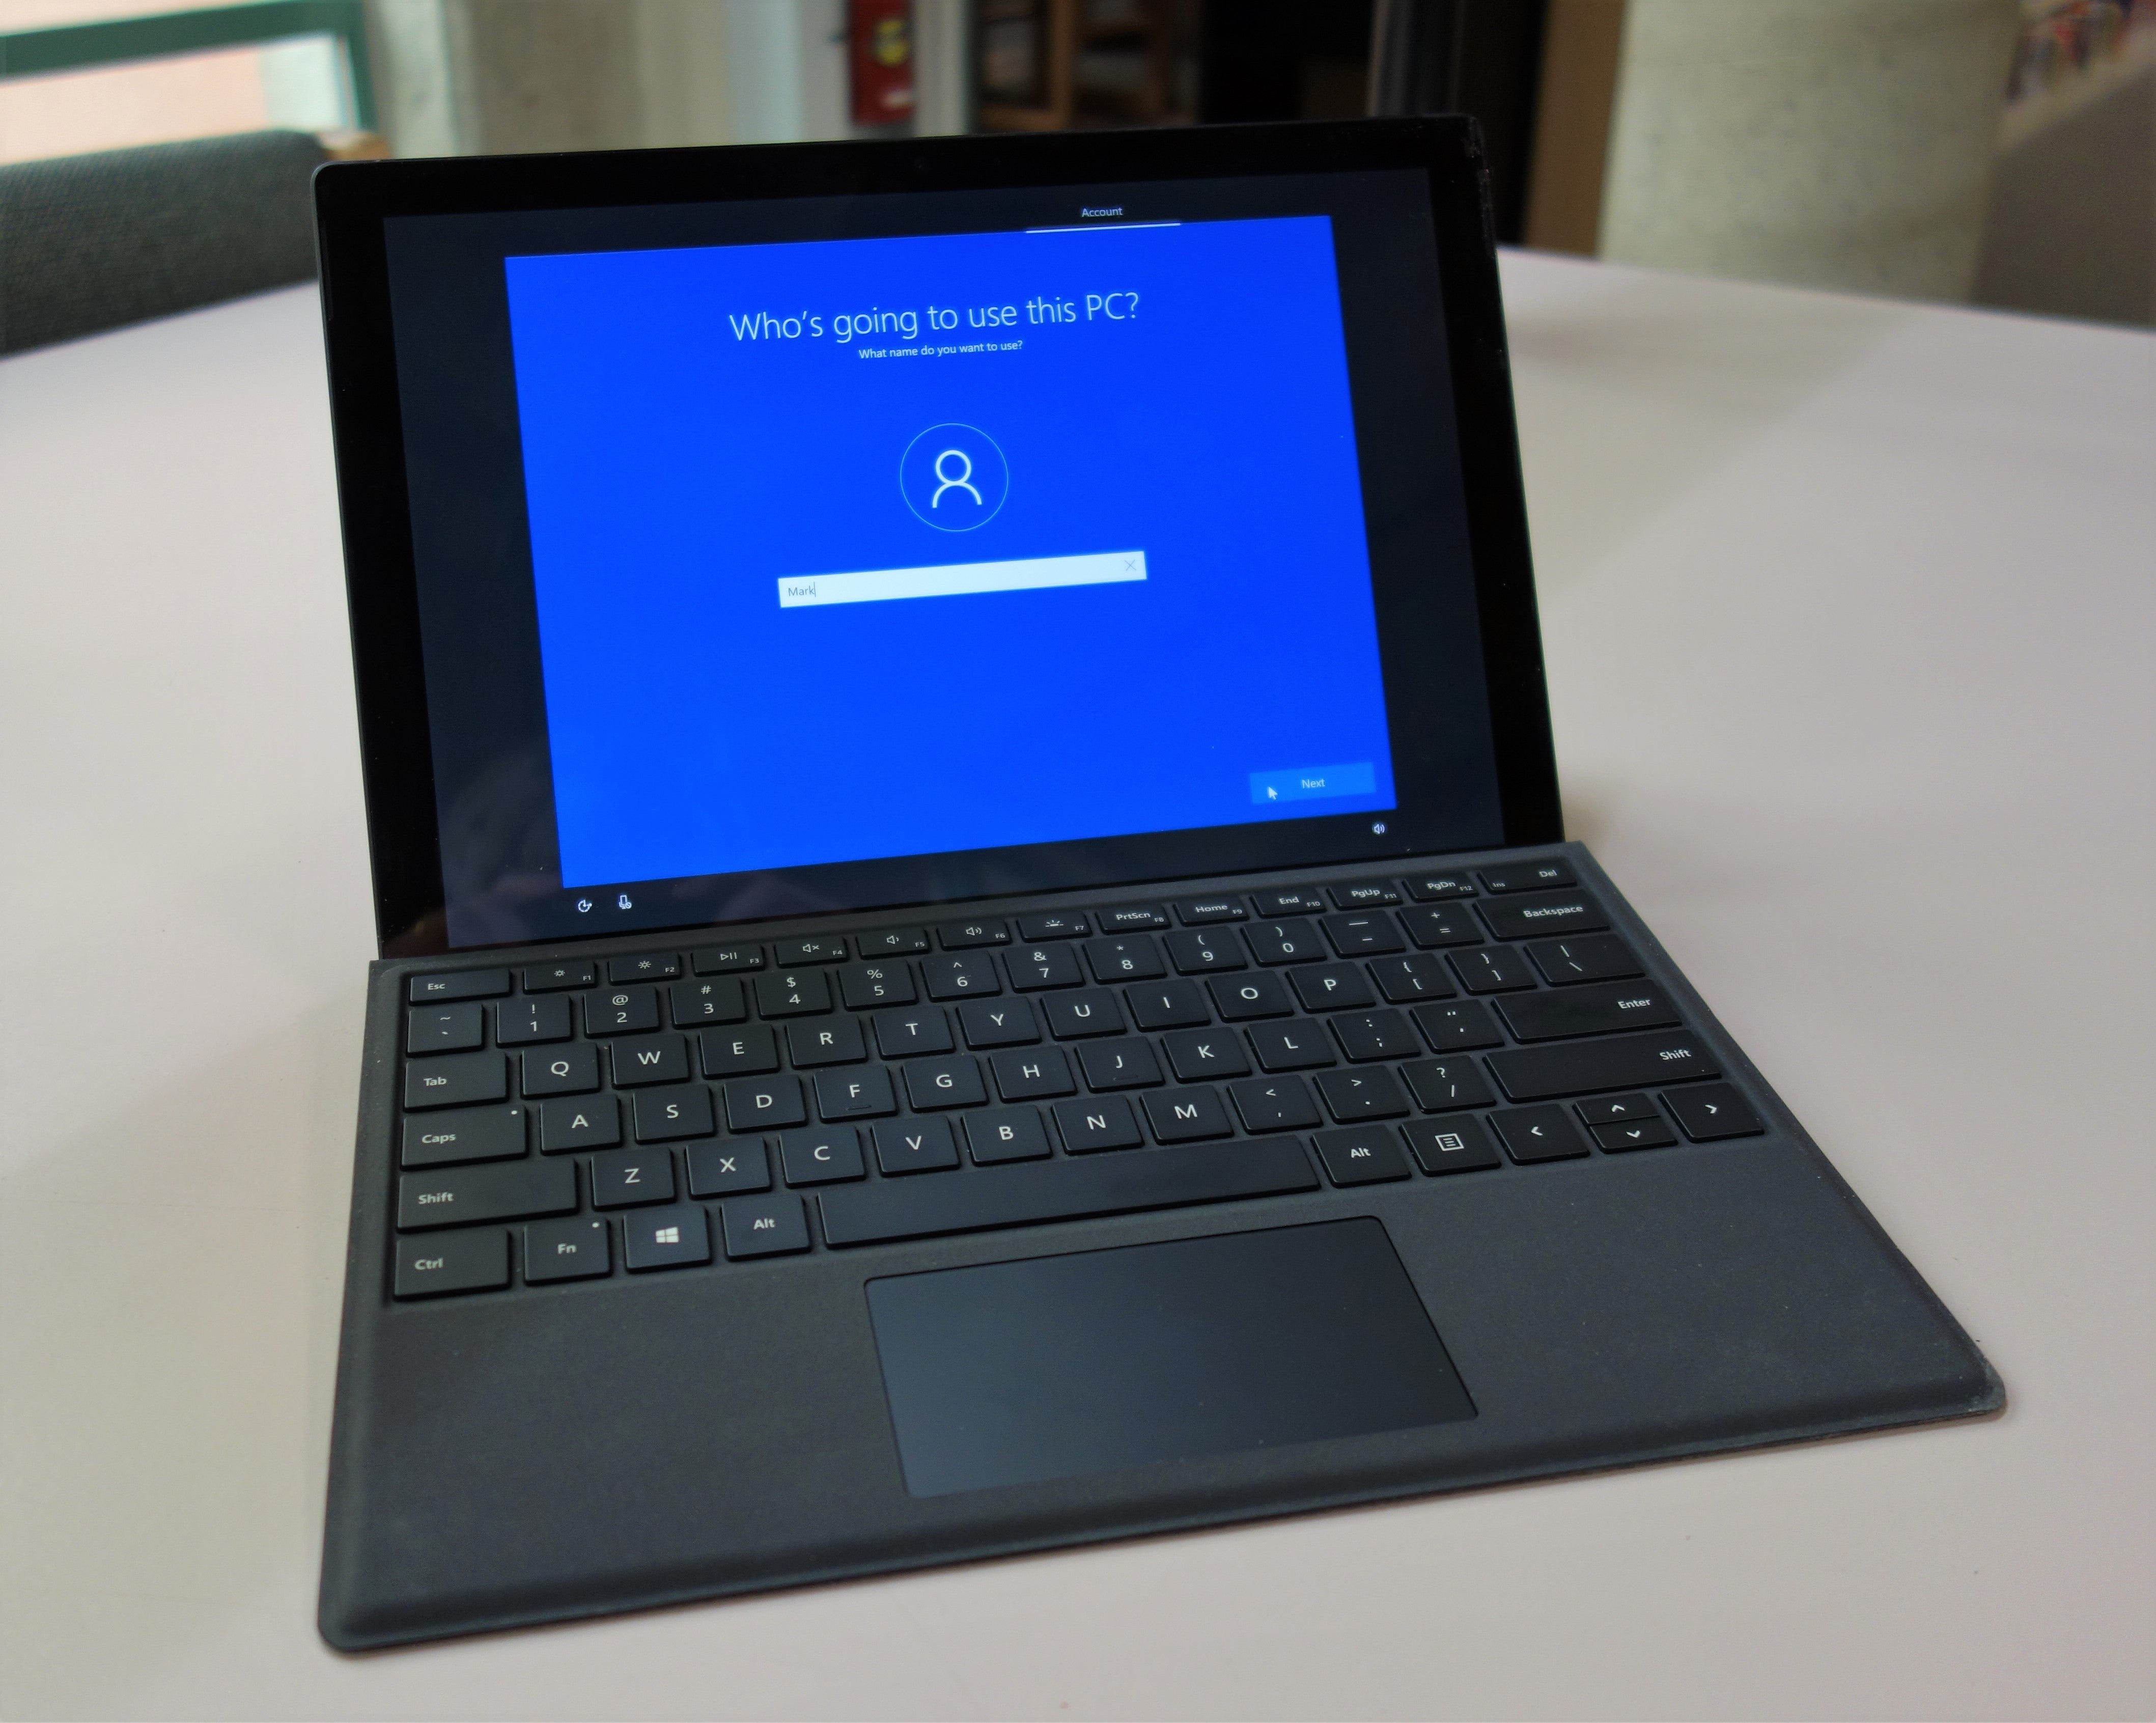
Any time you buy a new PC, you’re almost certainly going to walk through what Microsoft calls the “Out of the Box Experience,” or OOBE. While the OOBE is simply a series of setup screens narrated by the voice of Cortana, Jen Taylor, they may differ a bit from PC to PC, and be affected by your choices. Generally, you’ll be able to handle most questions without any hand-holding; you’ll be asked for your preferred language and keyboard layout, to connect to Wi-Fi, and so on.
 Mark Hachman / IDG
Personalization begins with entering your name.
Your major choices boil down to these: whether to enter or create a Microsoft password, whether to enable Cortana, and choosing your privacy settings. Entering (or creating) a Microsoft account allows your preferences to “follow” you from PC to PC, create a OneDrive cloud-storage account, and more. Creating an account is recommended, though you can use a local account and password instead.
 Mark Hachman / IDG
If Windows Hello is enabled on your PC, you’ll have a chance to set it up in the OOBE. Do so! It takes literally just a few seconds.
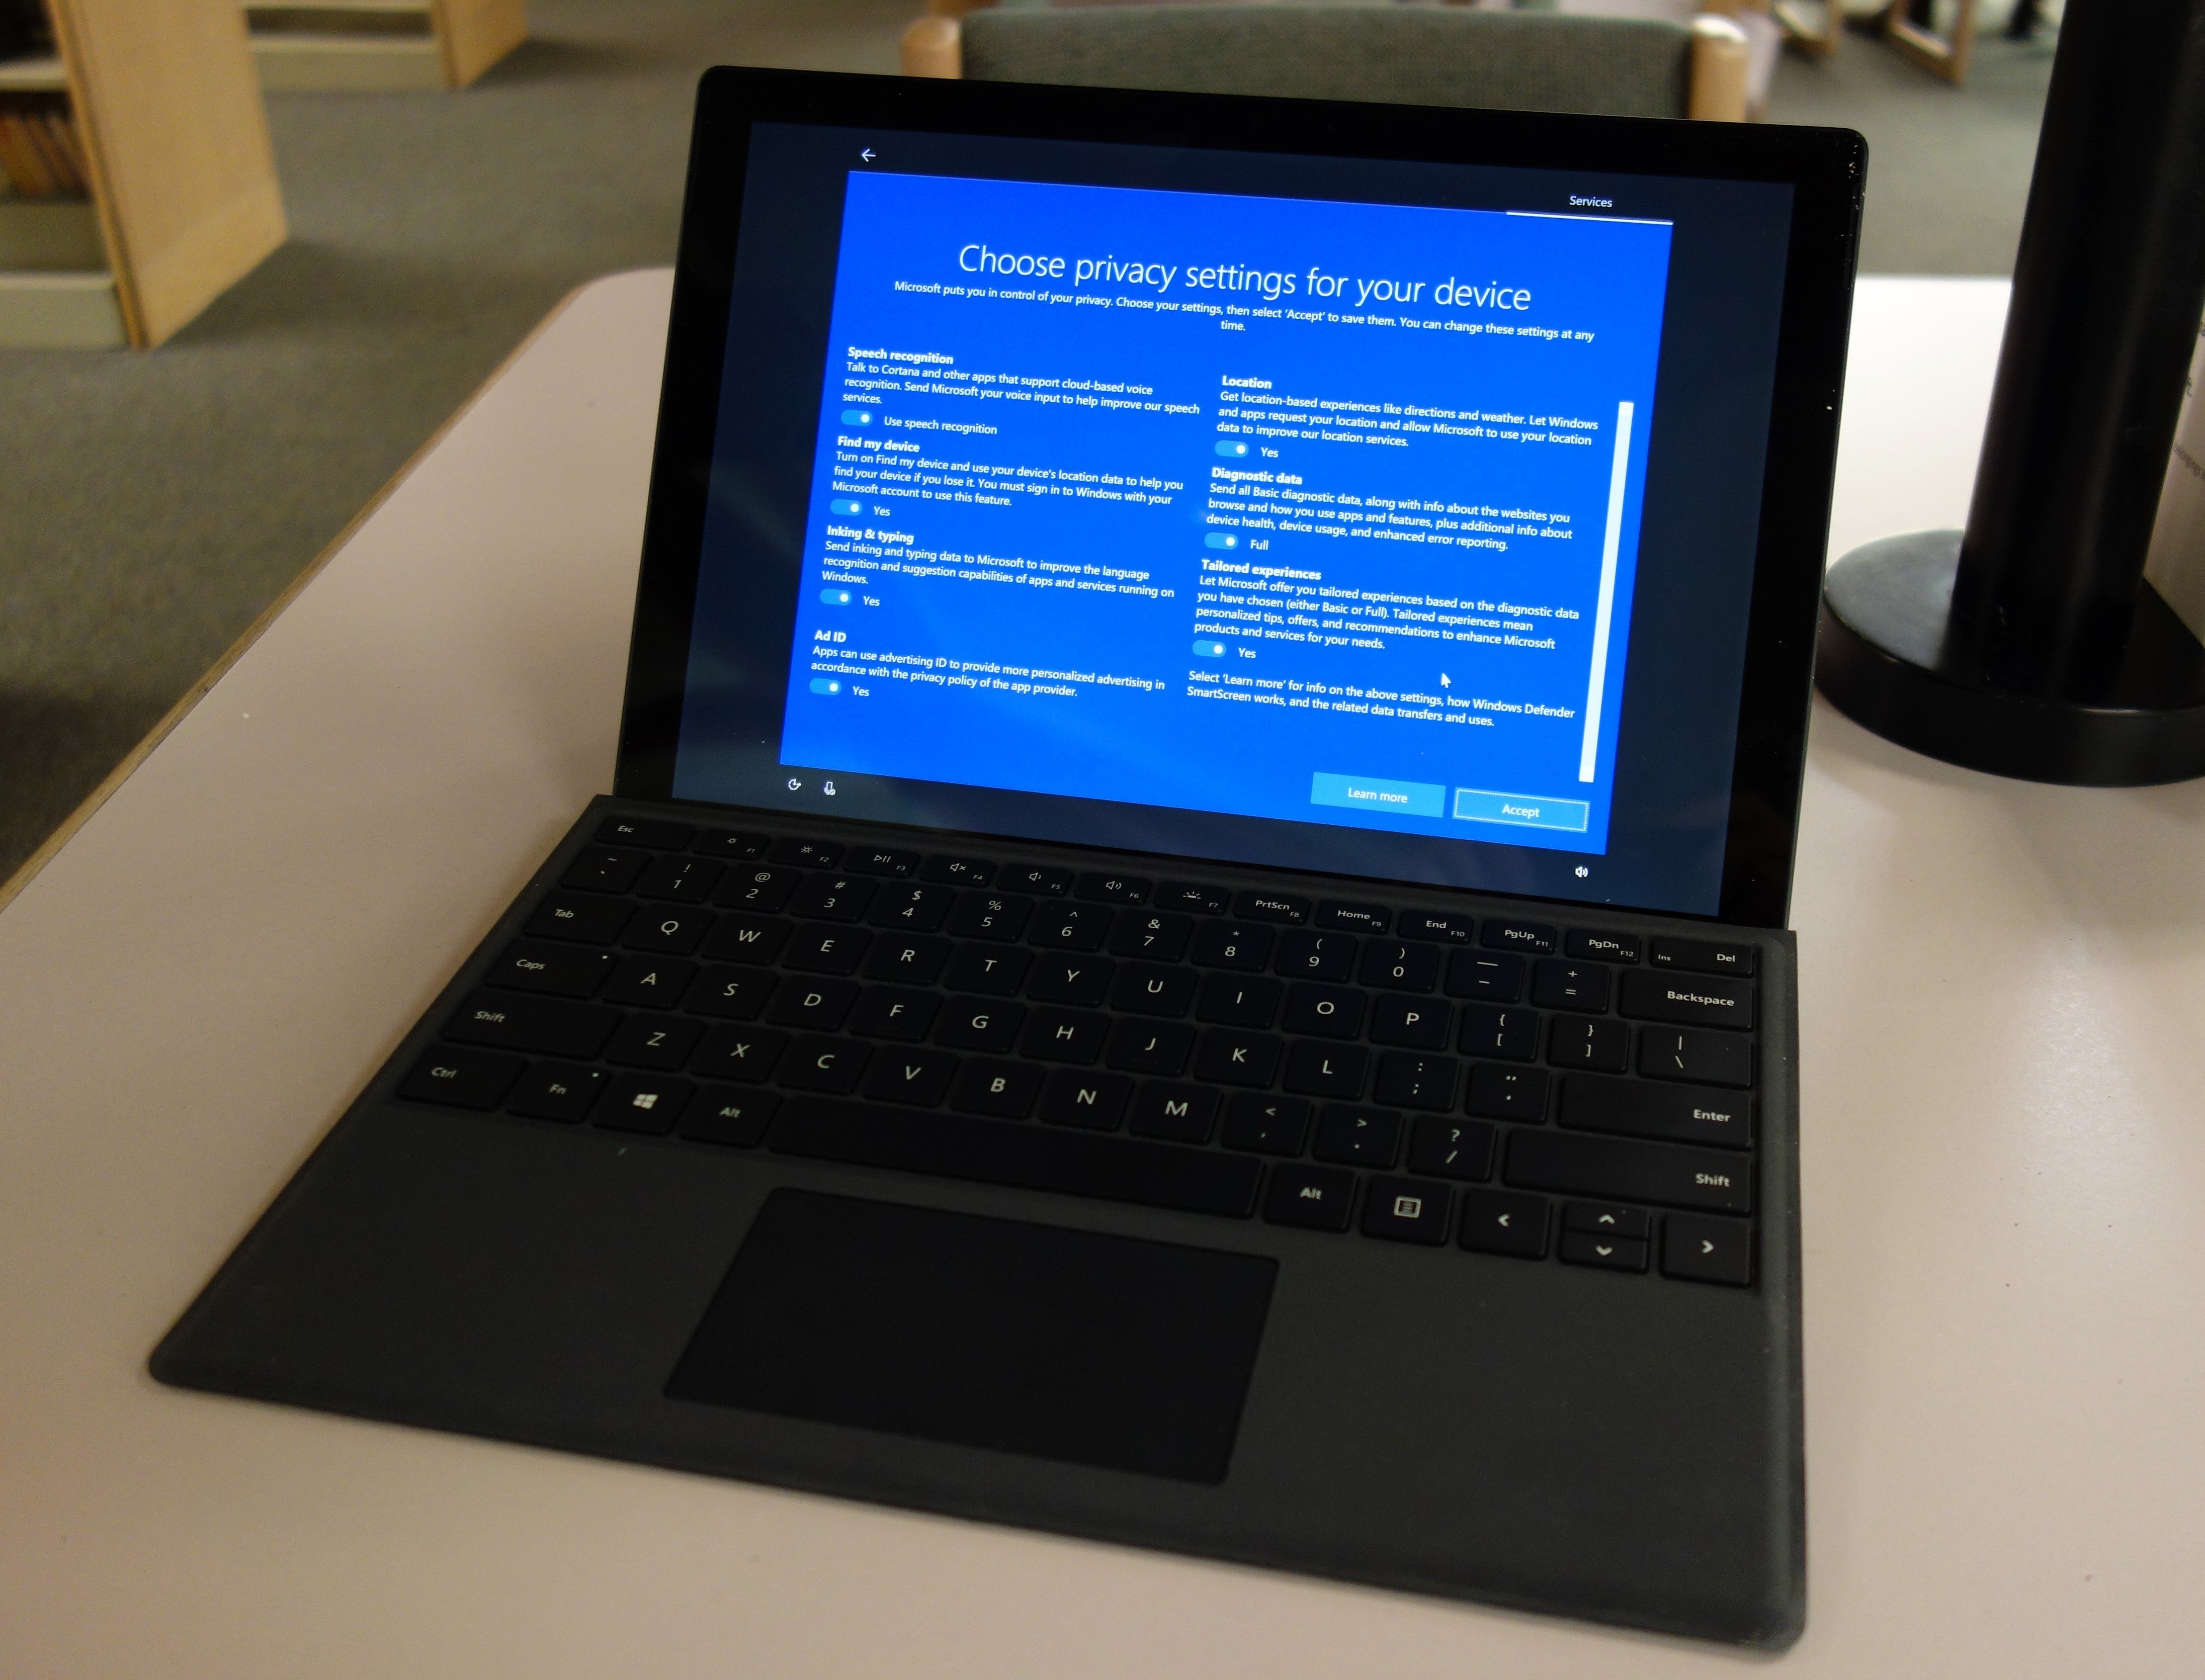
Likewise, it’s up to you whether you want to enable Cortana, though you’ll still find the icon lurking about the search box on your desktop when setup is completed. You’re free to fiddle with the privacy settings, though you also have the option to change these within Windows proper. We’ll talk about these a bit more later.
 Mark Hachman / IDG
Though you’re free to configure these privacy settings as you see fit, you can also take the time to adjust them later.
After a few minutes the setup process will complete, and you’ll see the Windows 10 desktop.
Begin personalizing your PC with Themes
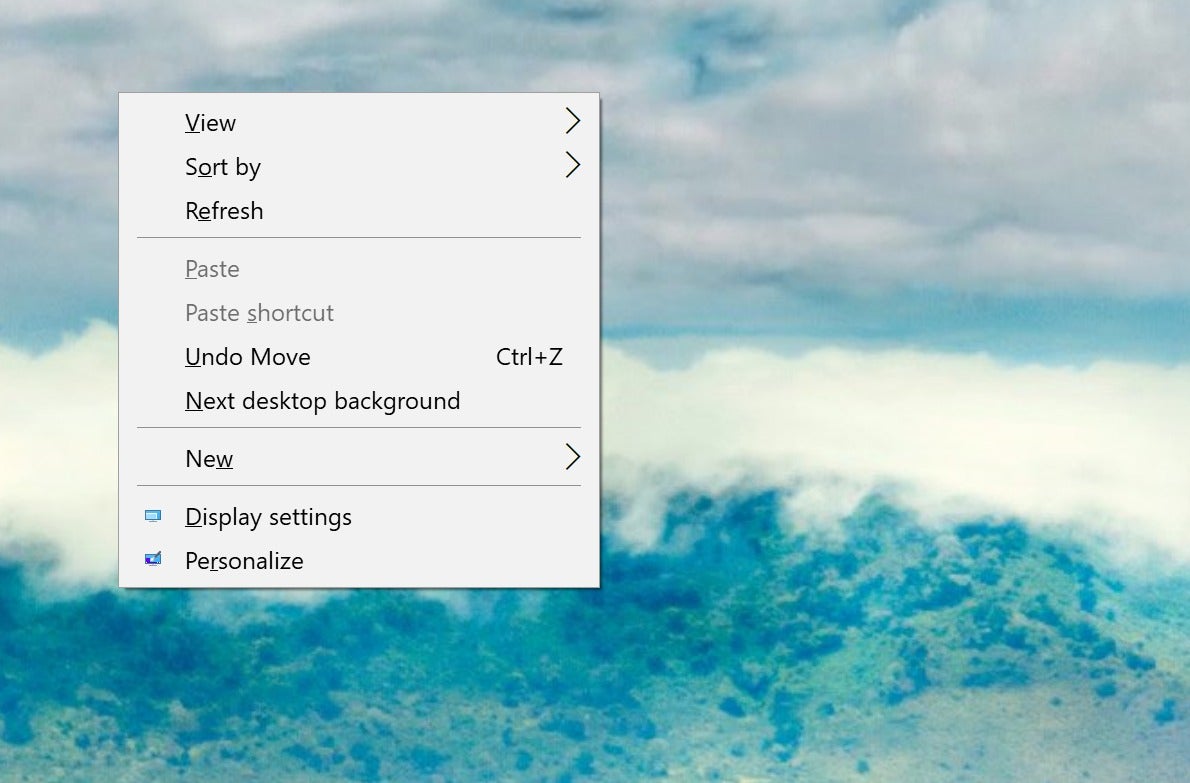
Assuming you’ve never logged in with a Microsoft account, you’ll see the default desktop wallpaper. It’s time to start making this PC yours! And the easiest way to do this is to right-click anywhere on the desktop, and then select Personalize.
 Mark Hachman / IDG
Right-click the desktop, click Personalize, and we’re off!
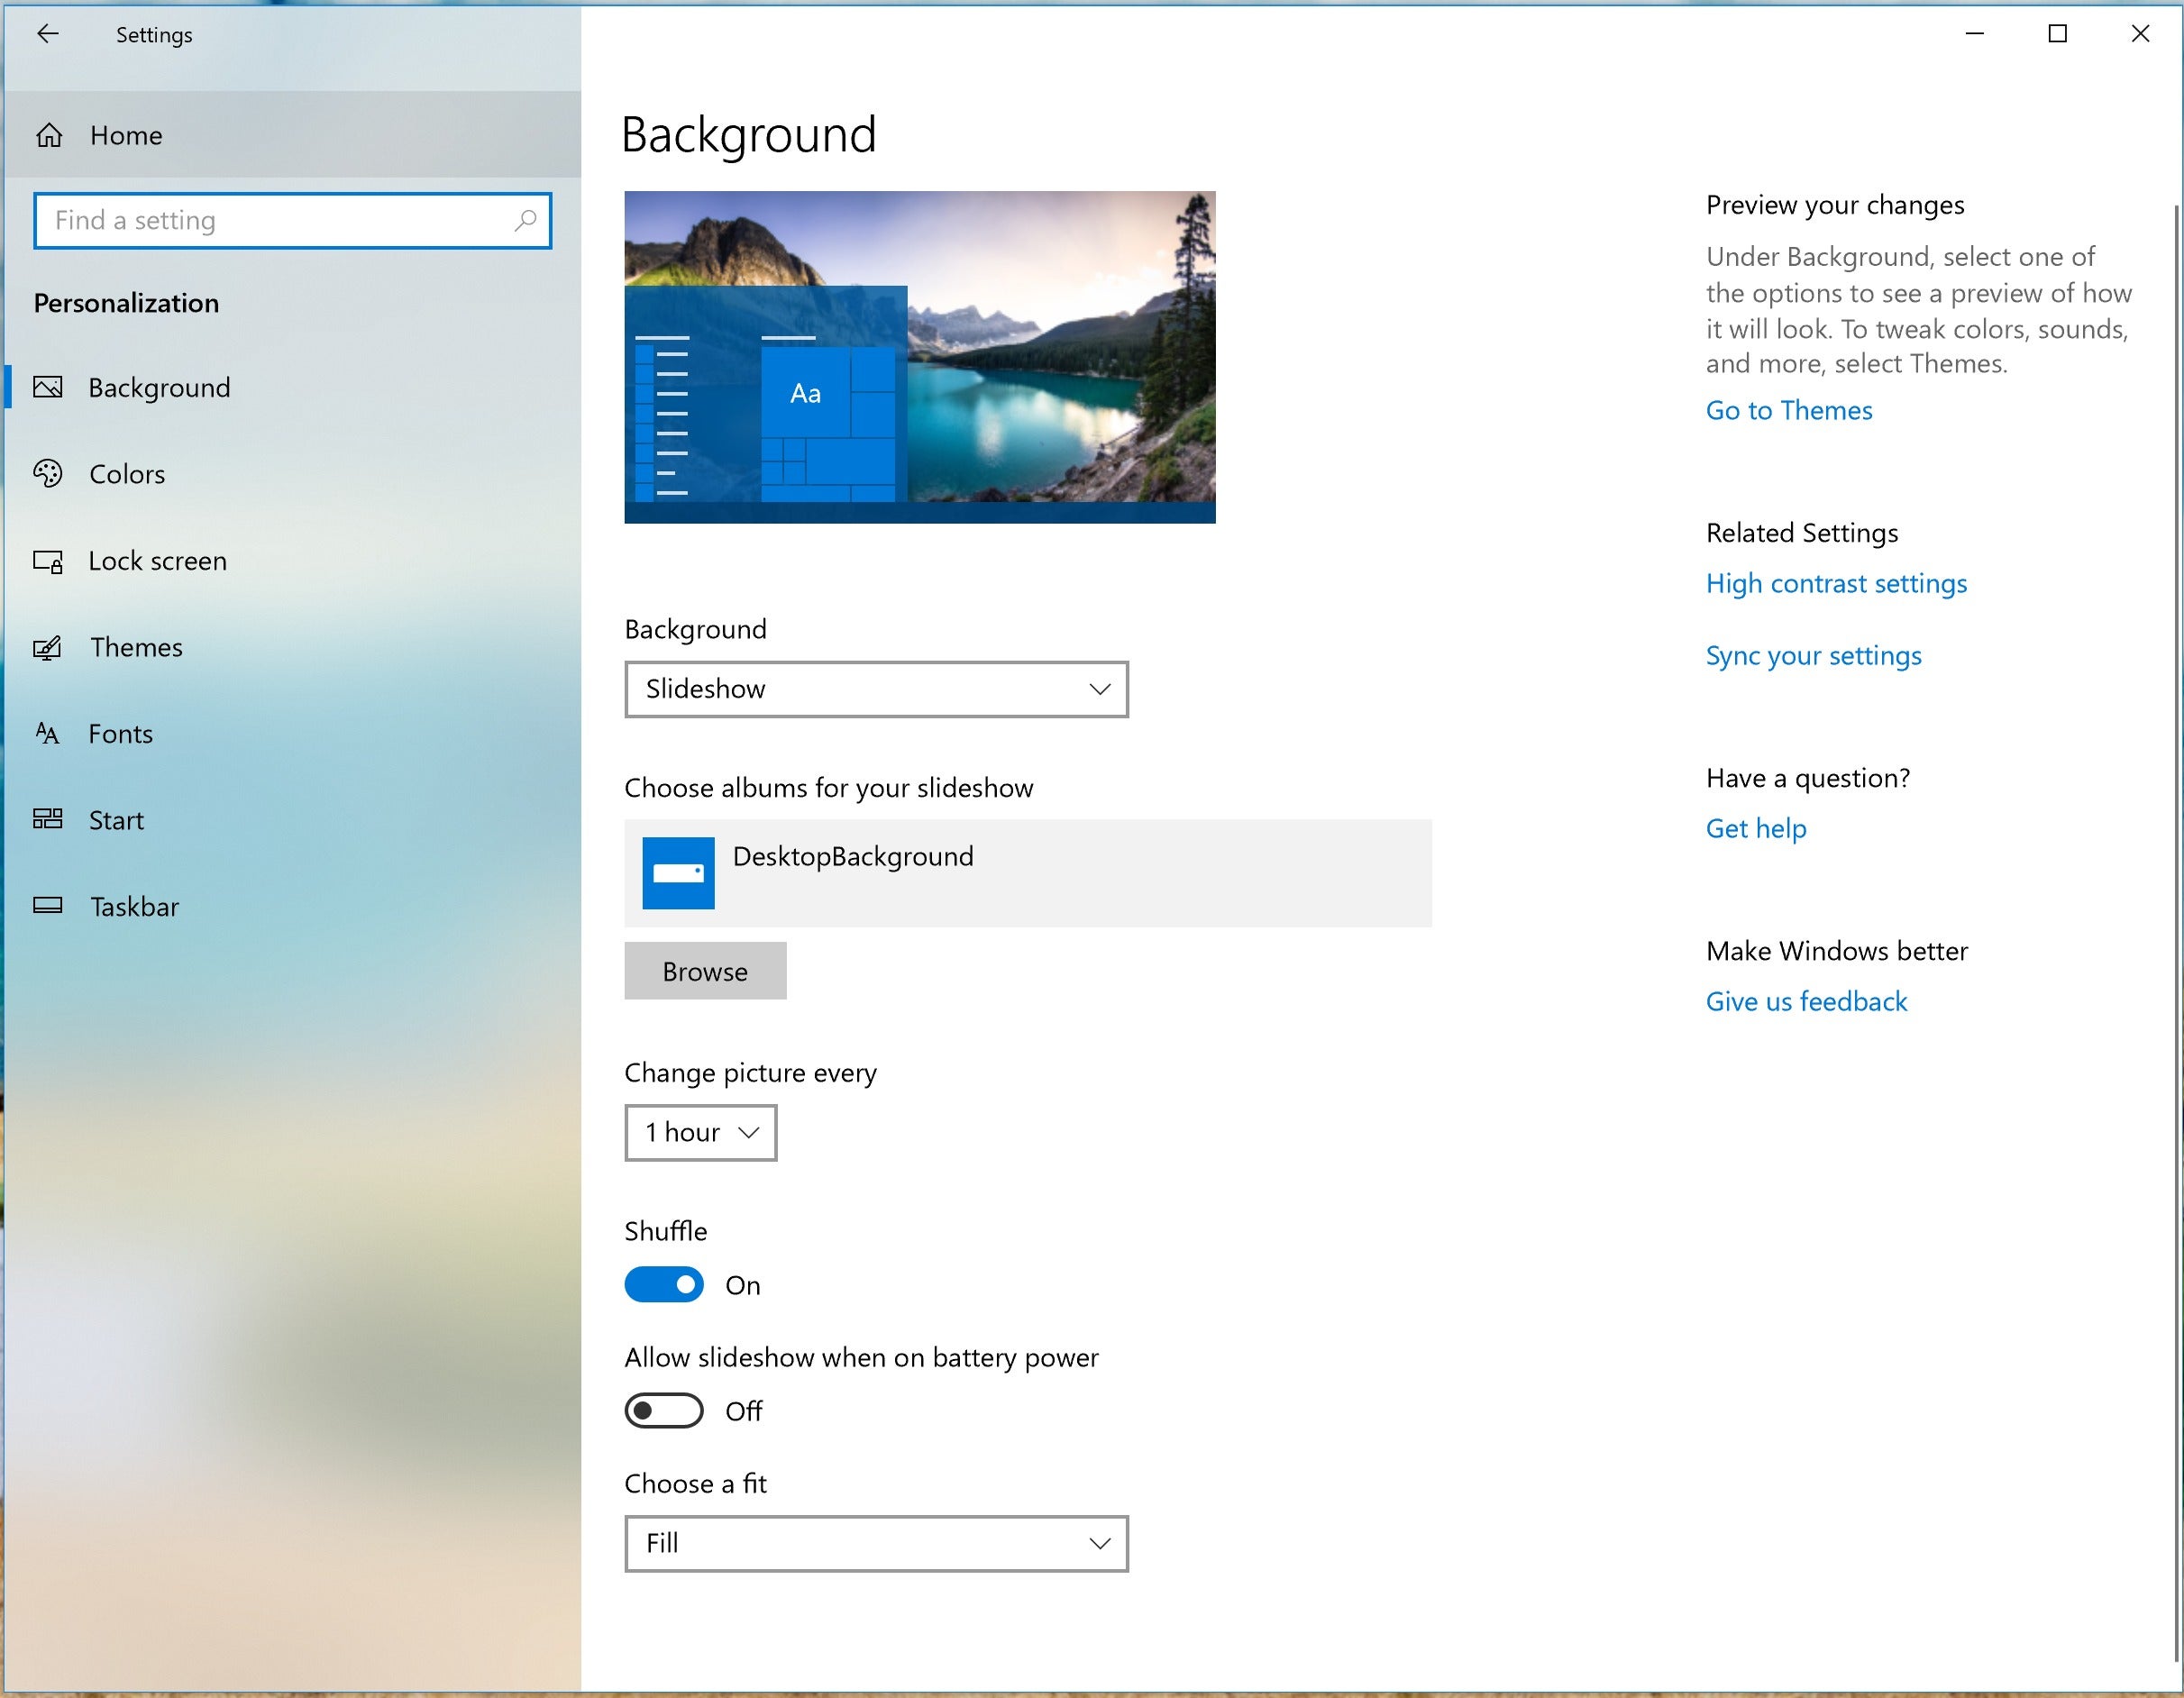
Doing so will open up the Windows 10 Settings menu, specifically Settings > Personalization > Background. You’ll see a list of background pictures to choose from, as well as an example of how it will look. If that’s good enough for you, fine. But it shouldn’t be—there’s so much more! And for that, navigate the menu options on the left-hand rail all the way down to Themes.
 Mark Hachman / IDG
The Personalization Settings is where we’ll begin.
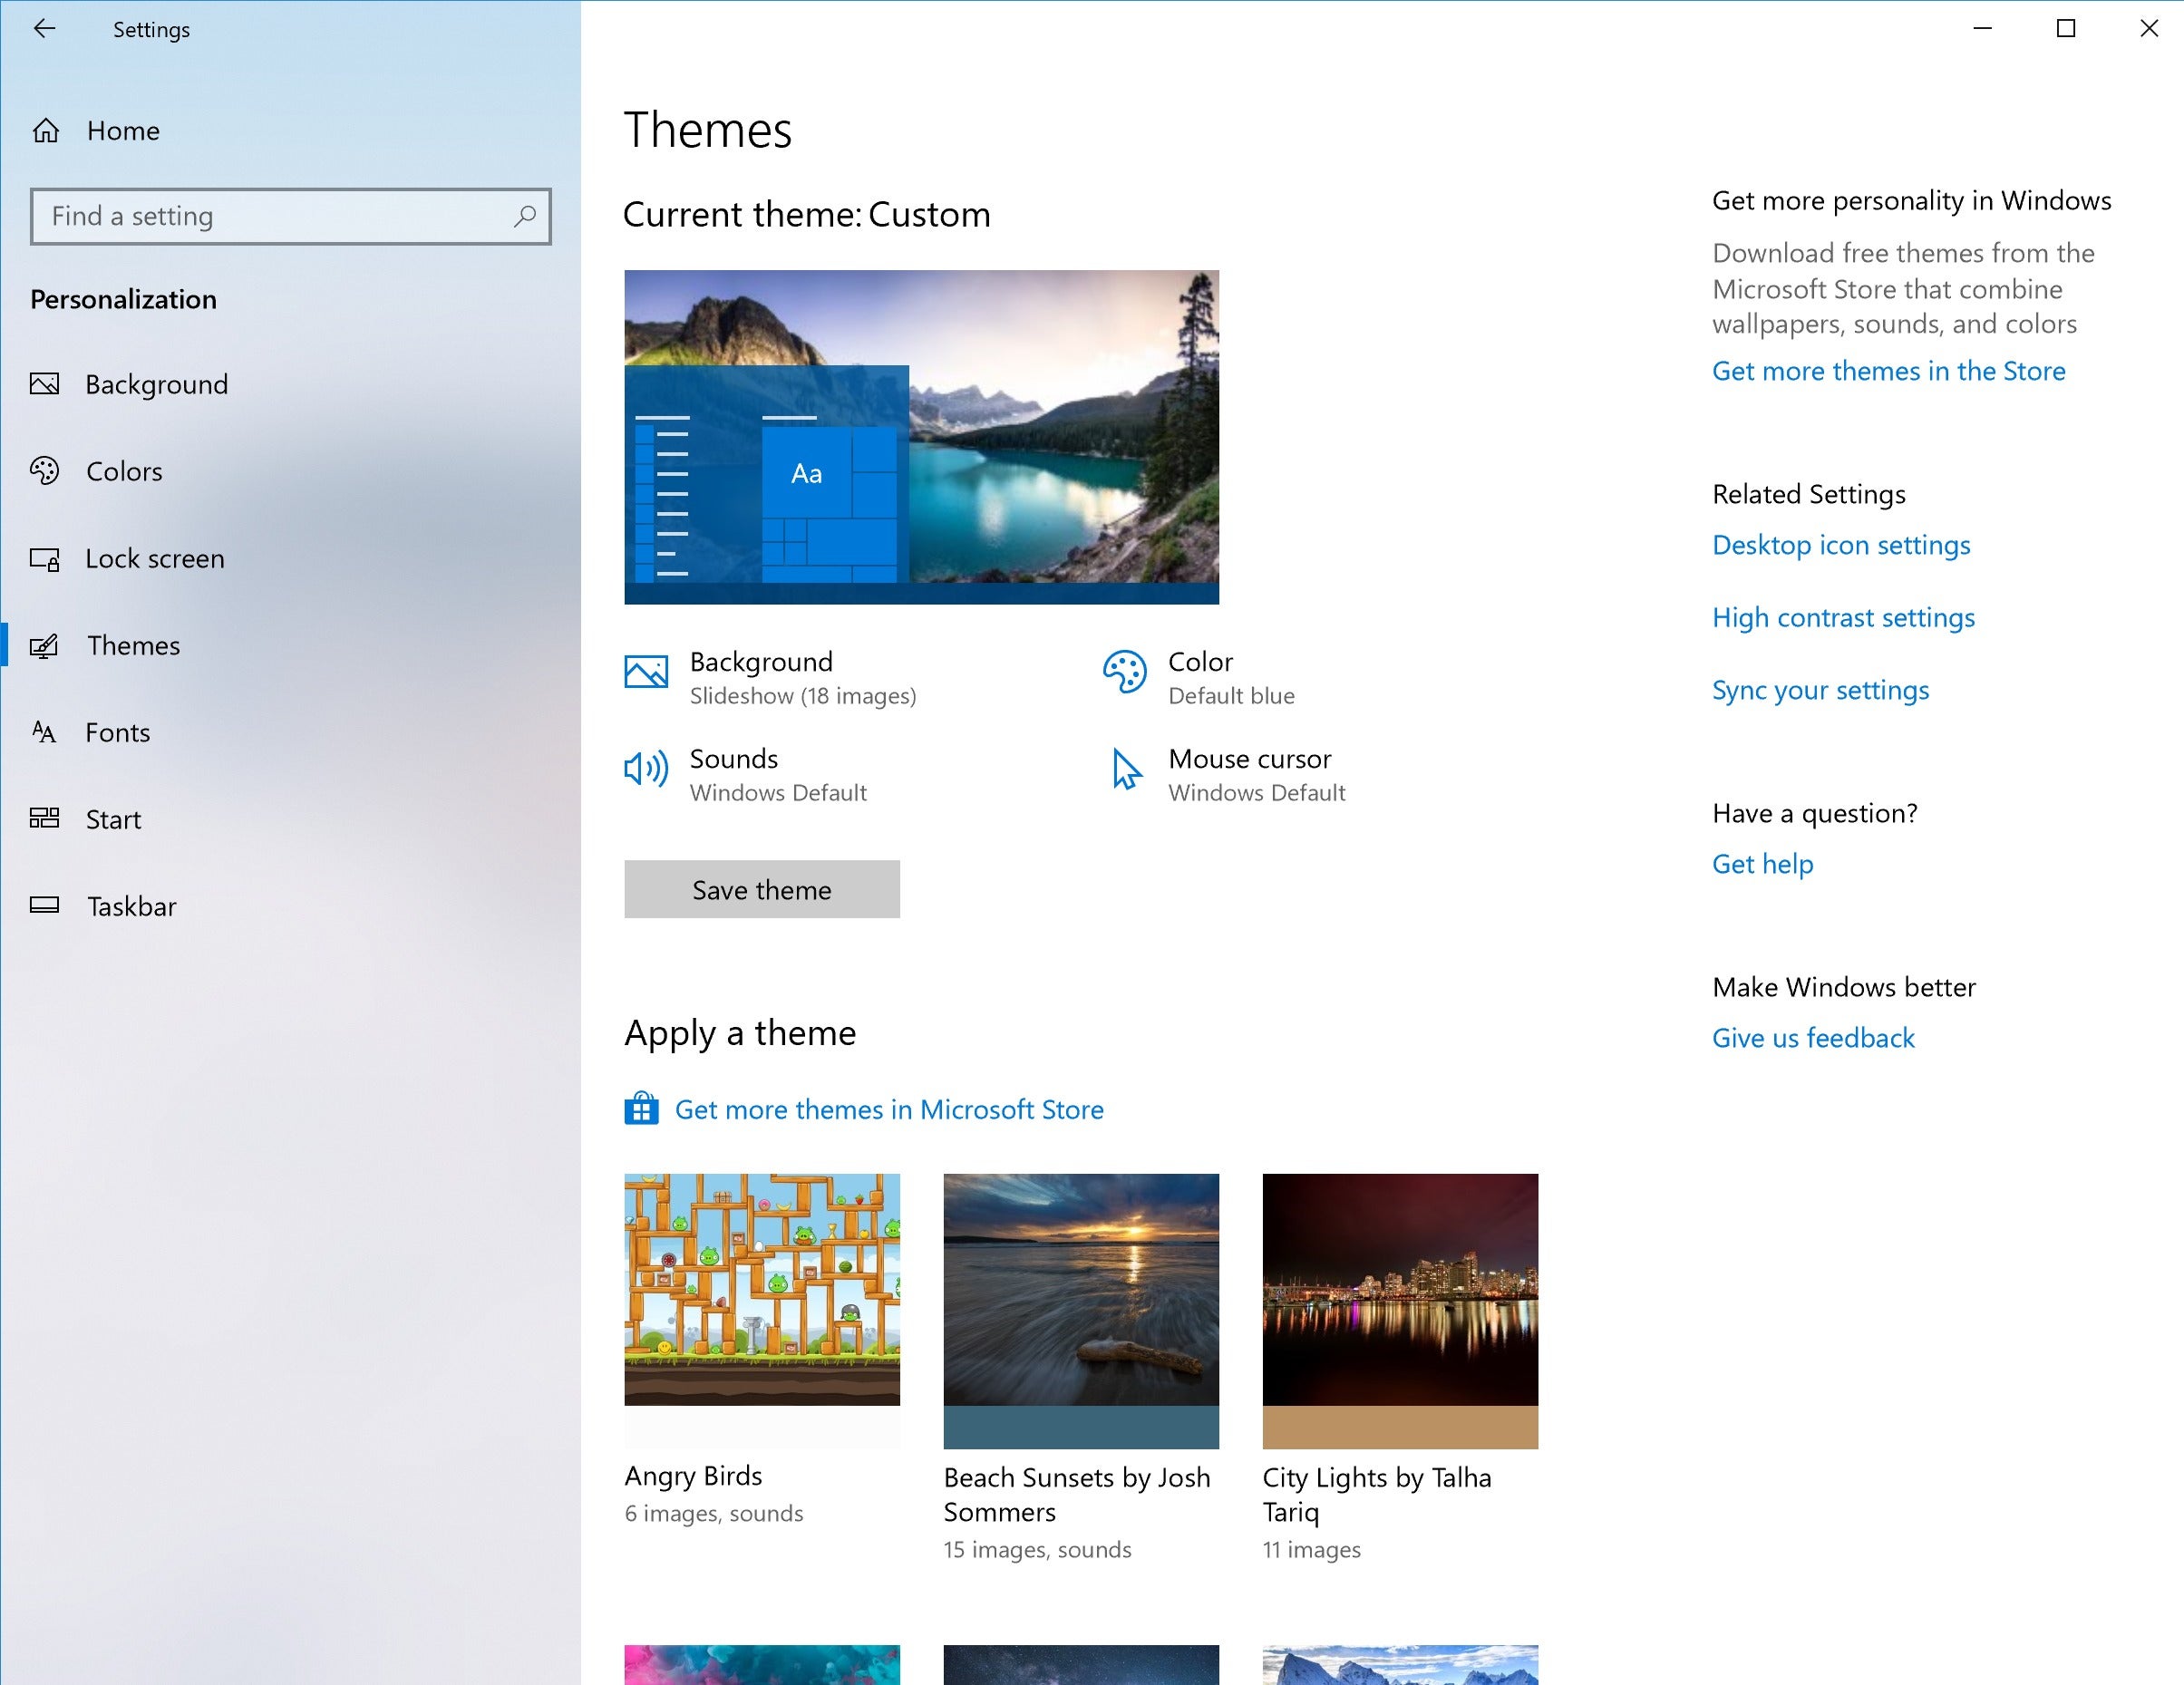
Windows 10 Themes are a collection of background images, virtually all of which use the sounds and mouse cursor that ships with Windows. But the reason we’re here is to click the link in the center of the page: Get more themes in Microsoft Store.
 Mark Hachman / IDG
If you have any existing Themes, this is the page where you’ll be able to select them.
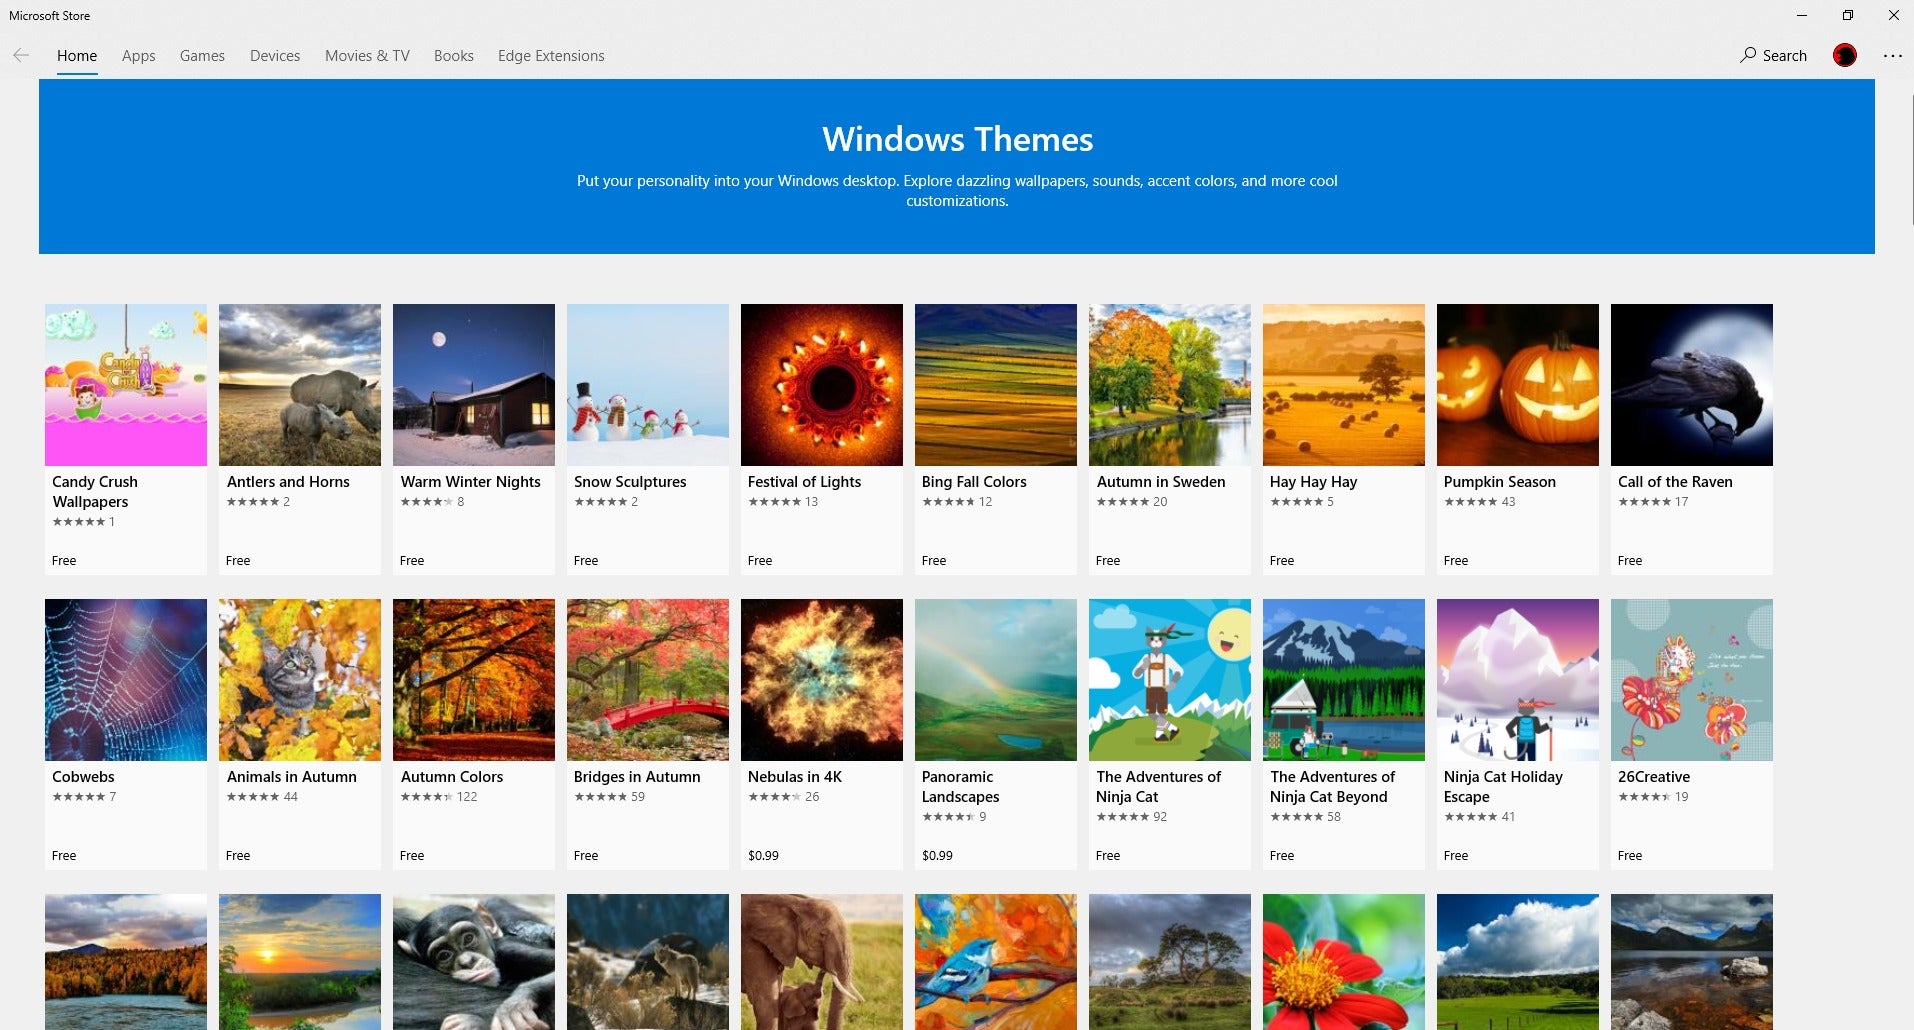
Clicking the link opens the Store, and the available Themes—and there’s literally dozens, the vast majority for free. There’s an enormous emphasis on architecture, animals, and nature photography, and a distinct lack of (copyrighted) sports and pop art. Oddly enough, some of Microsoft’s videogame Themes aren’t published to the Store, but appear in this list of Themes that come with custom sounds, such as Halo:Reach, Angry Birds, Eerie Autumn, or the French Riviera.
 Mark Hachman / IDG
If you’re a photography fan, there’s a wealth of free backgrounds to choose from in the Themes portion of the Microsoft Store. One quirk: you have to access these Themes from the Settings menu. They’re not accessible via the main Store app at present.
Downloading Themes from the Store places them in your list of Themes; downloading the Themes with sounds from the second page requires downloading them, then clicking the downloaded file to install it. Note that on the Themes page of the Settings, you can click the Sounds icon, which will open up the Control Panel. That's handy if you want to use one of the Themes with custom sounds, but eventually tire of them and want to switch back to the traditional Windows sounds, instead.
Feel free to download as many Themes as you want, then select which Theme to use in the Settings > Themes menu. Under Settings > Background, you can select how frequently the individual backgrounds in the Themes cycle through. I prefer one per day, but you can refresh them as frequently as one per minute.
 Mark Hachman / IDG
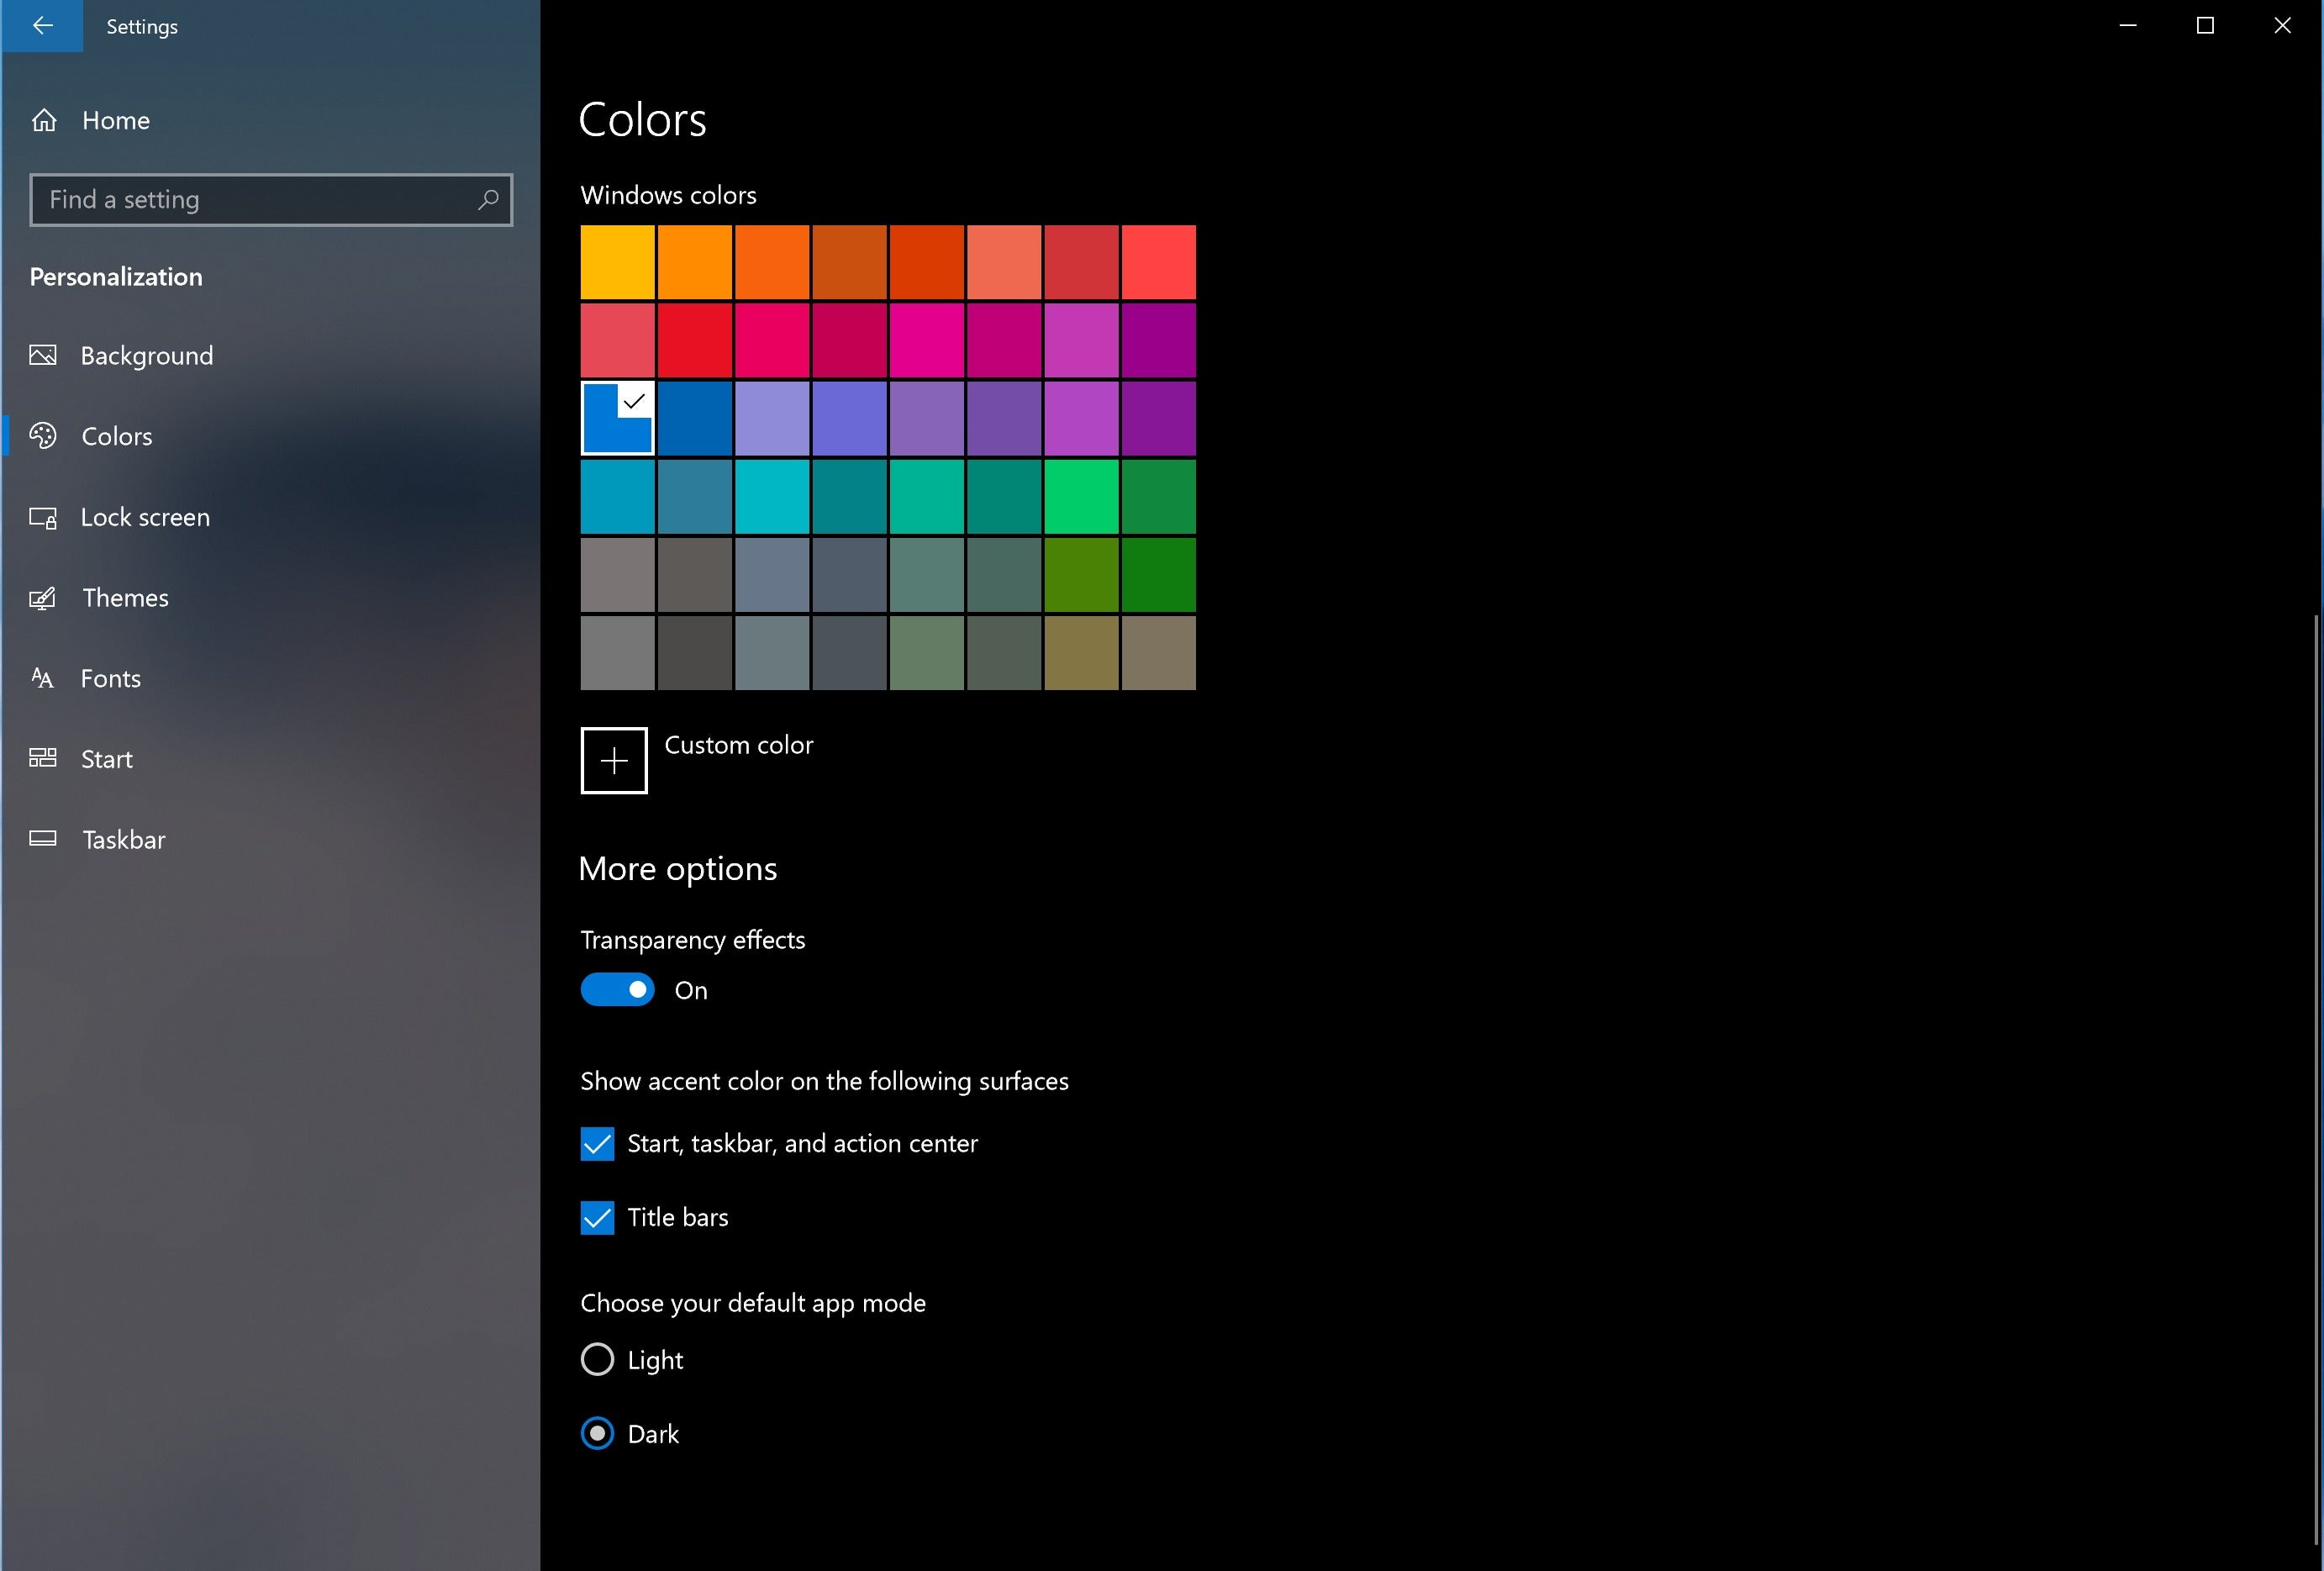
A “dark theme” option is available via the Settings > Colors menu.
Your next stop should be the Settings > Colors setting, which looks like an option to select accent colors. Boring, right? Well, no—the reason to explore is down at the bottom, where you can select either a dark or light theme. Try them both! Some people really prefer less light blasting from their laptops and monitors. Unfortunately, it’s not universal: You’ll have to set a dark mode separately within Microsoft Edge and Google Chrome, for example. But it’s a start.
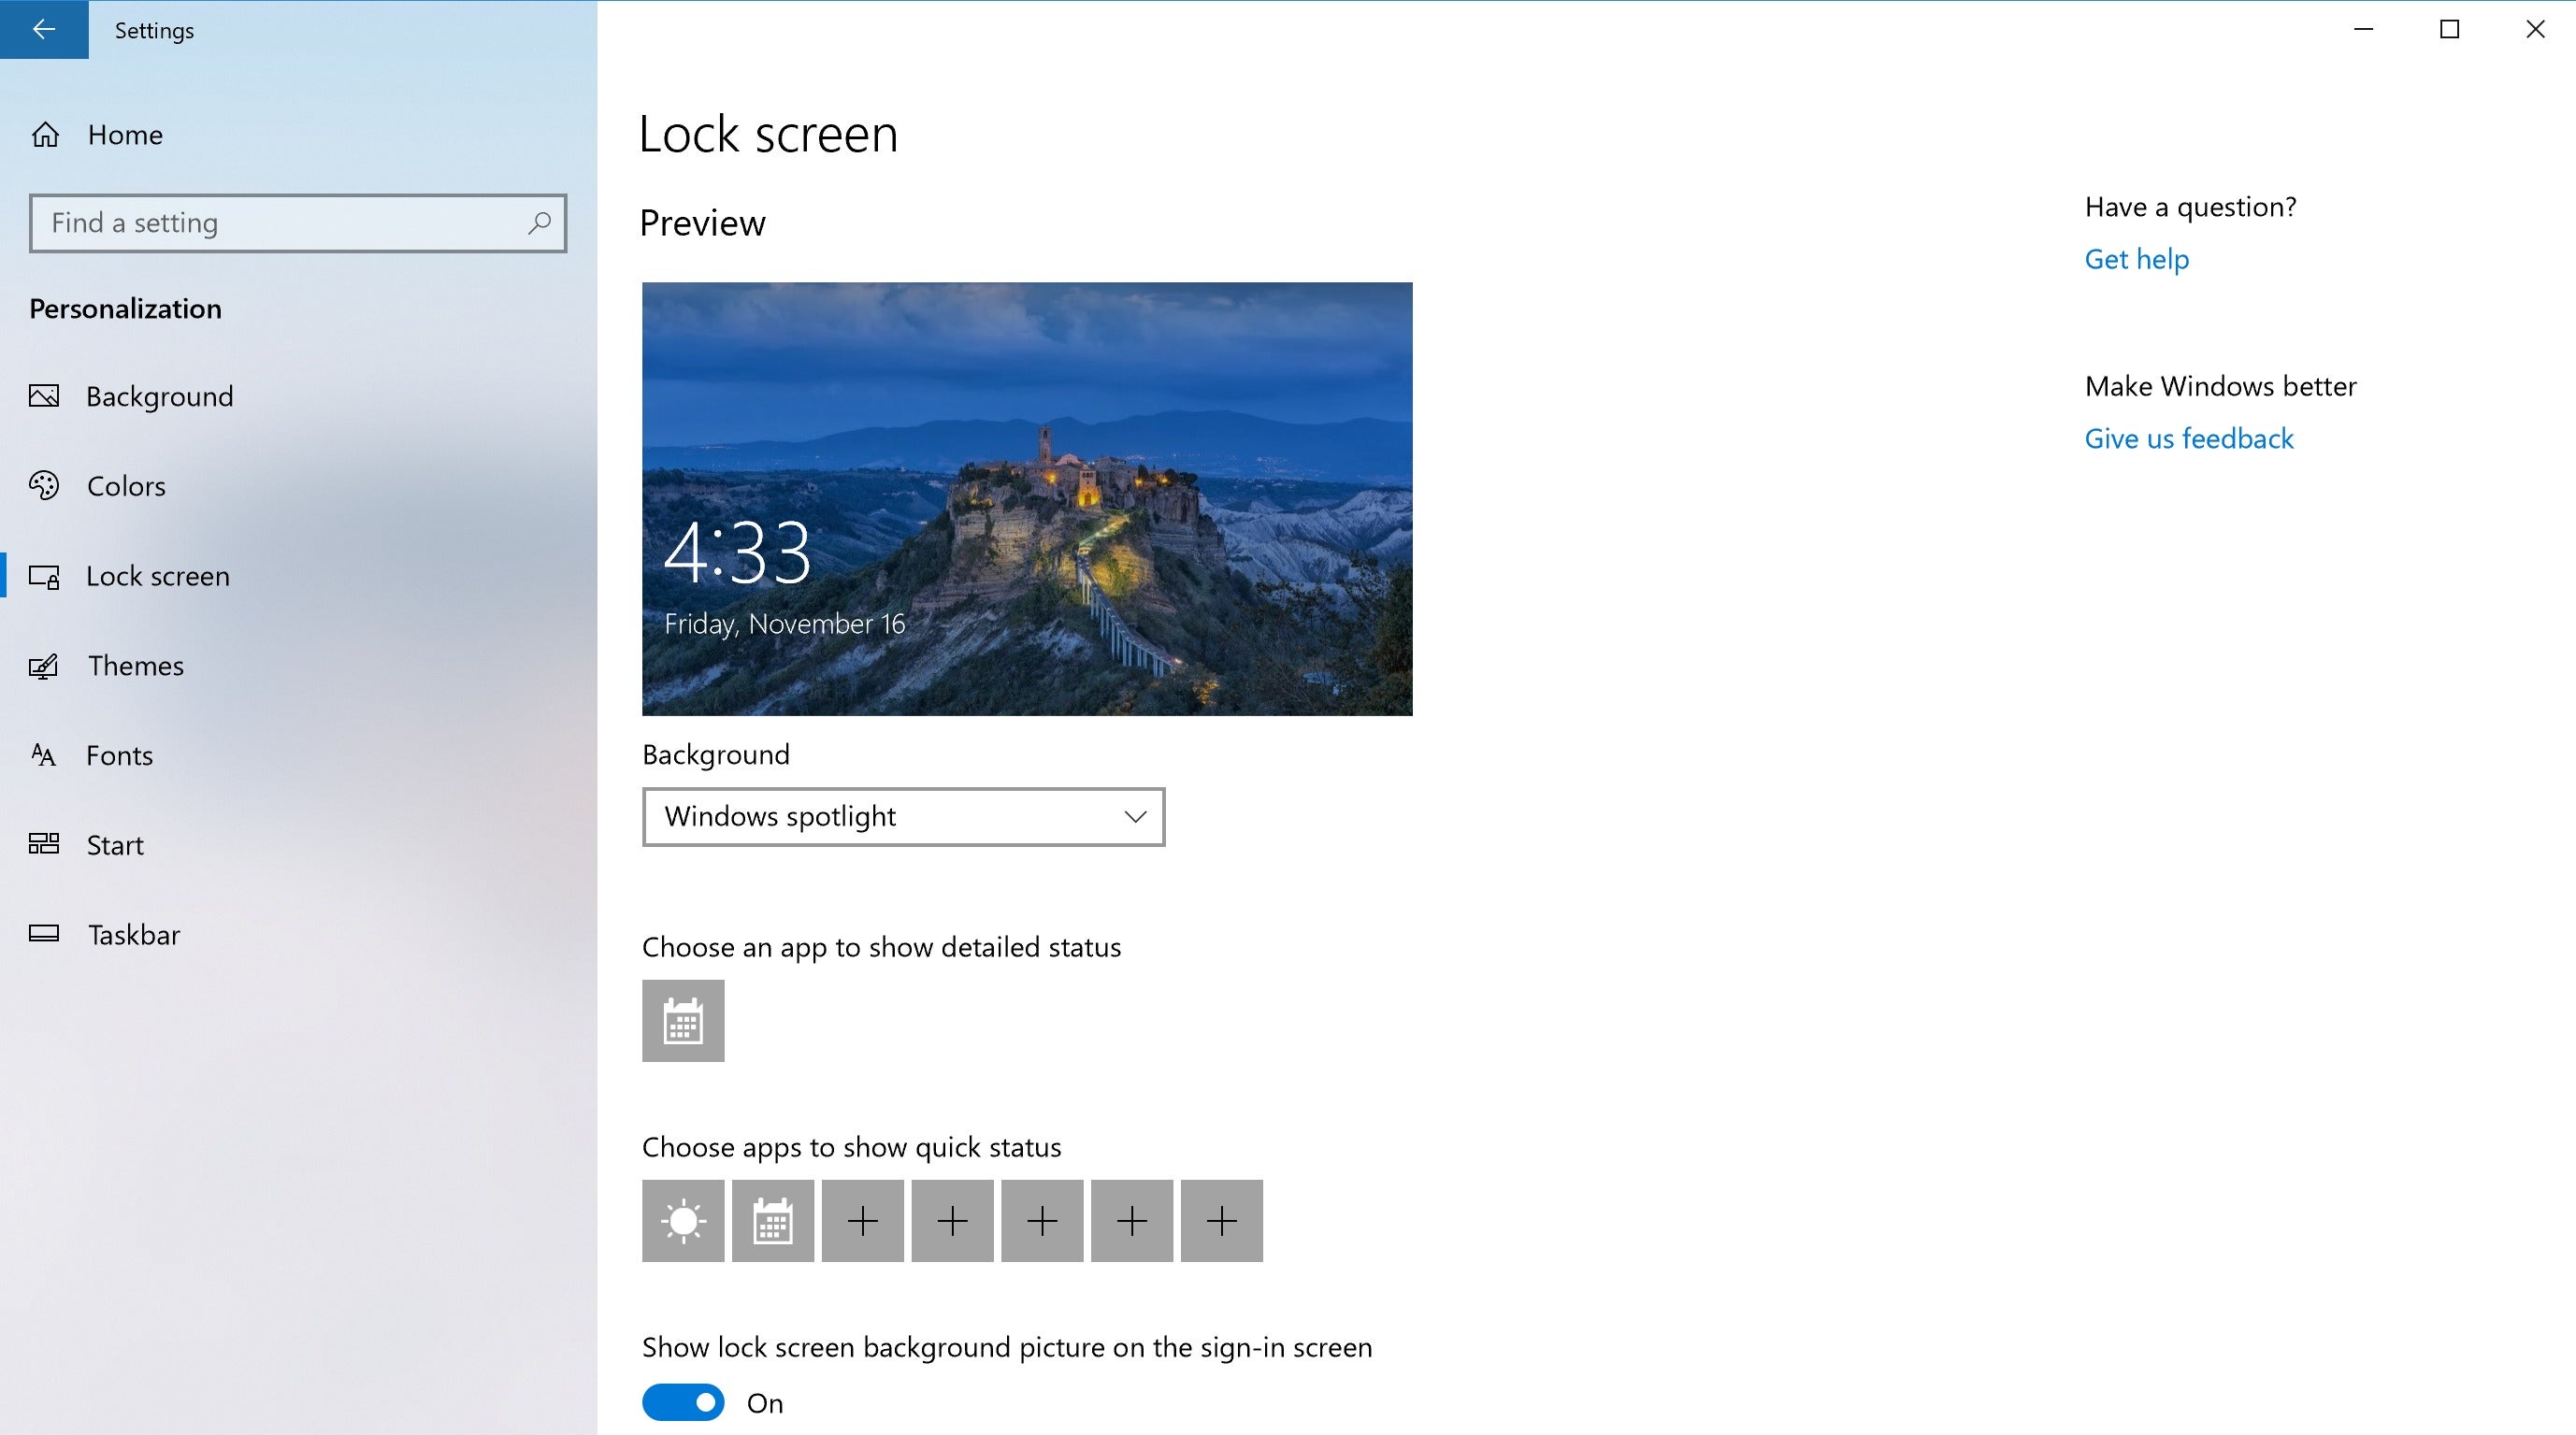
While the Fonts setting within Personalization doesn’t offer much, it’s worth taking a moment to configure Lock Screen, the screen that appears when your PC locks itself after being away for a while. Adding your Calendar data to the lock screen, for example, allows Windows to display your next calendar appointment when you return to your PC. It’s a great way to mentally reset and plan your next move.
 Mark Hachman / IDG
Here, you can designate various apps to display updates via the lock screen, which appears when you’re away from your PC for a time.
How to organize your Start menu and Taskbar
Windows offers many different ways to do the same thing—in this case, launch apps. The Start menu is an amalgamation of Windows 7’s list of apps, and the tiled interface of Windows 8. Right nextdoor is the Search box, where you can type an app name to launch it. And right next to that is the Taskbar, to which you can pin frequently used apps.
 Mark Hachman / IDG
The Start Menu in the lower left houses all of your apps.
How you organize things will be a matter of preference. But consider a few suggestions to help you get started:
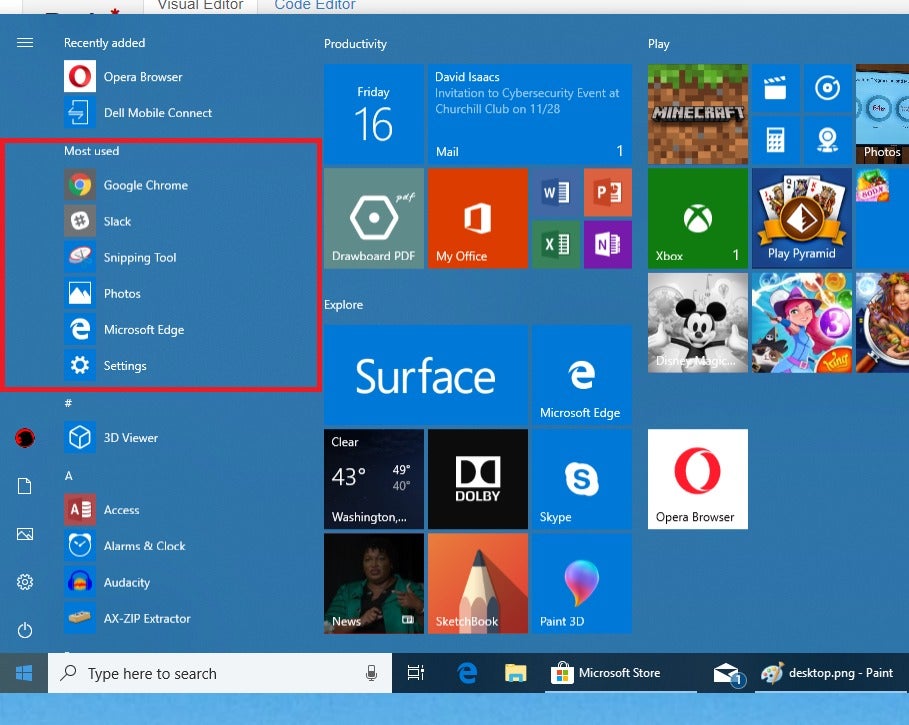
- If you prefer a list of apps, navigate to Settings > Personalization > Start, then toggle on Show most used apps. That will place your most frequently-used apps at the top of the list, eliminating the need to scroll through them.
 Mark Hachman / IDG
If you select it in the preferences, Windows will group your most frequently-used apps at the top of the stack.
- If you don’t use the list of apps, just the tiles, you can toggle off the list entirely from the same menu. You can even open the Start menu in a Windows 8.1 full-screen mode.
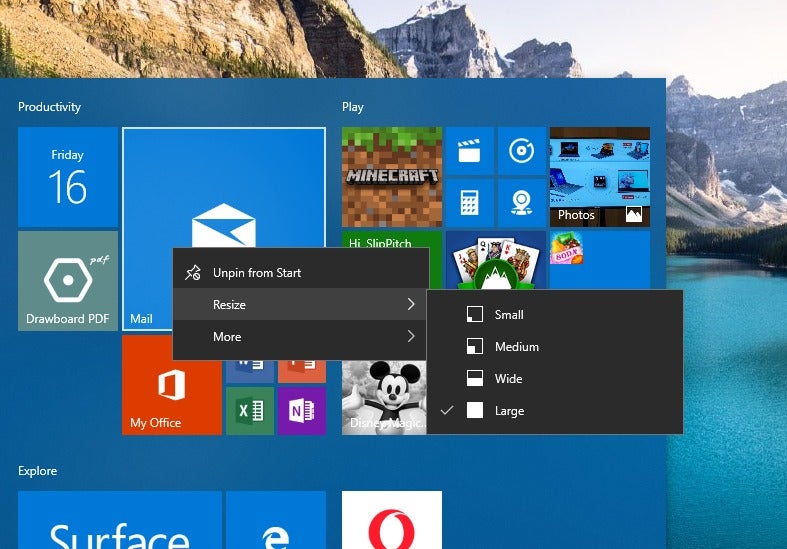
- Each of the tiles appears in one of three folders (Productivity, Play, and Explore, by default), which you can right-click to rename and move around. Right-clicking a tile allows you to adjust its size. That’s useful for apps that update information, like Mail, Calendar, or News.
 Mark Hachman / IDG
The Mail tile has been resized to make it the largest available. If there was unread mail, the tile would show the latest entry.
- If you hate the tiled interface, you can manually “unpin” each tile to get rid of them altogether. You can also uninstall some apps from this interface.
- If you right-click a tile and go to More > Pin to Taskbar, you can create a shortcut icon that will live on the row of icons on your Taskbar at the bottom of the screen. Remember, the more icons you pin, the less space you’ll have for shortcuts to active windows. If you hover over the taskbar icons, though, you’ll see a popup to the active windows under that app.
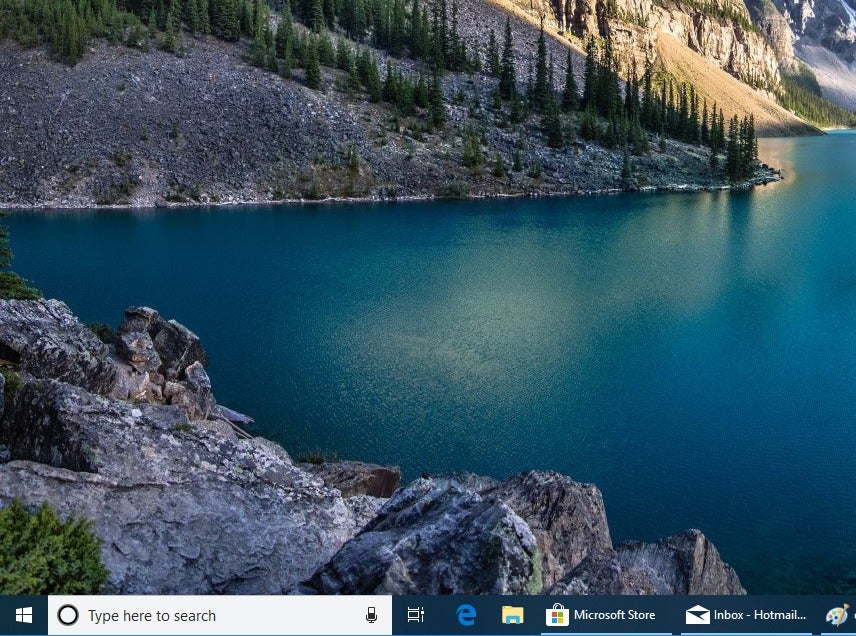
- The Taskbar can be turned off entirely (Settings > Personalization > Taskbar) or moved around your screen—on the top or side, for example. You can also create more room by turning off little-used options like People via the toggle switches.
 Mark Hachman / IDG
A Taskbar to the right? Unconventional, but sure, it’s possible.
The Search box, and Cortana
Unless you’ve toggled it off, you should see a Search box next to the Start icon. It’s here that Cortana has merged her consciousness with general Windows search.
 Mark Hachman / IDG
The Search box appears at the bottom of the screen, next to the Start menu icon.
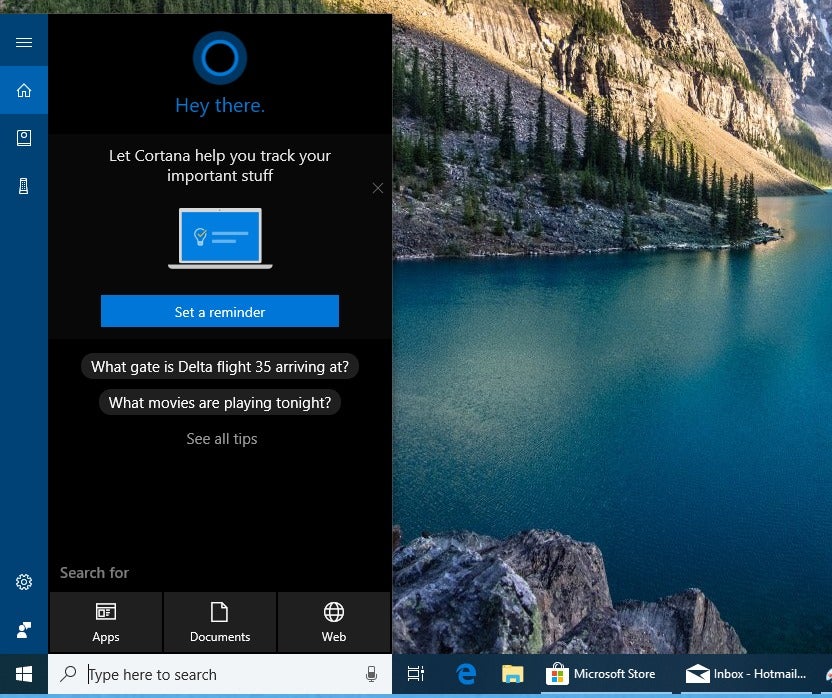
At one time, Cortana would monitor all of your interests and surface news and relevant bits of information. Today, she serves three purposes: as an assistant to answer questions, set reminders, and create lists. If you click in the search box, you can ask a query (“How tall is the Eiffel Tower?”) and Bing will report the result. But it’s easier to go to Settings > Cortana and enable the “Hey Cortana” trigger word. If your PC has a microphone built in, you can then ask these questions of Cortana, even when the PC is locked. You can also set reminders (“Remind me to call Dad at 8 PM”) or create a shopping list.
 Mark Hachman / IDG
Cortana doesn’t have the high profile that she used to, but she’s there to answer questions, set reminders, and more.
To better understand you, though, Cortana needs to know your information. In Settings > Cortana > Permissions & History, if you toggle on permission to allow access to your search history across the cloud and various devices, it will be easier to find a document or other file from the search box. You can use the File Explorer (the little folder icon on the taskbar) to hunt down a file. But you can also search for it from the Search box, and receive a list of suggestions.
 Mark Hachman / IDG
This is why it’s handy to allow Windows access to your search history, as we’ll teach you how to do in the privacy section, below.
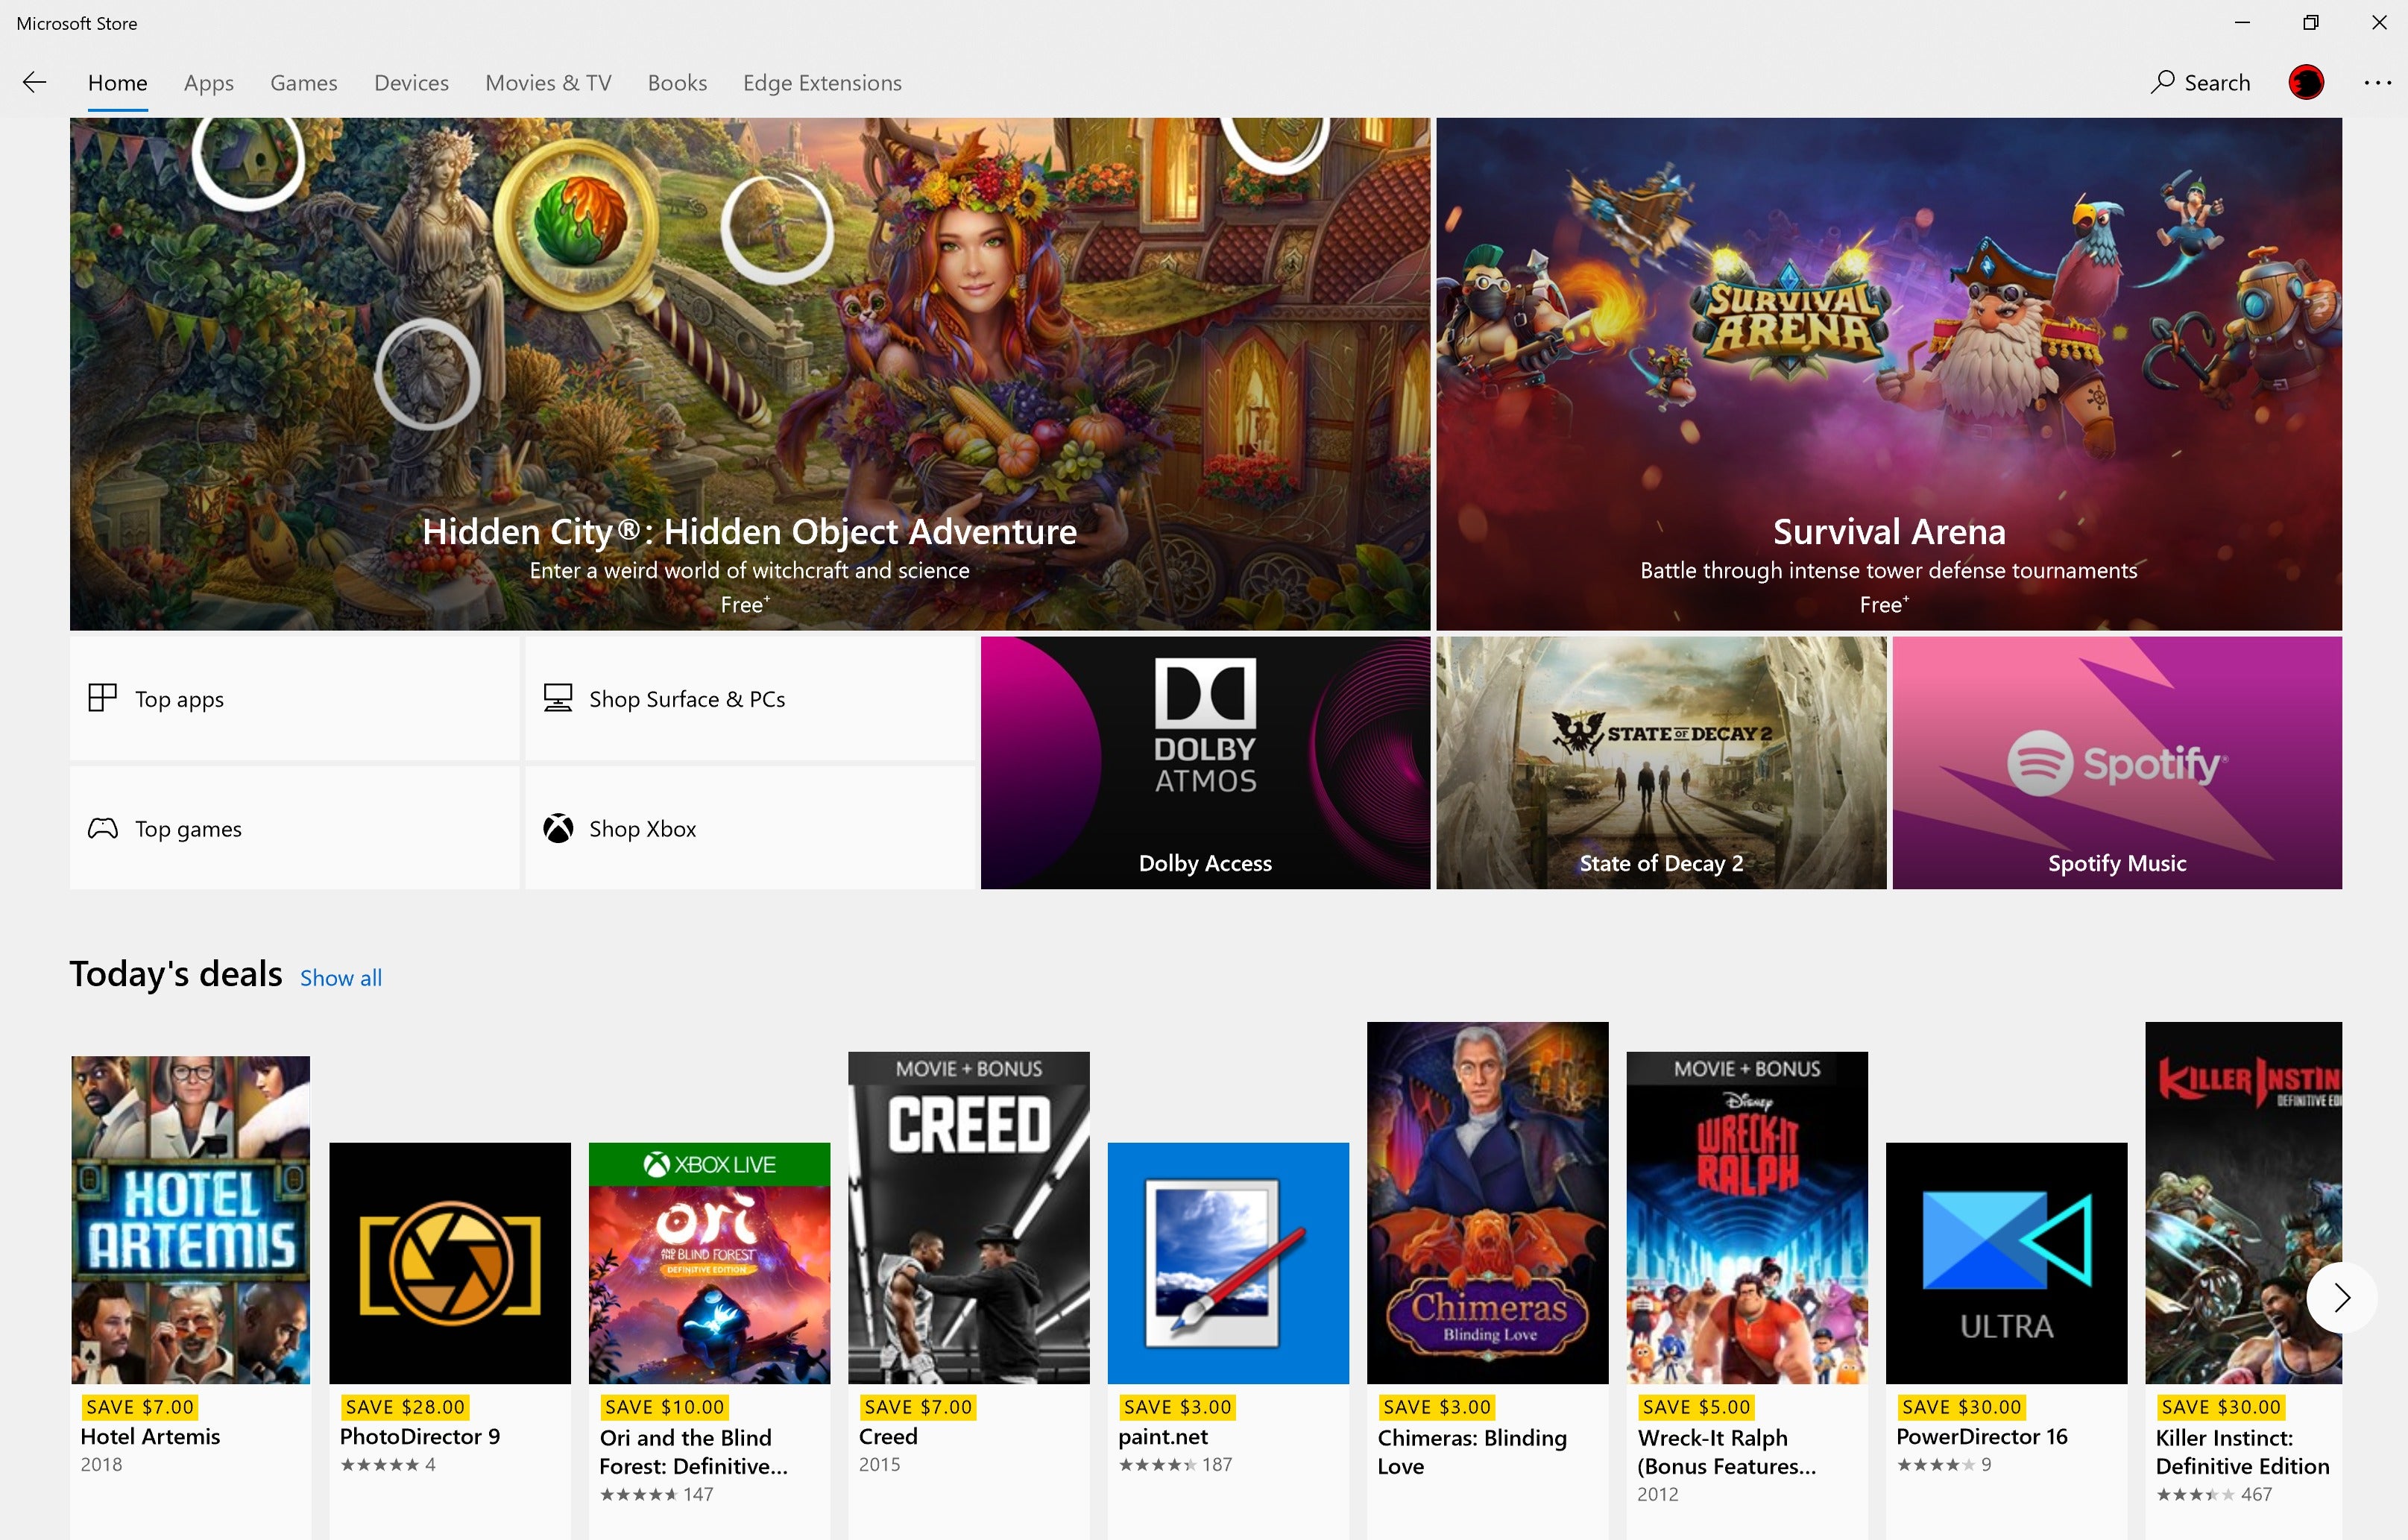
The Microsoft Store app
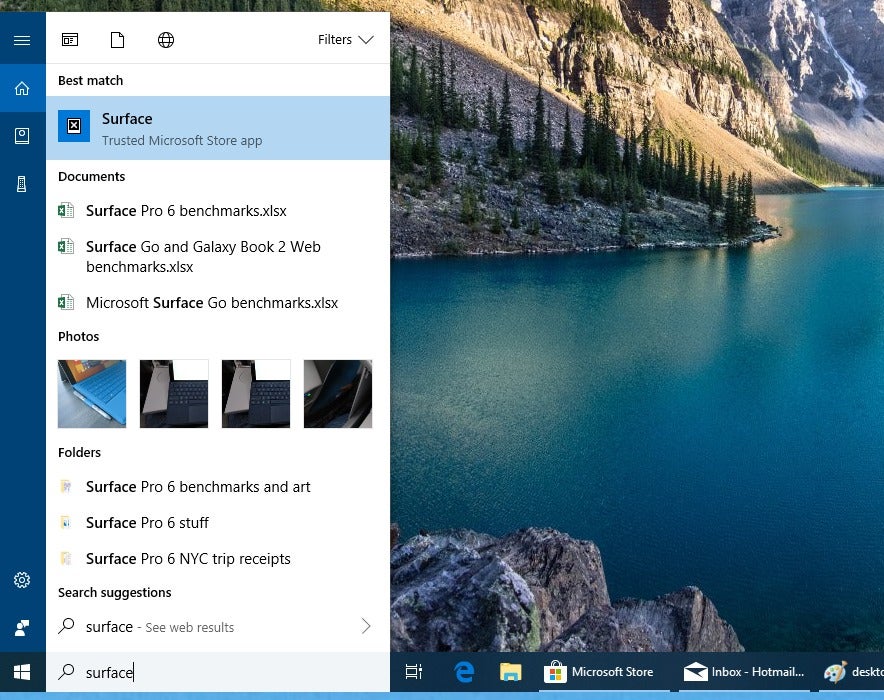
As you may know already, one of the easiest ways to configure your PC is to download the apps that you want to use, and an easy shortcut is the Microsoft Store. While you can access the Store from the Start menu, an easy way to do it is to type the app you’re looking for into the Start menu, and look for the corresponding Store entry. Try it with something like “Facebook” or “Spotify.”
 Mark Hachman / IDG
From apps to games to videos, the Microsoft Store app is the iTunes of Microsoft.
Which apps you download are up to you—and not all apps are available via the Microsoft Store! But if you’re looking for suggestions of good free apps to download, here’s our list.
The Action Center
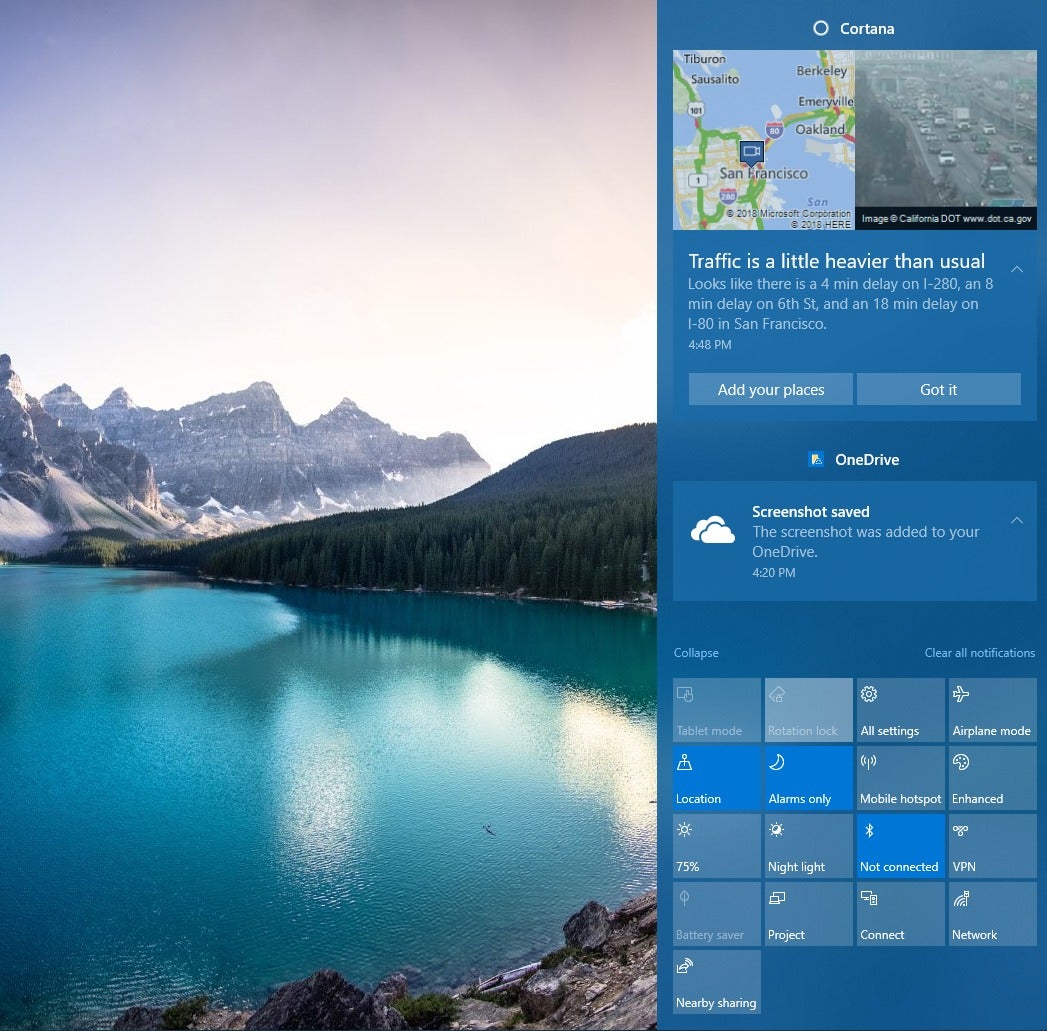
Despite its name, the Action Center, tucked way down into the bottom right-hand corner of the screen, can be a quiet corner of your PC's operations. The Action Center archives any notifications you receive (new email, calendar reminders, etc.) and pops them out from the left side of the screen. But it’s the Quick Actions down in the lower third where you can quickly tweak things to your liking: adjust the brightness of our screen, turn on Nearby Sharing, toggle Wi-Fi on and off, and more. You can always make these adjustments in the Settings menu (or sometimes even via your laptop keyboard), but they’re designed to be readily accessible.
 Mark Hachman / IDG
The Action Center hides quite a bit, from detailed notifications to shortcuts at the bottom of the screen.
In the October 2018 Update of Windows 10, you’ll have the option to drag these little icons and around and organize them as you see fit.
A quick note about privacy
Remember how we encouraged you to click through the OOBE and push past the privacy defaults? Now might be a good time to go back and think about which data to provide to Microsoft, via the Settings > Privacy menu.
 Mark Hachman / IDG
Truly understanding Windows’ privacy options will take some doing, and Microsoft still struggles to explain what it’s doing to consumers. Allowing Microsoft access to your data has some benefits, but provide just the basics.
You’re free to decide what data Microsoft learns about you, but the trade-off is this: Microsoft would like you to believe that the more data you provide, the better your experience will be. There’s some truth to that. If you allow access to your search history and cloud documents, for example, your searches should be more effective. But you’ll still see ads, so there’s really no need to create a "unique advertising ID," so we suggest you should toggle off that switch in Settings > Privacy > Options. You can also set the Privacy > Diagnostics & Feedback data to Basic, without any consequences. Want a deeper dive on Windows privacy? Check out our tutorial.
There are certainly other touches you could make to customize your PC: adding a second monitor to increase your virtual workspace, uninstalling bloatware like Candy Crush, or simply adding a trusty old keyboard and mouse. Remember, it’s all about making your PC... your PC.


