 Credit: Jared Newman / IDG
When you’re trying to focus on a specific task, the right display settings can make a big difference. Dimming or disabling secondary monitors, cutting down on harsh screen lighting, or even eliminating color altogether can help draw your eyes to the job at hand and reduce eyestrain.
With the right tools, Windows can make managing these display settings practically effortless. Here are five screen manipulation tools and tricks to help you concentrate:
Automatic dark mode
With the May 2019 update for Windows 10, Microsoft added a “light” mode to complement its existing dark theme, rendering the taskbar, Start menu, and certain app menus in a bright shade of gray. Unfortunately, Microsoft provides no way to switch automatically between light and dark modes, so your display vibes might be too mellow by day and too harsh at night.
 Jared Newman / IDG
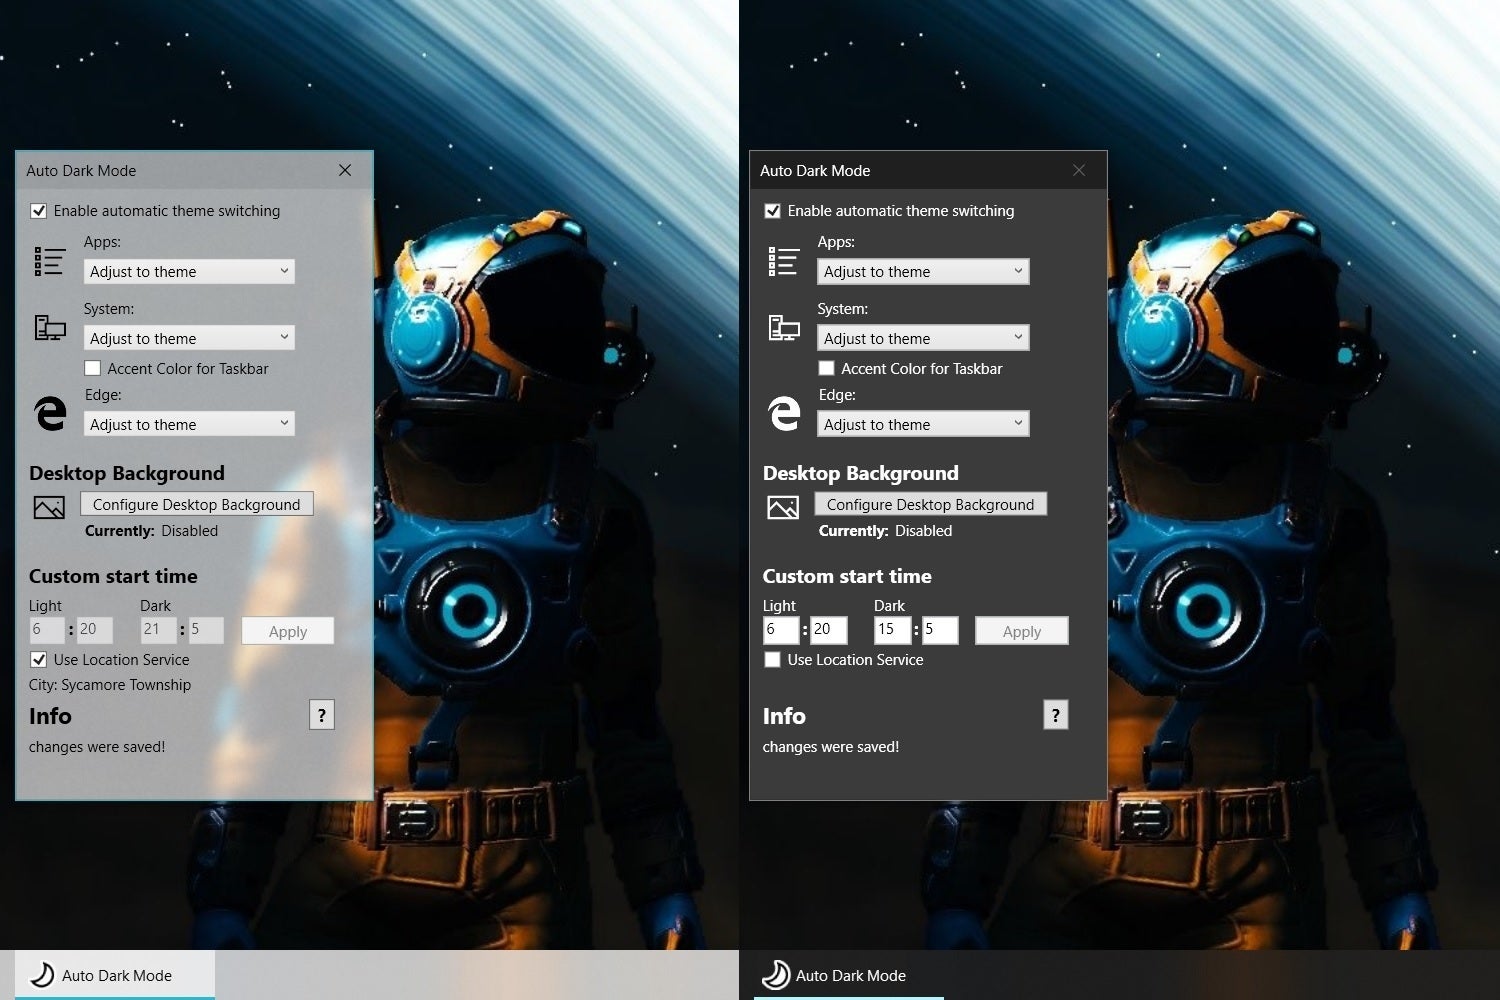
Auto Dark Mode toggles light and dark themes in Windows 10 based on time of day.
If this bothers you, check out the free Windows 10 Auto Dark Mode app, which can switch between light and dark modes based on the time of day. You may specify the light and dark times yourself, or use your location to switch automatically at sunrise and sunset. (For the latter option, you must enable Allow apps to access your location under Windows Settings > Privacy > Location.) Auto Dark Mode even lets you set up separate desktop wallpapers to complement each mode.
Eliminate blue light at night
For the last couple of years, Windows 10 has offered a “night light” mode that makes your screen look warmer with less blue light. You can enable this setting and make it run on a schedule by heading to Windows Settings > Display, then selecting Night light settings.
 Jared Newman / IDG
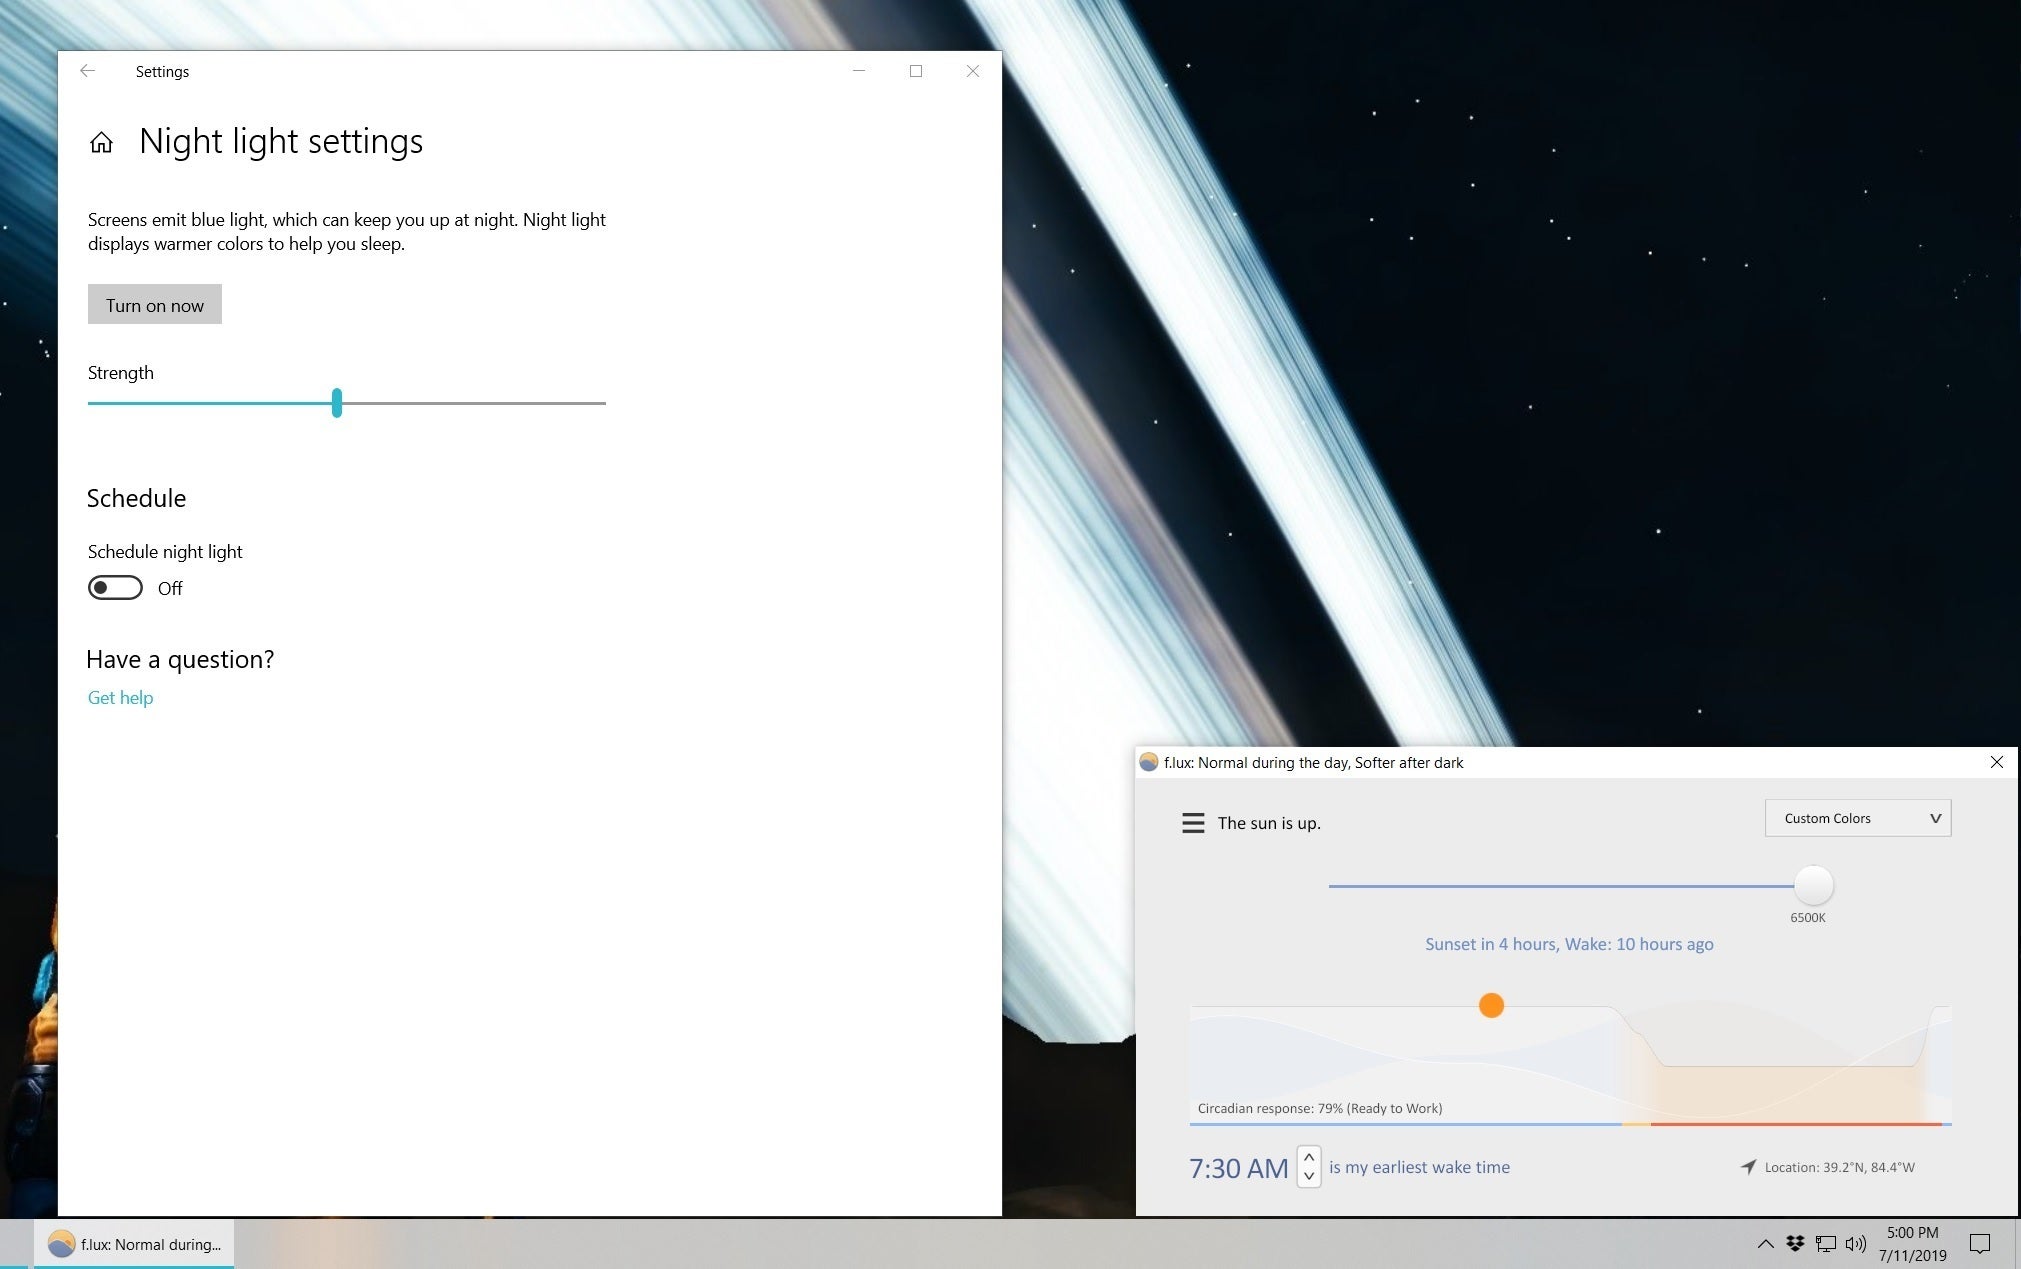
Windows 10’s night light feature and the third-party F.lux app can give your screen warmer tones after sunset.
For even more control over display temperature, check out the free app F.lux. Instead of just offering a single temperature slider for night mode, F.lux has three separate levels for daytime, sunset, and night. You can edit these settings by hitting the menu button in F.lux, then selecting “Adjust day and night colors together.”
F.lux can also automatically disable warmer colors while using certain programs—useful for late-night photo editing—or while using any program in full-screen mode. Just hit the menu button, then point to Disable.... From here you can override color changes for any app that’s currently open.
Grayscale mode for maximum concentration
When you’re trying to get work done, all those colorful app icons in your taskbar and Start menu are just beckoning you to waste time on social media or peek at email. Setting your display to grayscale mode can help you avoid temptation.
To enable Windows 10’s built-in grayscale mode, head to Settings > Ease of Access > Color filters. Enable the Turn on color filters toggle, then select Grayscale from the list below. You should also check off the Allow the shortcut key to toggle filter on and off option, so you can hit Windows-Ctrl-C to enable grayscale without revisiting this menu.
To take this a step further, try enabling Grayscale inverted instead of standard grayscale. This will make light tones dark and vice versa, so you can write on a black background in programs like Word.
 Jared Newman / IDG
Avoid colorful distractions with grayscale and grayscale inverted modes.
The aforementioned F.lux also has its its own grayscale mode, which you can toggle by pressing Windows-End. By using this in tandem with the Windows color filters above, you can have one keyboard shortcut for standard grayscale (Windows-End via F.lux) and a second shortcut for grayscale inverted mode (Windows-Ctrl-C via Windows color filters).
Dim one or more monitors with ease
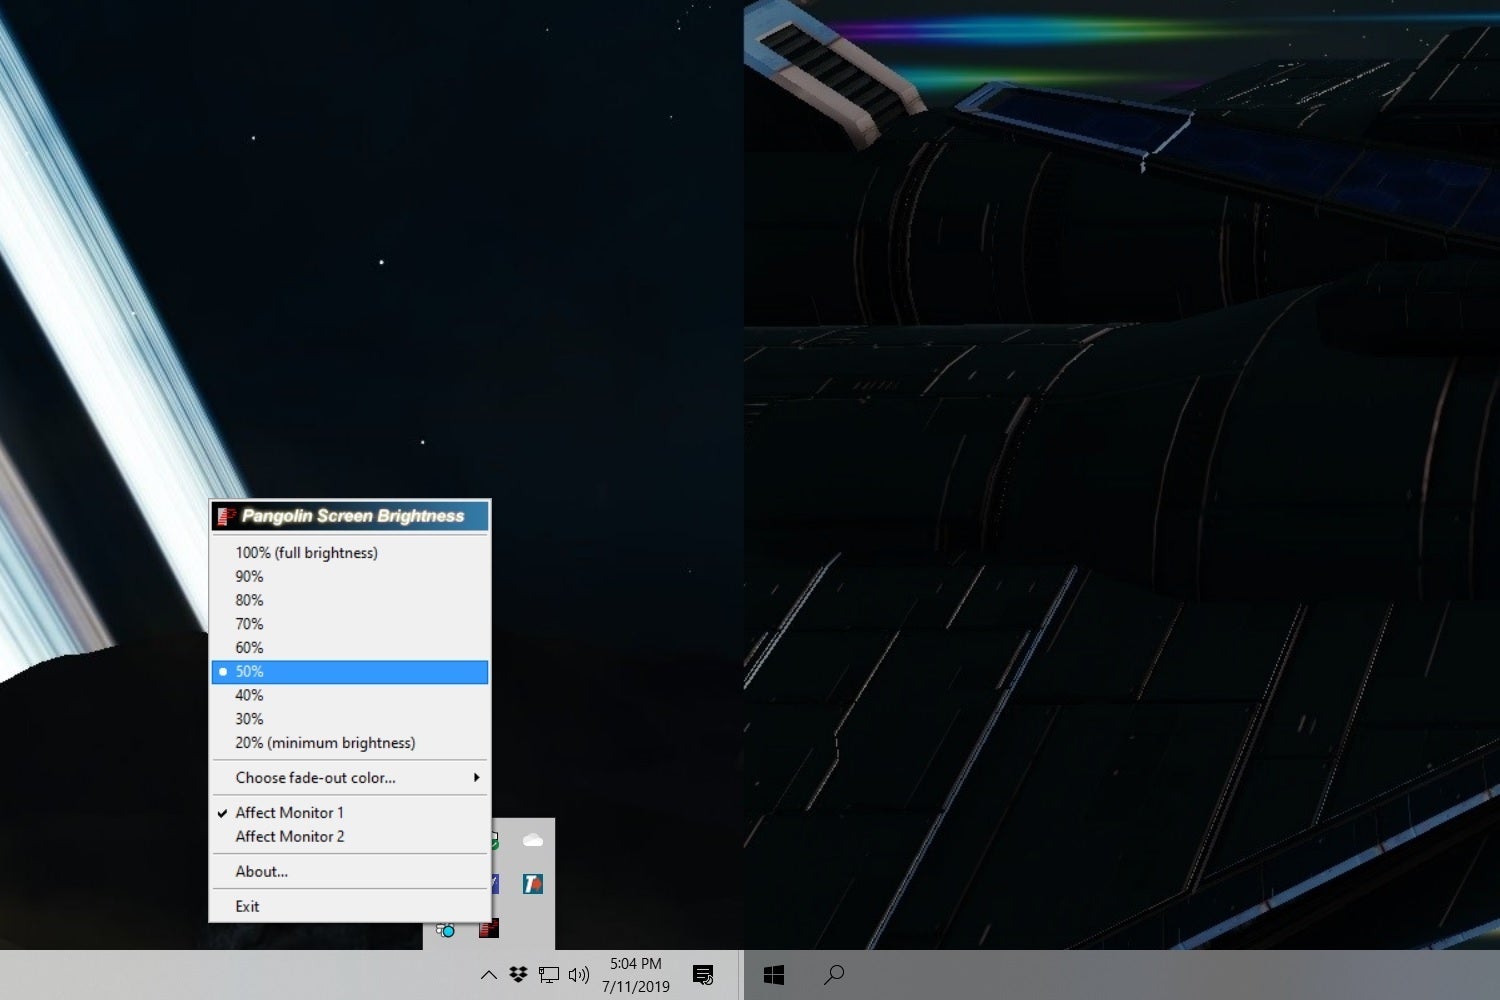
Multi-monitor setups are great for referencing several apps at the same time—until you spend too much time staring at your off-center screens and wind up straining your neck. With the free PangoBright app, you can dial down the brightness of individual monitors straight from the system tray, thereby keeping the focus on your main screen. Try setting your secondary monitors to 50-percent or 60-percent brightness and see if it makes a difference.
 Jared Newman / IDG
PangoBright can dim the brightness of secondary monitors so you don’t stare at them too much.
If you’re already using the popular multi-monitor utility DisplayFusion, you can set up something similar without installing more software. Open DisplayFusion settings, head to the Functions menu, click Scripted Function, then choose Download Scripted Function. Select Dim All Monitors Except Primary from the list, then click Download Function. Create a keyboard shortcut with the Edit button in the top-right corner, then click OK.
Auto-disable your second monitor for certain apps
This last trick might be overkill, but if you have a multi-monitor setup, you can create a batch file to shut down secondary monitors automatically when you launch specific apps. This can be useful when you want to concentrate on writing or playing games without extra screens in your peripheral vision. While you could accomplish the same goal by pressing your monitors’ off buttons or using the Windows-P shortcut to disable secondary screens, automating the routine is much more satisfying.
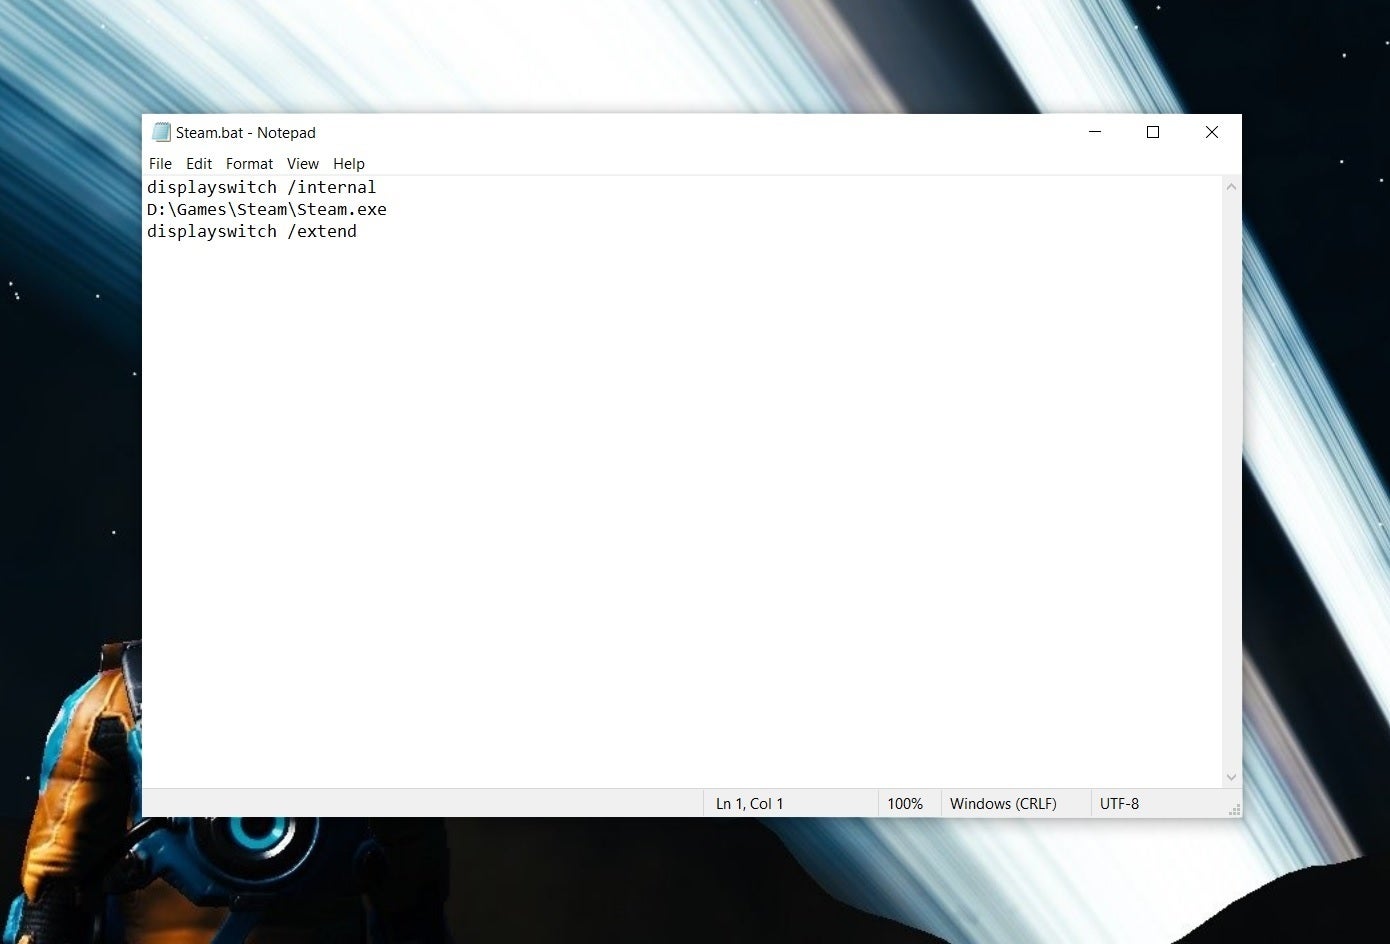
We’ll use Valve’s Steam launcher as an example. Start by creating a text file in any directory—the same directory as your Steam install is fine—with the following lines:
displayswitch /internal
C:\Program Files\Steam\Steam.exe
displayswitch /extend
 Jared Newman / IDG
Note that if you’ve installed Steam to a different directory than the default, or want to open a different application, you’ll need to replace C:\Program Files\Steam\Steam.exe with your install directory and file name.
Save the text file, then rename the file to Steam.bat using File Explorer.
Next, we’ll make a shortcut to this file that looks like the regular Steam icon. Right-click on the desktop and select New > Shortcut, then type cmd /c “C:\Program Files\Steam\Steam.bat” into the location bar. Select Next, then give the shortcut a name, such as Steam. (Kudos to WinAero for this shortcut tip.)
 Jared Newman / IDG
To change the shortcut’s icon, right-click and select Properties, then select Change Icon. Navigate to your Steam directory, then double-click Steam.exe. You may also want to select Minimized in the Run section from the same Properties menu, so you don’t see a command prompt window when this batch file runs.
You’ll end up with an icon that looks just like your regular Steam app on the desktop, except it will disable your secondary monitors upon launch, and reenable them when you exit. You can also right-click on this icon to add it to your Start menu. Try pairing this trick with Steam Big Picture mode for dramatic effect.


