 Credit: Cara Neil / Flickr
Yes, you can “magically” remove people and objects out of photos using Adobe’s expensive Photoshop application. But did you know that a simple version of the same tool is hidden within Windows 10, for free? Let’s introduce you to Paint 3D’s Magic Select tool, and teach you how to use it.
I’m a fan of simple, free tools that don’t require any installation or setup, and Magic Select is one of my favorites. You would think Magic Select would be found with Windows 10’s Photos app, or even Paint, but no—Microsoft hoped that one day we’d all be editing 3D objects, not 2D photos, and reserved Magic Select for the Paint 3D app within Windows 10. Fortunately, it’s as easy to edit a 2D photo within Paint 3D as Paint, though you’ll have to ignore the vast majority of the user interface to do so.
What Magic Select can and can’t do
What can Magic Select do for you? Two things. First, you can select and remove a photo or an object from a scene, and put them in front of an entirely new backdrop—or just give them their own photo, as we’ve done here. (We’ve used a photo in the public domain from Flickr for demonstration purposes only—we hope the couple is very happy together!) You can see the original, followed by the edited photo.
 Flickr / Cara Neil
  IDG / Cara Neil
The original photo is credited to Cara Neil, on Flickr, in the public domain. Edits to the second photo were made by IDG’s Mark Hachman, including cropping and moving the woman over to a separate part of the scene.
Secondly, if you remove a person or an object from a scene, Magic Select will algorithmically fill in the backdrop that was “behind” the person or object. In this scene, it would technically be easier to crop the man out. We’ve used Magic Select to demonstrate the limitations of the tool, however.
 Flickr / Cara Neil
  IDG / Cara Neil
The original photo is credited to Cara Neil, on Flickr, in the public domain. Edits to the second photo were made using Paint 3D by IDG’s Mark Hachman.
You’ll probably quickly notice the limitations of Magic Select: If you try to edit a complex image, full of little bits to add and remove, Magic Select and Paint 3D really struggles. Keep it simple and you’ll have much better luck.
Let’s dive in!
How to use Paint 3D’s Magic Select
The easiest ways to jump directly into editing your photos are either to open the Photos app with your stored photos; or open the folder on your PC where you archive your photos. With the latter, simply right-click the file and scroll down to Edit with Paint 3D. In Photos, this option isn’t immediately available. You’ll need to left-click once to preview the photo, then right-click it, drop down to the Edit and Create sub-menu, and on to Edit with Paint 3D.
Paint 3D was designed with 3D dioramas in mind, but opening an image with the Edit with Paint 3D shortcut will bypass the 3D setup and take you into the 2D editing tool. For the purposes of editing a photo, you’ll want to ignore the majority of the Paint 3D UI, anyway.
 Mark Hachman / IDG
When you edit a photo with Paint 3D, you’ll probably want to focus on the Crop and Magic Select tools.
It’s not entirely clear how Magic Select works. Adobe’s Magic Wand and Magnetic Lasso tools have historically looked for sharp differences in color and lighting as a way to perform edge detection and distinguish one object from another. Magic Select seems to work in a similar fashion, so that a well-lit photo, with a clear distinction between objects, will deliver the best results.
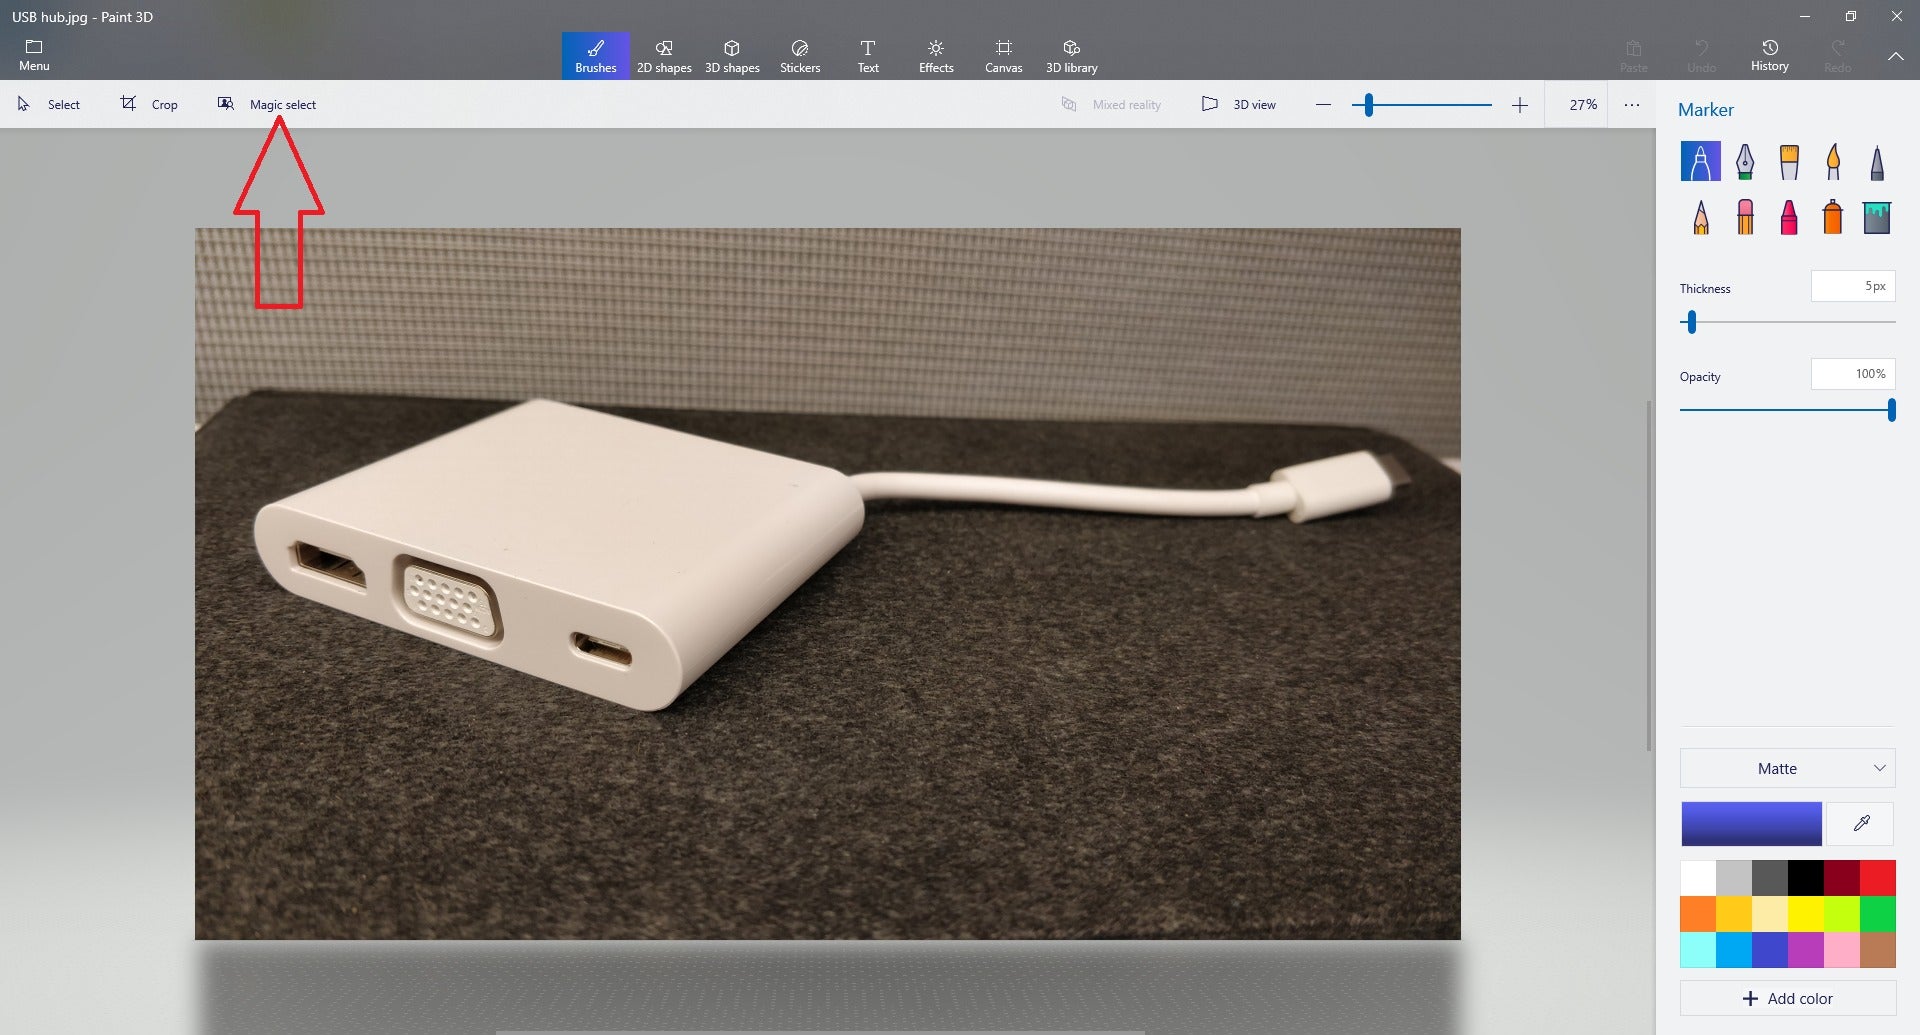
Make sure you’ve sized the photo to fill the screen; the zoom tool adjustment slider seems awfully coarse. Then click Magic select in the menu bar.
 Mark Hachman / IDG
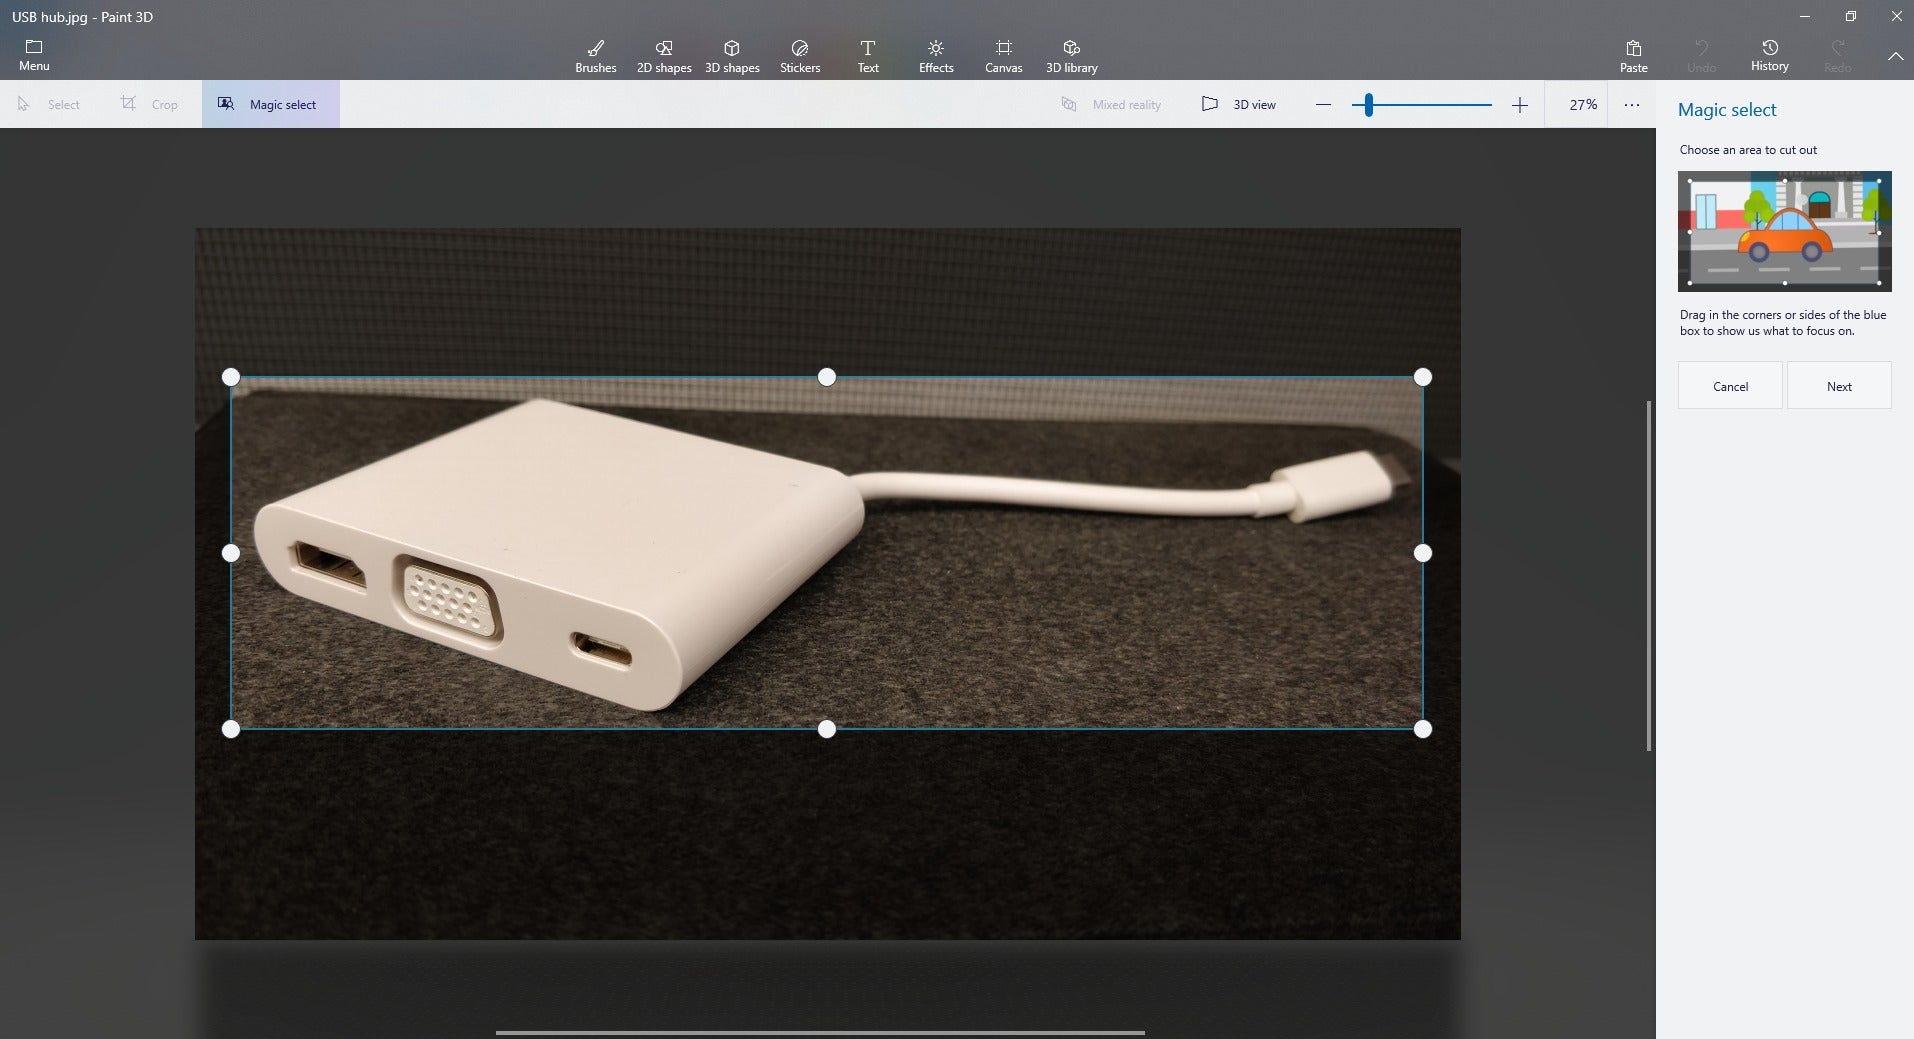
Highlight the object that you want to select using the border highlighting tool. Surround the object as best you can.
Magic Select asks you to slide a rectangular border around the object you wish to highlight. Get close to the object you want to focus upon, as this helps teach Magic Select what you want to do. Then click Next.
 Mark Hachman / IDG
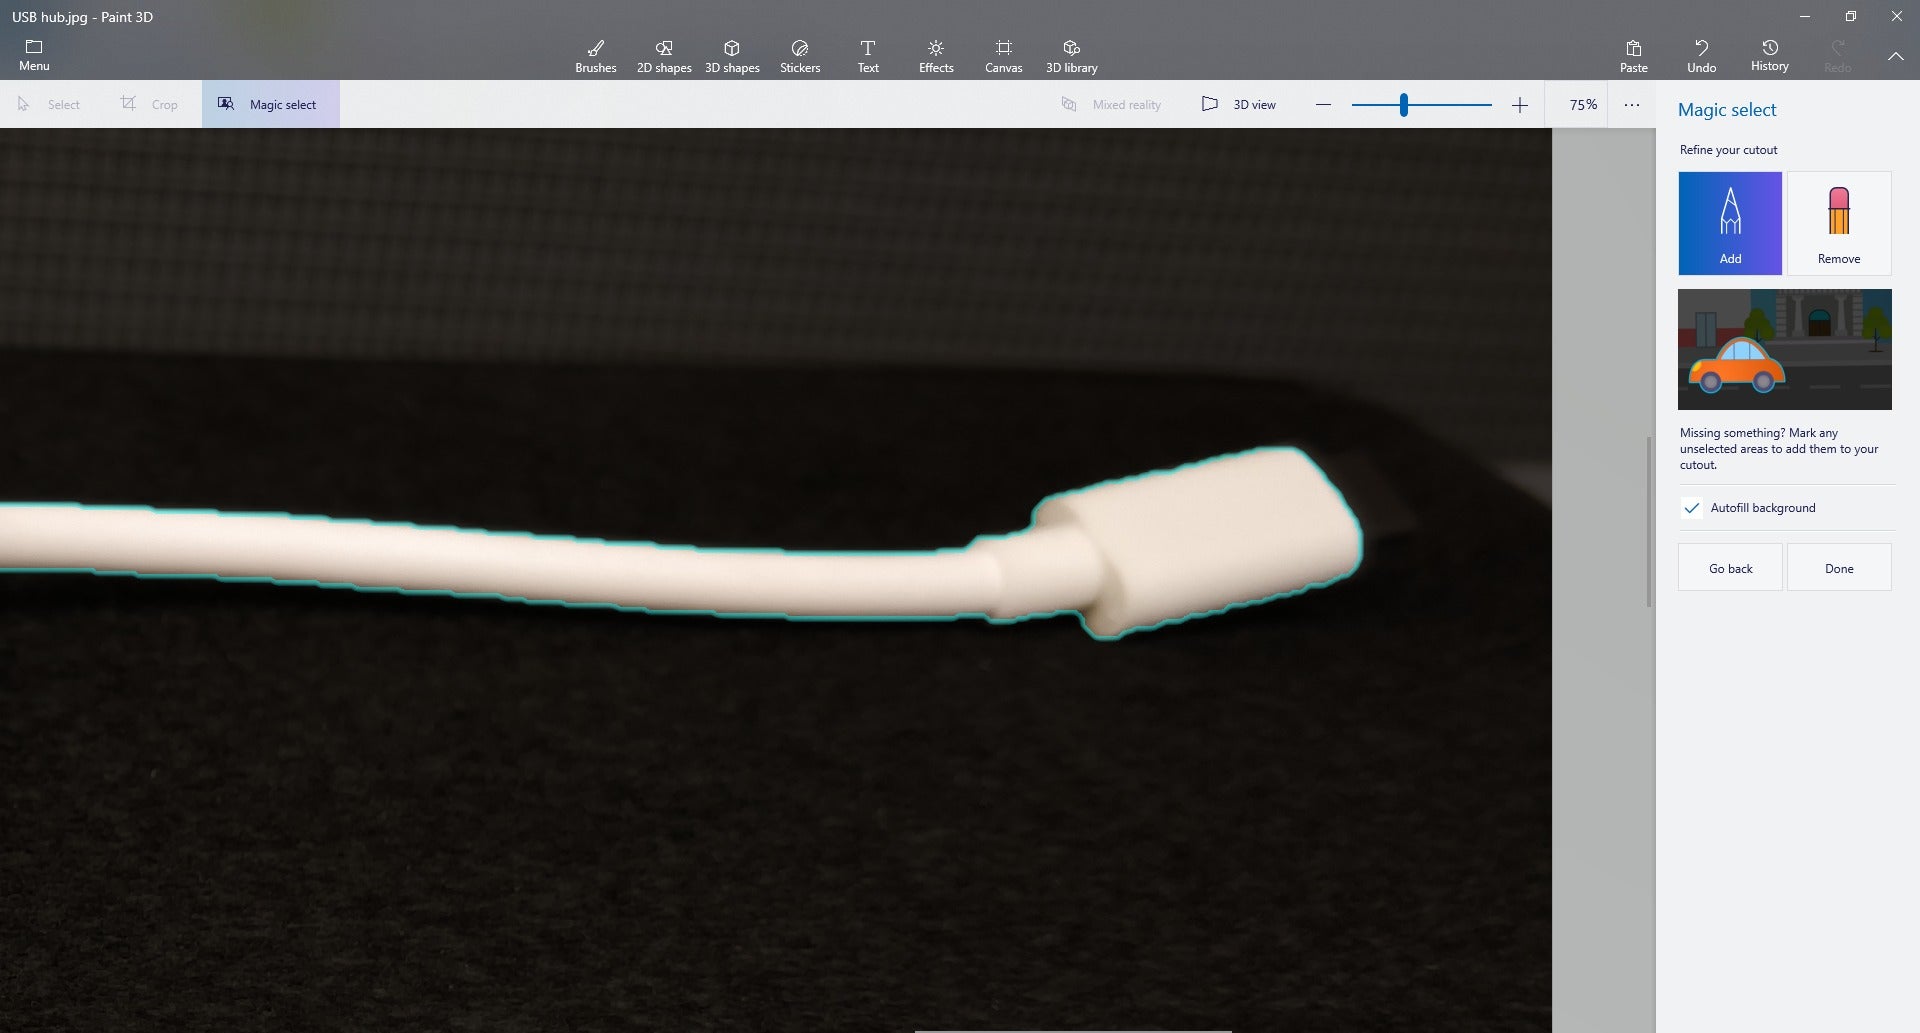
Here, the Magic Select tool algorithmically selected the white hub from the black background, outlining it in blue. But wait—there’s a bit of the plug that Magic Select didn’t detect!
If you’re lucky, Magic Select may nail it on the first try, highlighting exactly what you want to cut out of the scene in a halo of blue. Often, however, you may need to assist. You can either tell Magic Select to remove an unwanted part of the image, or add something that it didn’t know to include. As Microsoft’s animated tool suggests, try just drawing a line with your mouse across whatever region you want to exclude or include.
(A drawn circle would be an excellent way to tell Magic Select what to choose, but it doesn’t really work. That’s a real shame, because you can end up with tiny little regions of the photo—sort of like islands—that are too small to individually swipe through.)
 Mark Hachman / IDG
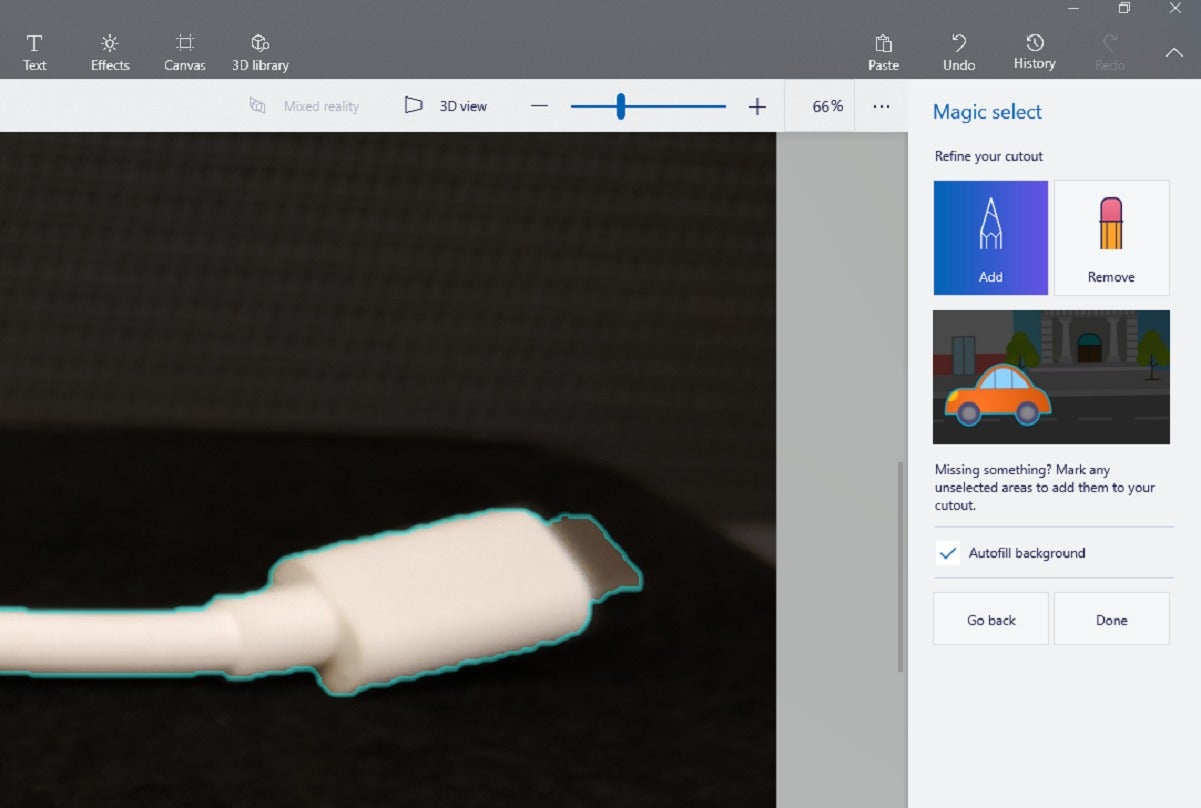
I made one diagonal swipe with the mouse across the plug (with the “Add” button” selected) and Magic Select correctly guessed what I was looking for. This doesn’t always happen perfectly, however, and you may need to add or subtract from the scene.
One tip: if you want to retrace your steps, use the Undo or History tool in the upper-right corner, not the Go Back button. It seems to work more effectively.
 Mark Hachman / IDG
Here’s an example of when Magic Select just can’t quite get it (zoom in to see the details). Could you spend 15 minutes fine-tuning everything? Sure, but for these tough cases you might want to try something like Adobe Photoshop instead.
When you’re happy with your selection, simply drag the object off the canvas into the 3D virtual space next to it.
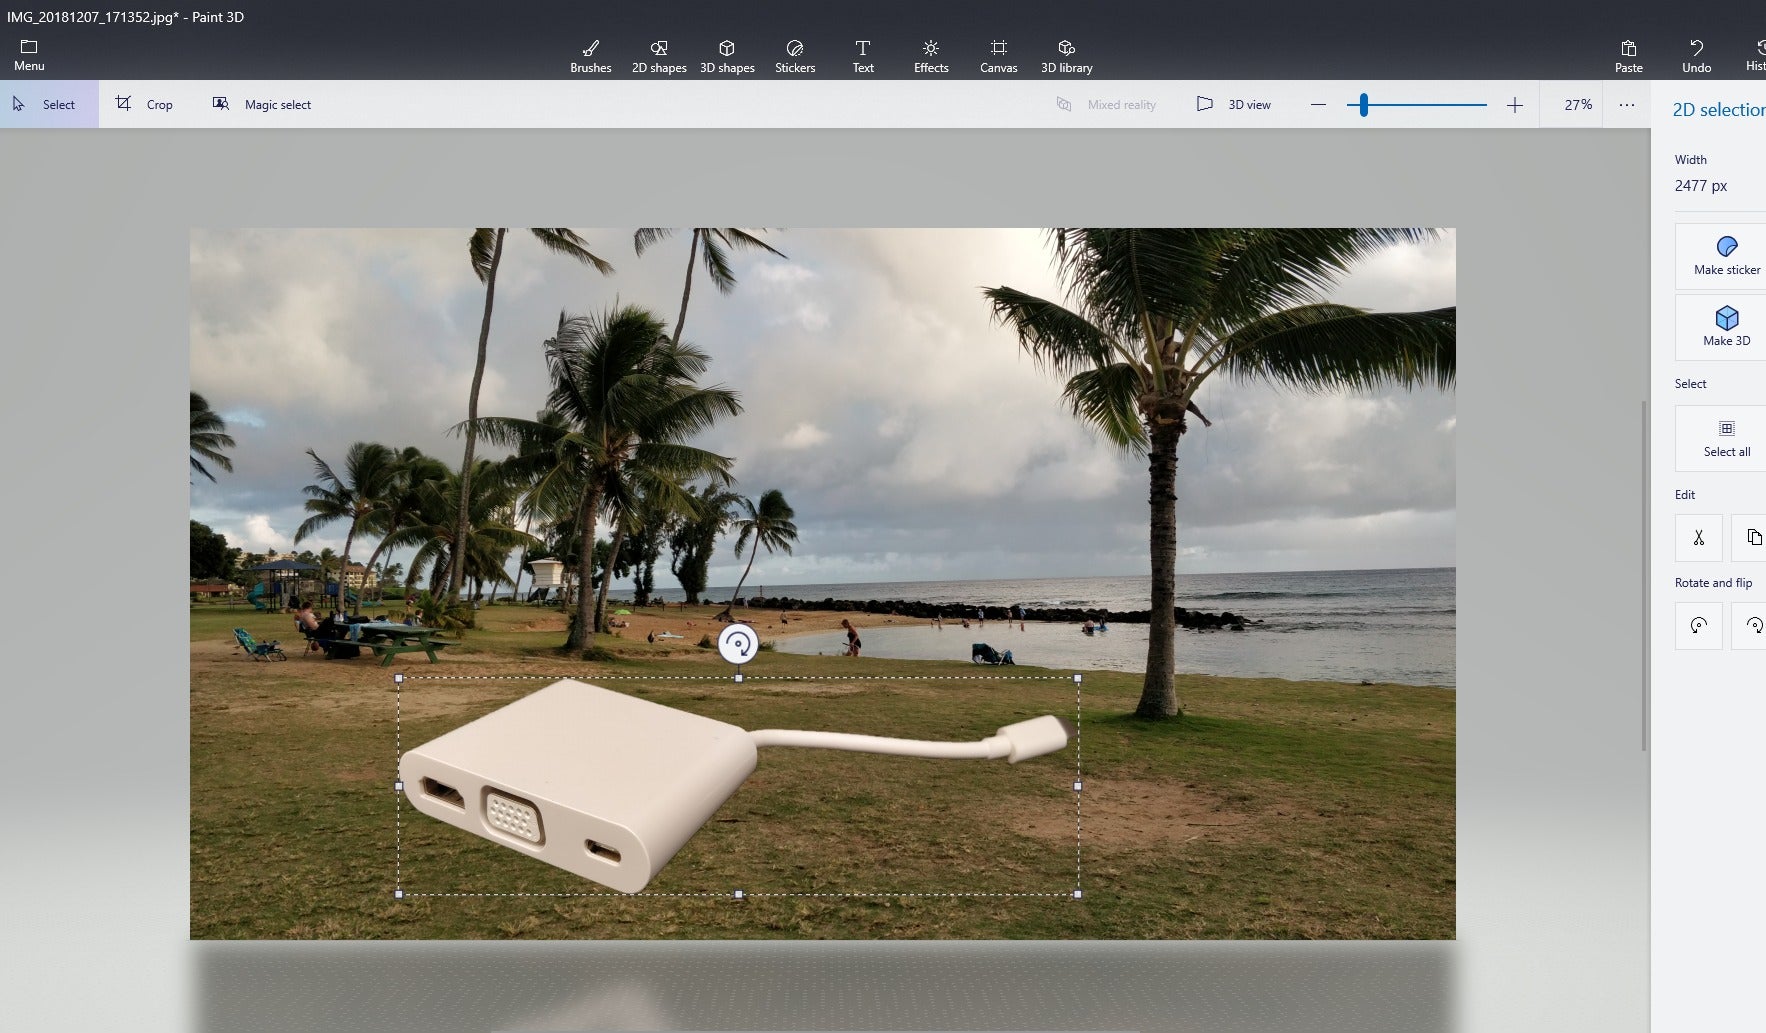
At this point, you have a few options. If you want to place your edited object into a new scene, you’ll need to cut and paste it into a new image in Paint 3D. (I’ve pasted a USB-C hub into a beach scene below, for fun.) Magic Select and Paint 3D can’t reproduce the lighting effects and color matching to convince your eye that a giant USB-C hub is sitting on the beach. The edge detection is excellent, however, and the finished image will probably look quite good. You can resize and reshape your virtual object as you’d like, and you can use Paint3D’s other tools (stickers! text!) to play with it further.
 Mark Hachman / IDG
Magic Select and Paint 3D can handle a wel-defined, well-lit simply object very well.
Not surprisingly, Paint 3D and Magic Select don’t do nearly as good of a job on the background that it “paints in” to fill background where an object was edited out. For one thing, there’s a tendency to leave a “ghosting” or “halo” effect behind, along with any shadows that the object or person cast. In some cases, using Magic Select again on the remainder will trim those out. Sometimes, though, what remains isn’t fixable without more sophisticated tools.
 Mark Hachman / IDG
Removing an object from a scene can create a ghosting effect, with halos, shadows, or other artifacts. Sometimes an additional round of Magic Select editing can remove these, too. Sometimes, though, it really can’t.
Nothing that Paint 3D and Magic Select produces is going to survive close scrutiny, either. If you zoom in on our edited photo of the couple looking at one another, you can see the repetitive pattern in the background forest imagery where the man’s image once was. Because the scene utilizes bokeh as a cue to focus on the foreground, however, your eye might not immediately notice.
It’s a shame that Magic Select isn’t in Photos, and that you’ll essentially need to open two separate apps to take advantage of Windows 10’s full photo-editing capabilities. Remember, the Windows 10 Photos app already has an small arsenal of tools that can spruce up your photos: color filters, red-eye correction, portrait mode, and dust-eliminating spot fixes, among others. Magic Select goes an additional step, eliminating or adding portions of a scene. It’s probably not necessary for the majority of your photos. But for eliminating that annoying cousin who photo-bombed your birthday photos? Sure, why not?


