 Credit: Karol D / Pexels
Webcams are hard to come by at the moment. These sudden necessities have sold out across major retailers, with remaining stock going for inflated prices through third-party and eBay sellers.
All is not lost, however—you might still be able to cobble together an equivalent setup with a digital SLR (dSLR) camera, camcorder, GoPro, or premium point-and-shoot you already own. Provided that the device passes muster, you just need to buy a capture device and possibly a few accessories.
The cost? About the same amount of cash as those opportunistic webcam listings (currently between $130 and $180 for models with MSRPs of $100 and below). And you’ll very likely end up with better picture quality, too.
Here’s how to do it.
Before you buy anything
Not only does your digital camera or camcorder need to be recognized by a capture device, its settings must allow you to shut off any auto-shutdown features and visual distractions like focus boxes and on-screen display information. Manual focus control is also helpful.
To figure out if your camera qualifies, you can start by looking at Elgato’s list of devices compatible with its Cam Link 4K dongle, but it’s not exhaustive. (If your model appears there, you should find it pretty straightforward to use it as a webcam.)
Instead, spend 15-20 minutes searching online and check whether others have been successful using your exact digital camera, camcorder, or GoPro for streaming (i.e., livestreaming to Twitch or YouTube). Keep an eye out in particular for any weird quirks that people mention in Reddit threads or forum posts. Some older cameras will work with the hardware setup described below, but the results aren’t as spot-on as you might hope.
Example: We initially tried a Canon 60D, but scrapped it as an option after we discovered we couldn't turn off the focus box that plasters a face while filming.
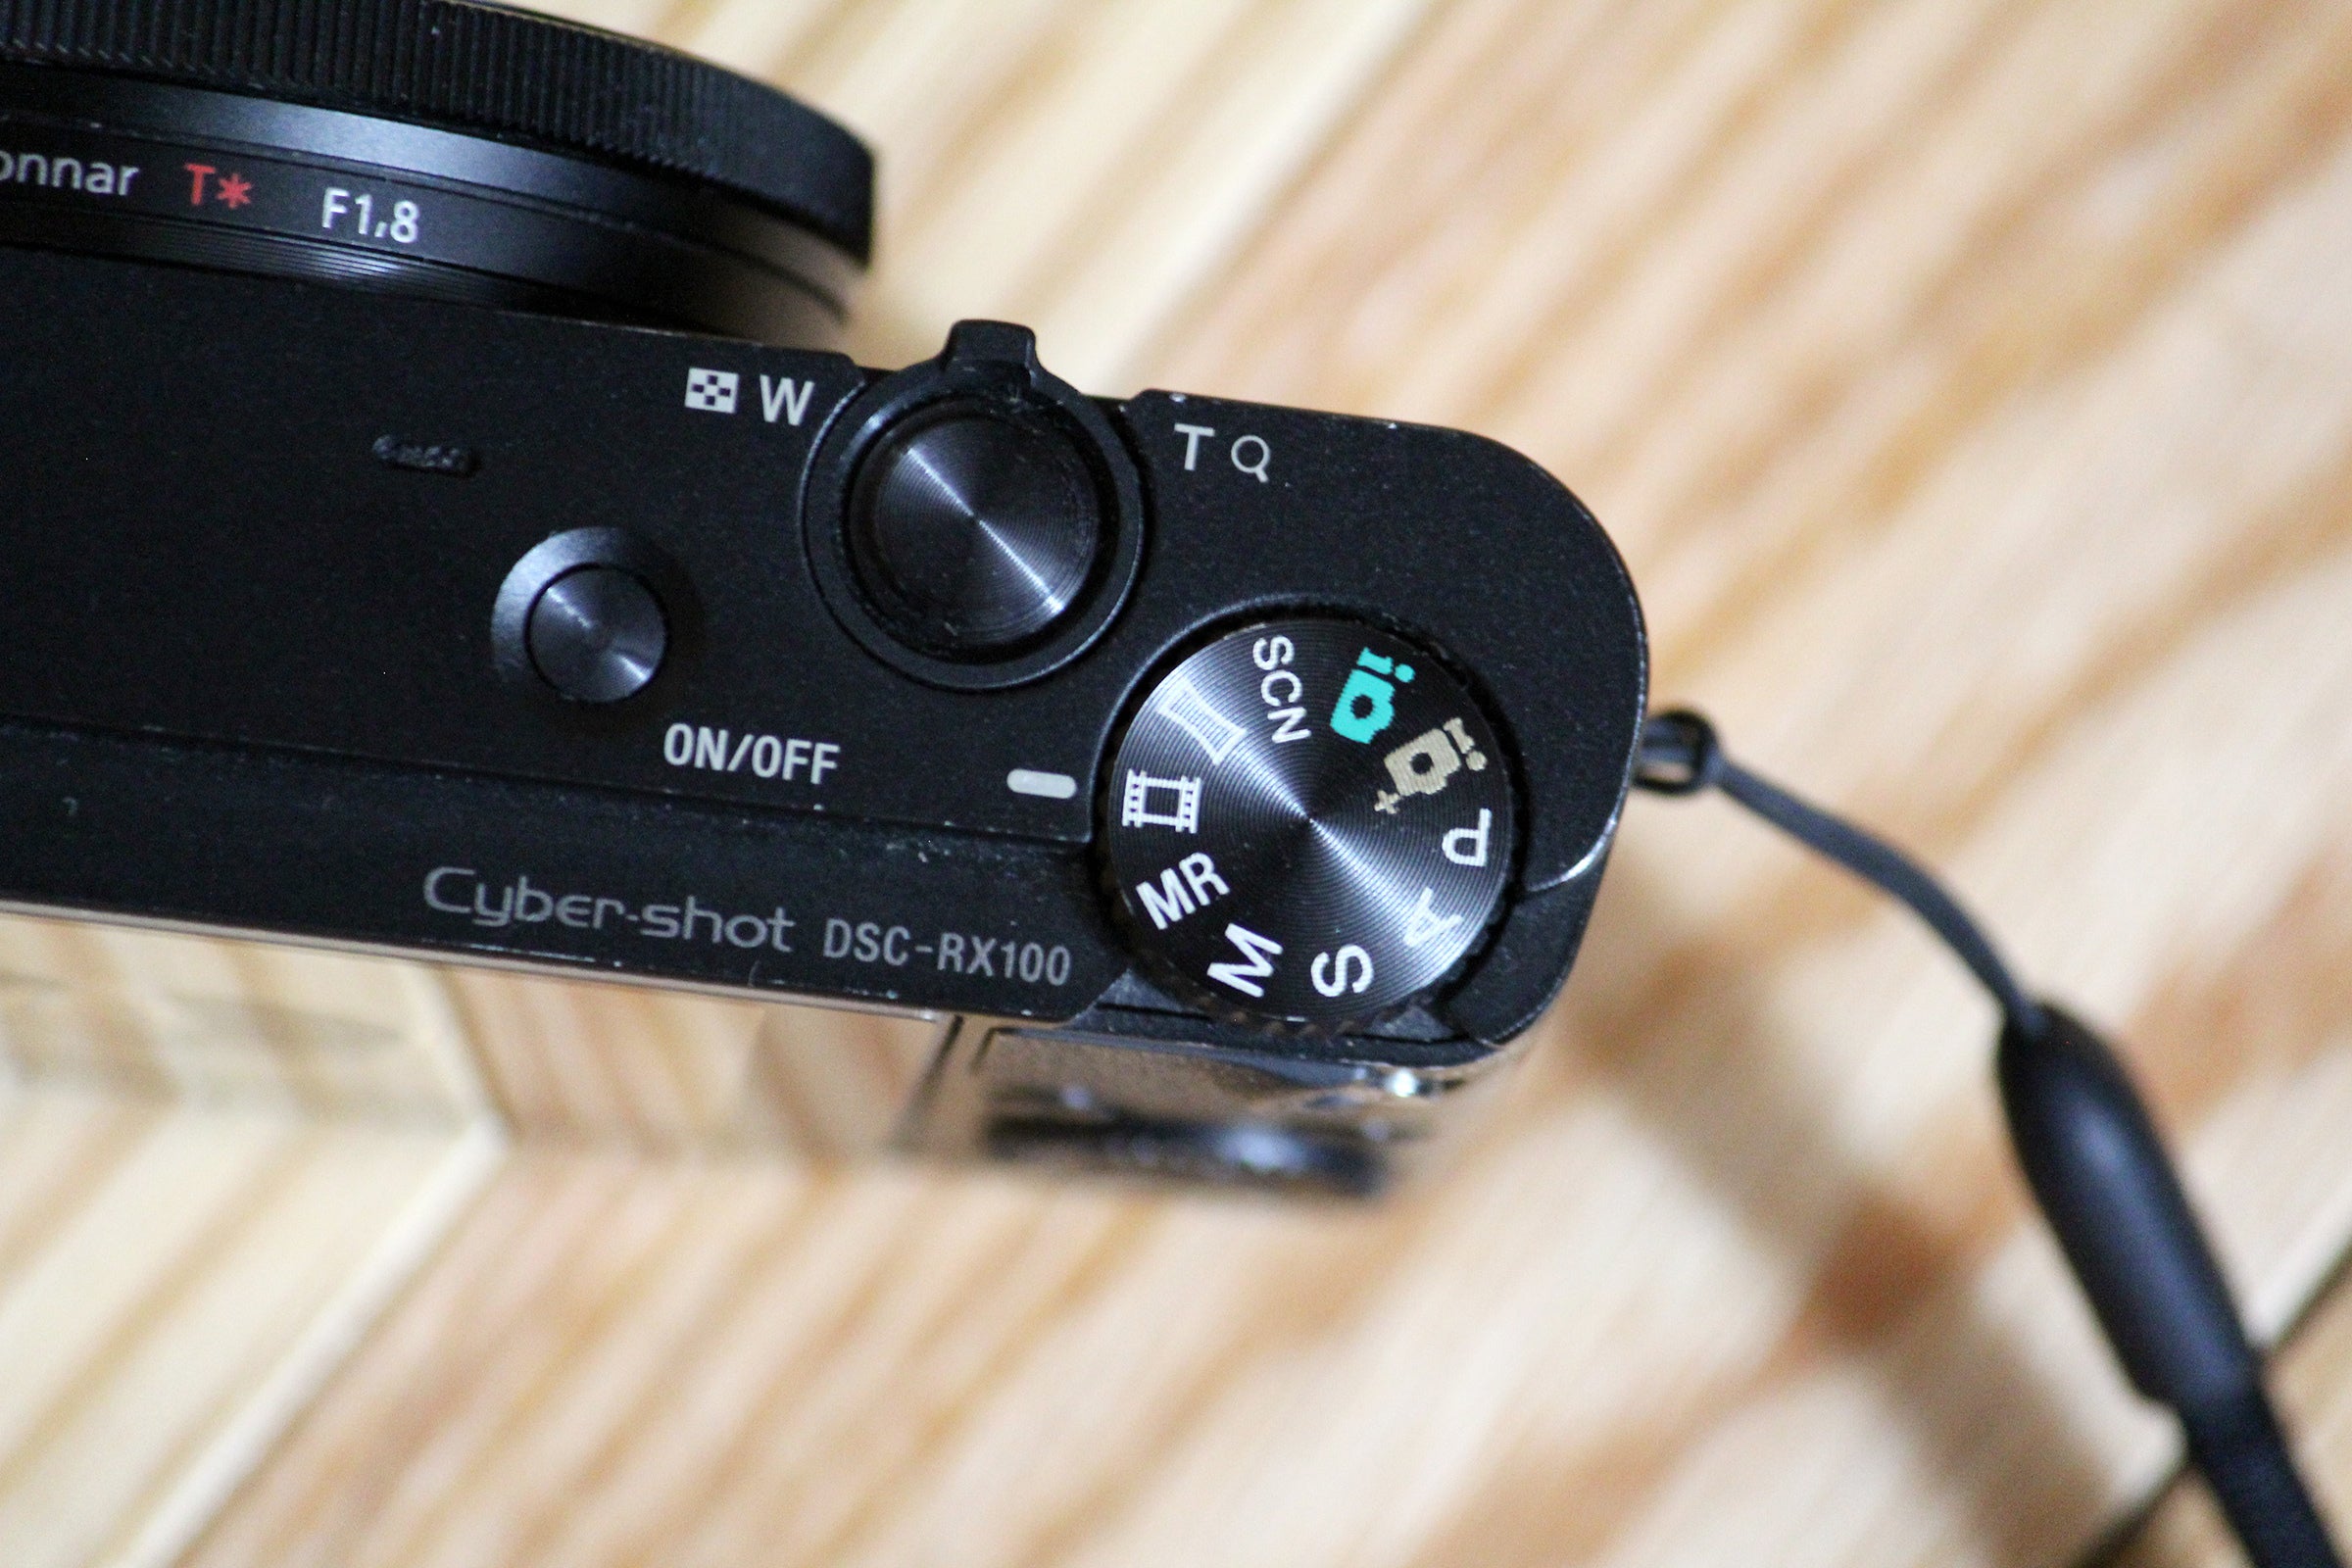
We also tried a Sony RX100 Mark I, which provided clean video...yet showed all of the current settings underneath the image. Acceptable, but not ideal.
 Alaina Yee / IDG
Not the result we had hoped for.
Equipment you’ll need
Camera, camcorder, or action cam
First and foremost, you need a device capable of video with an HDMI-out port.
Your best bet is a newer digital SLR camera, camcorder, or action cam. Even entry-level dSLRs have video modes, HDMI out, and improved control interfaces. Older variants and even high-end point-and-shoots like the Sony RX100 may work, but they’re more prone to odd quirks when used as webcams.
(For more details on how to vet a camera you own, see the Before you buy anything section above.)
Lens
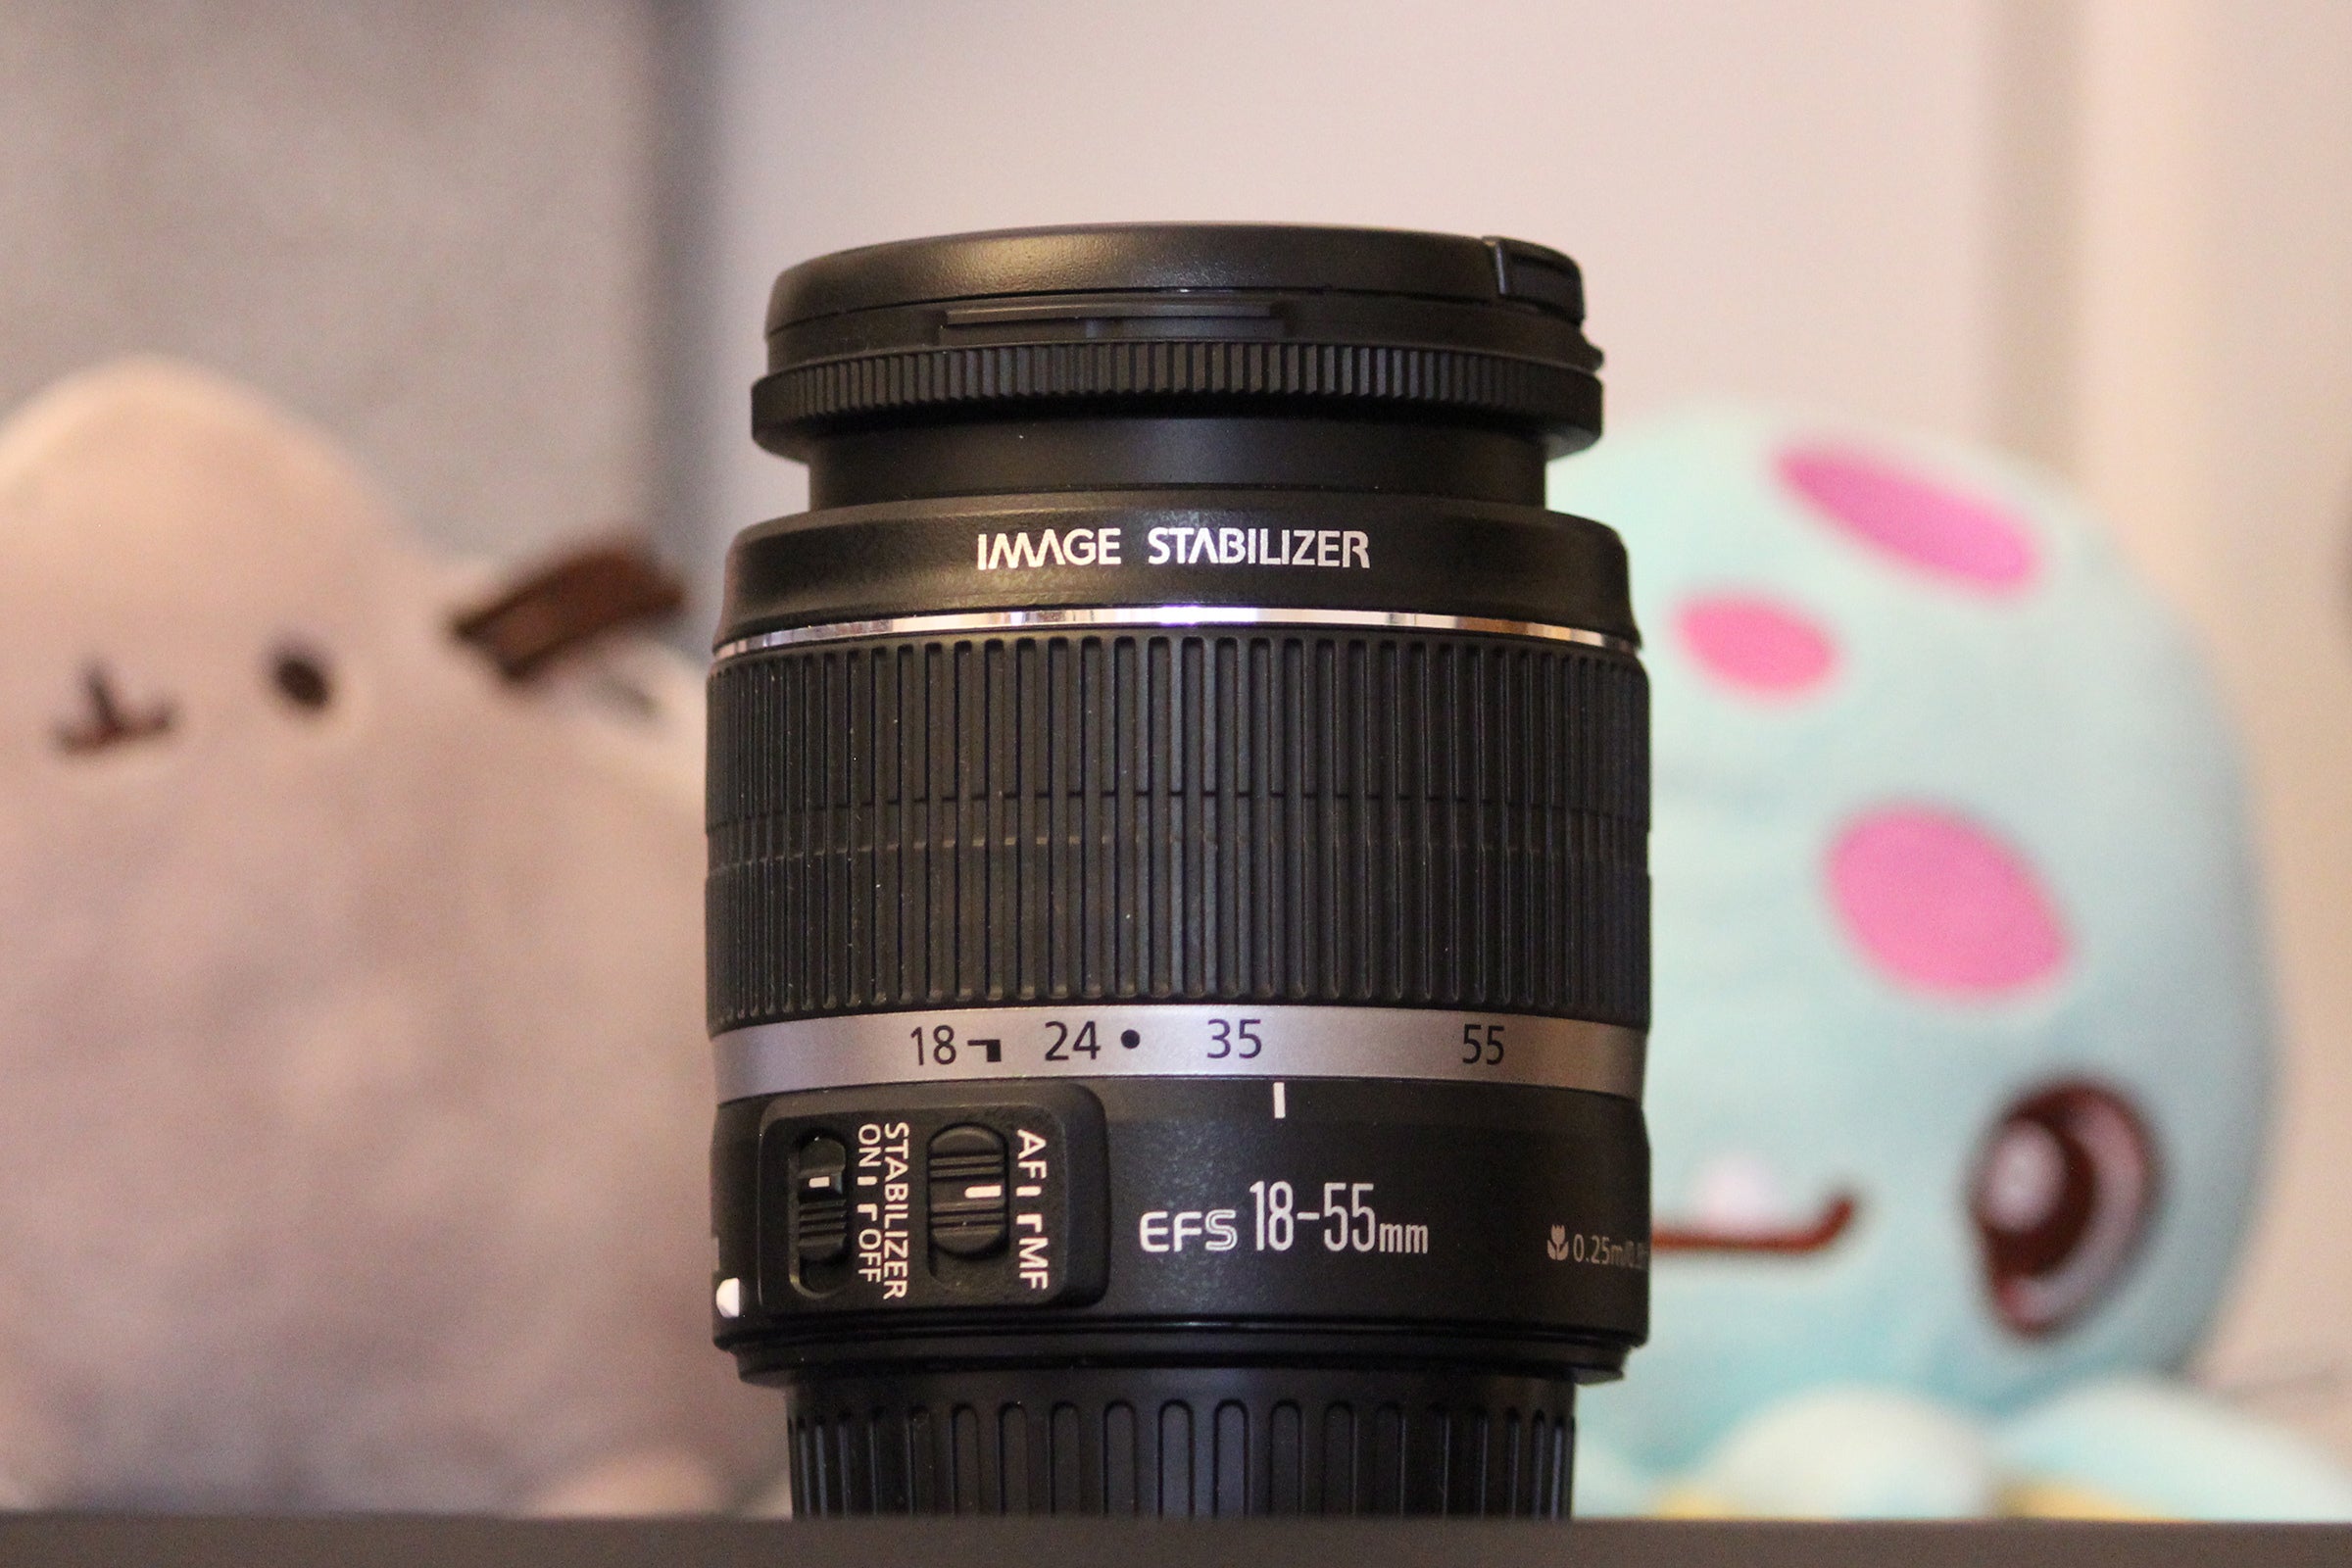
For digital SLRs, we recommend using a zoom lens in the 18mm to 24mm range. Bonus points if it supports manual focus.
 Alaina Yee / IDG
This kit lens works perfectly for our purpose here.
If you bought your camera as a bundle—that is, it came with one or two lenses in addition to the body—you should already have a lens that fits these specs.
(If you’re using a camcorder, action cam, or point-and-shoot, you are set to go and don’t need an additional lens.)
Capture device
Found in external USB and internal PCIe-card varieties, this hardware allows your computer to read the signal from your camera.
Elgato currently produces the most popular models, which include dongles like the $130 Cam Link 4K (unfortunately sold out into oblivion at the moment) and the $180 HD60 S (currently still in stock).
 Alaina Yee / IDG
The elusive Elgato Cam Link 4K.
Alternatives include those from AverMedia, like the $140 AverMedia Live Gamer Portable 2 Plus. We don’t recommend expensive brands like Blackmagic and Teredek, as they’re overkill for this purpose.
HDMI cable
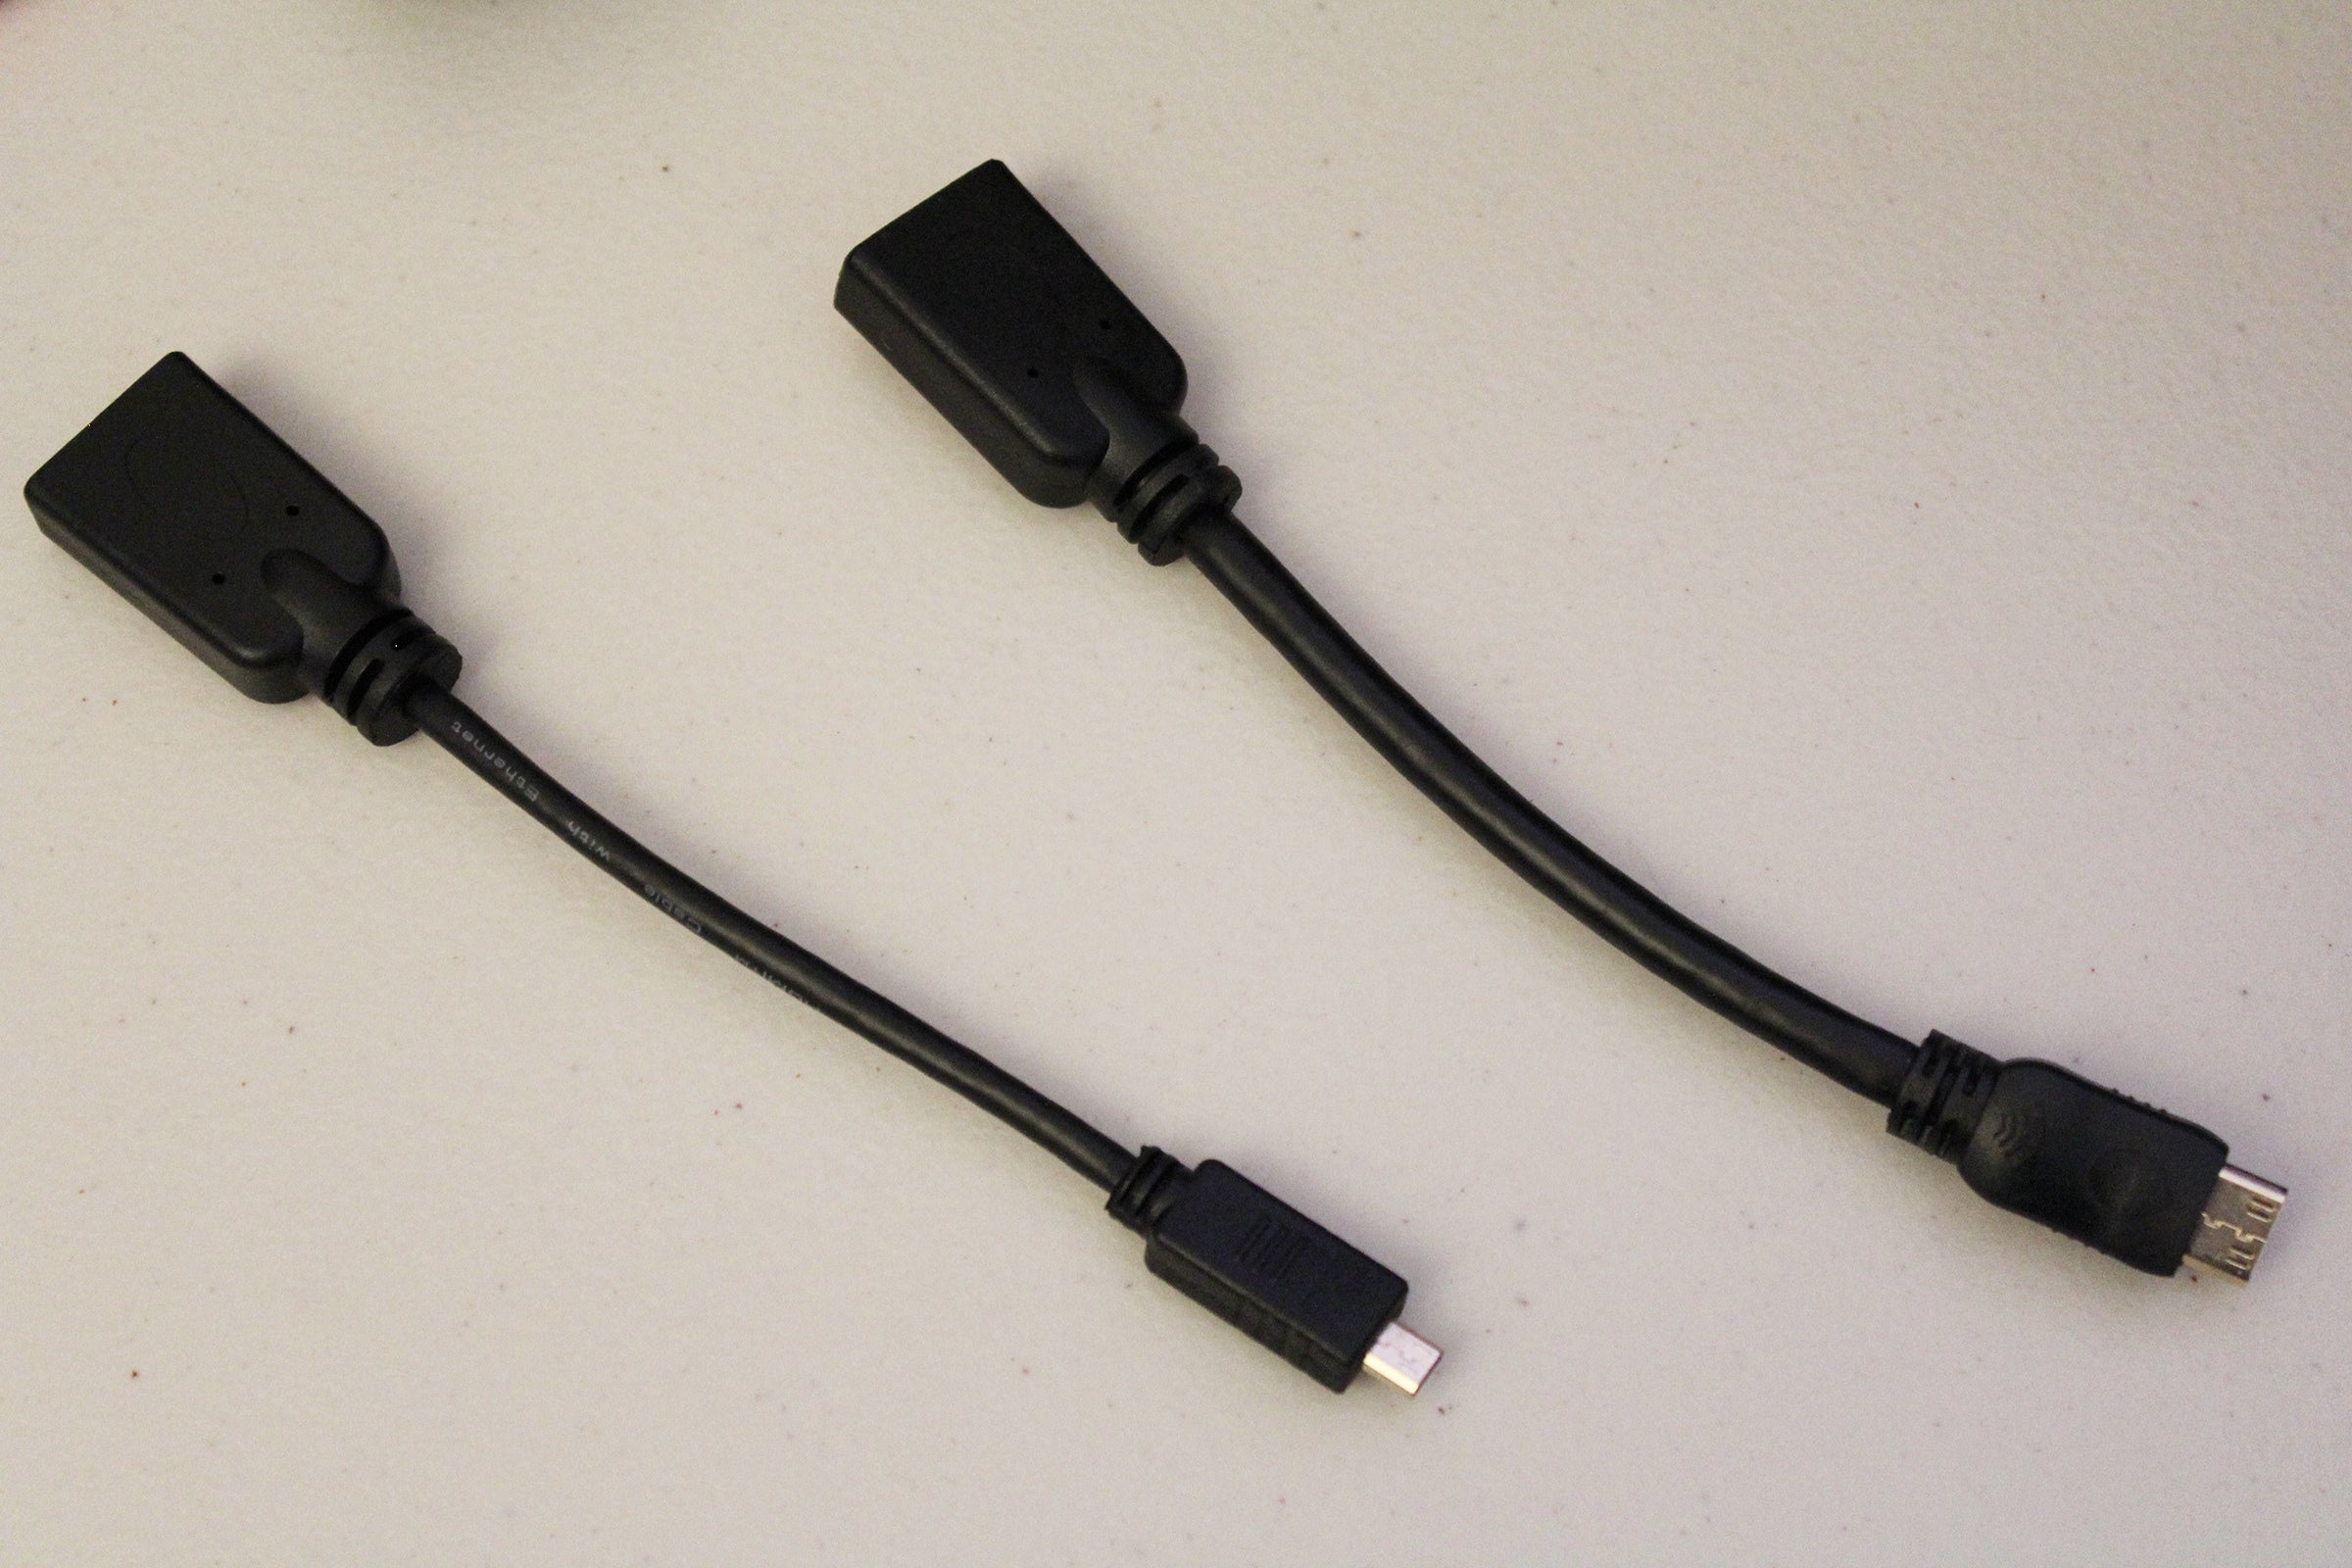
A mini- or micro-HDMI adapter is the easiest route, because most people already own spare standard HDMI cables.
 Alaina Yee / IDG
Mini- (R) and micro-HDMI (L) adapters.
Alternatively, you can buy a specialized HDMI cable that accommodates mini- or micro-HDMI on one end and full HDMI on the other end.
Anecdotally, we ran into fewer problems using adapters with a standard HDMI cable. Using an adapter also makes for easier troubleshooting if your setup doesn’t work right away. (See the Tips and troubleshooting advice section at the end of this article for more info.)
Microphone
While your digital camera or camcorder does have built-in audio pickup, the quality is generally poor. You can experiment with the onboard audio and see if people in your chats can hear you clearly enough, but we recommend having a separate microphone.
You don’t need anything expensive. Most earbuds that come with smartphones have an inline mic, for example. Or you might already have a gaming headset lying around. Plugging one of these into your computer will make you sound much clearer.
Tripod or stand
Before you choose between a stack of books or buying a proper tripod, identify where your HDMI-out port is located. Check to see where an AC adapter’s cord would route from, too.
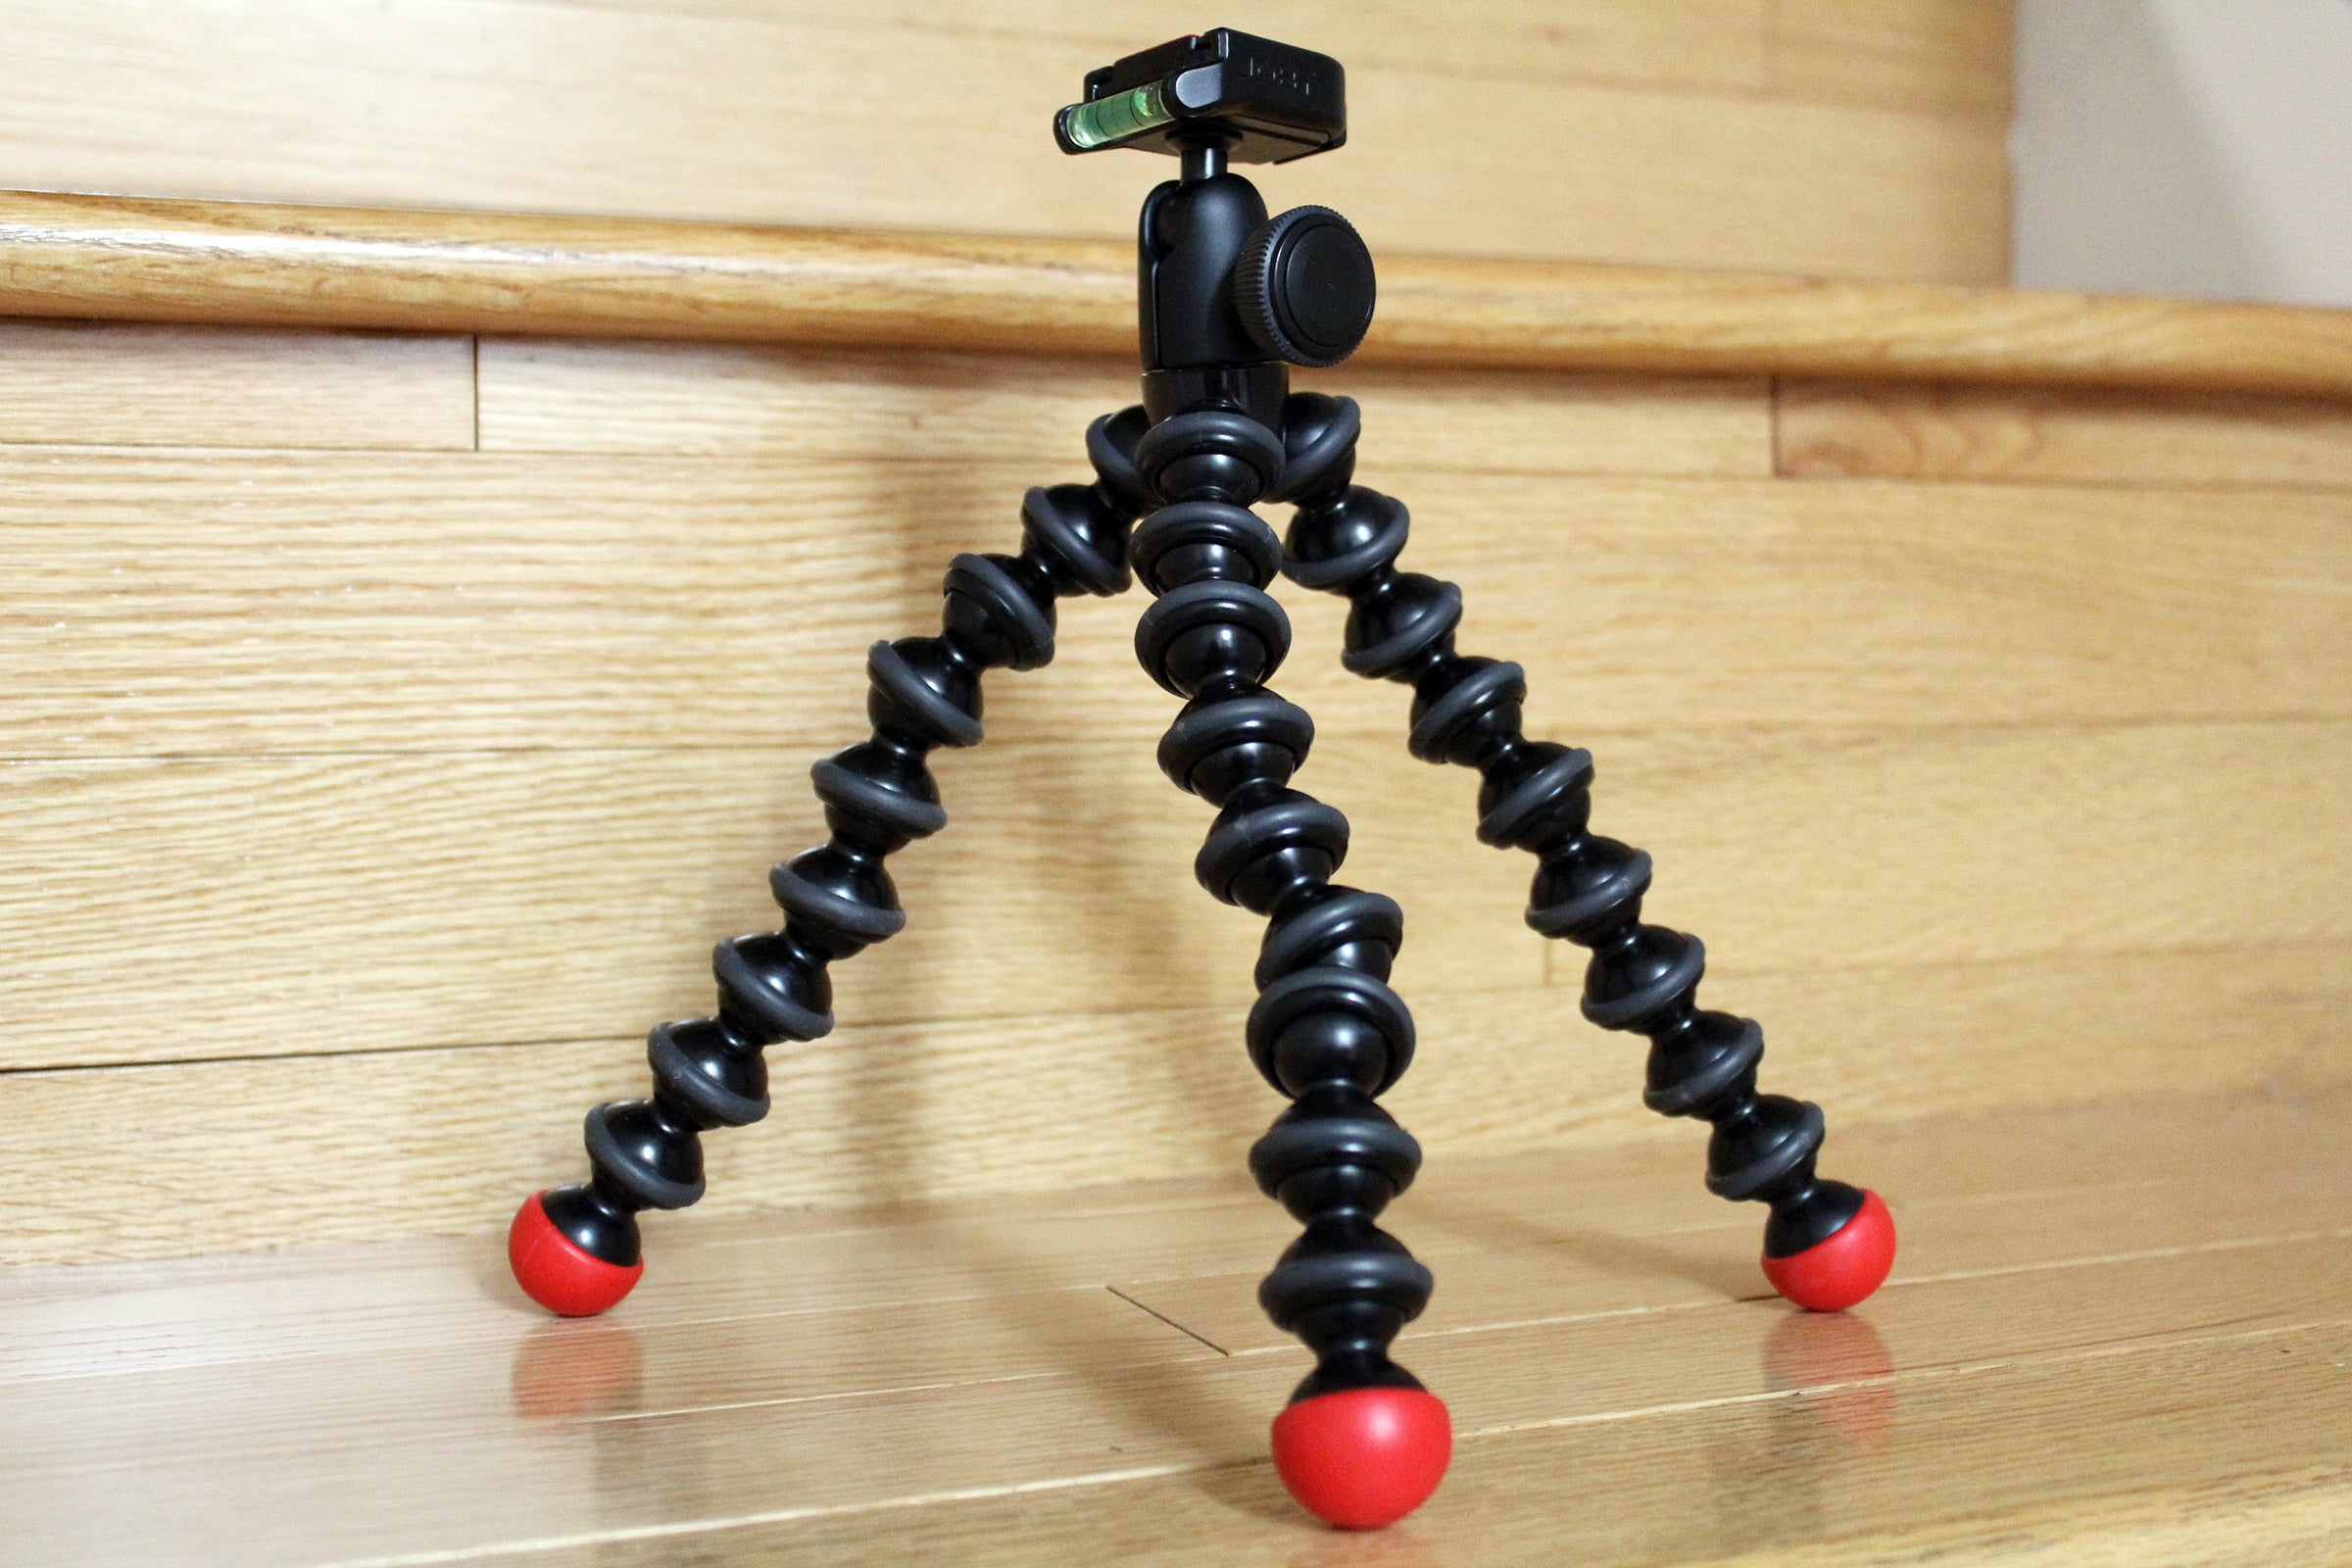
A pile of books or boxes works best when the camera or camcorder can sit flat upon it. You can upgrade the setup by opting for a mini-tripod with a ball-head mount (like this simple one or this one with flexible legs), which gives you some room for cables coming off a camera’s underside.
Note that with a few older cameras, you will find yourself in an impossible situation and only a very creative use of boxes will solve serious design flaws. Like when Sony places the HDMI-out port literally next to the mount on the bottom of the RX100 Mark I.
 Alaina Yee / IDG
The bigger and heavier your camera, the sturdier you'll want your tripod to be. This particular model is better suited for mirrorless dSLRs, action cams, point-and-shoots.
Optional equipment
Extra light
Facing a window for free natural lighting is the ideal. If that’s not possible, you can still make sure your face gets the proper illumination needed to show up clearly on camera.
You don’t need to spend much (or possibly anything at all). While streaming-specific lighting solutions exist (like ring lights and Elgato’s Key Light), a regular desk lamp can help balance out the light sources in your room.
If you do use a standard lamp, install a bright white bulb in it for a more flattering look.
AC adapter
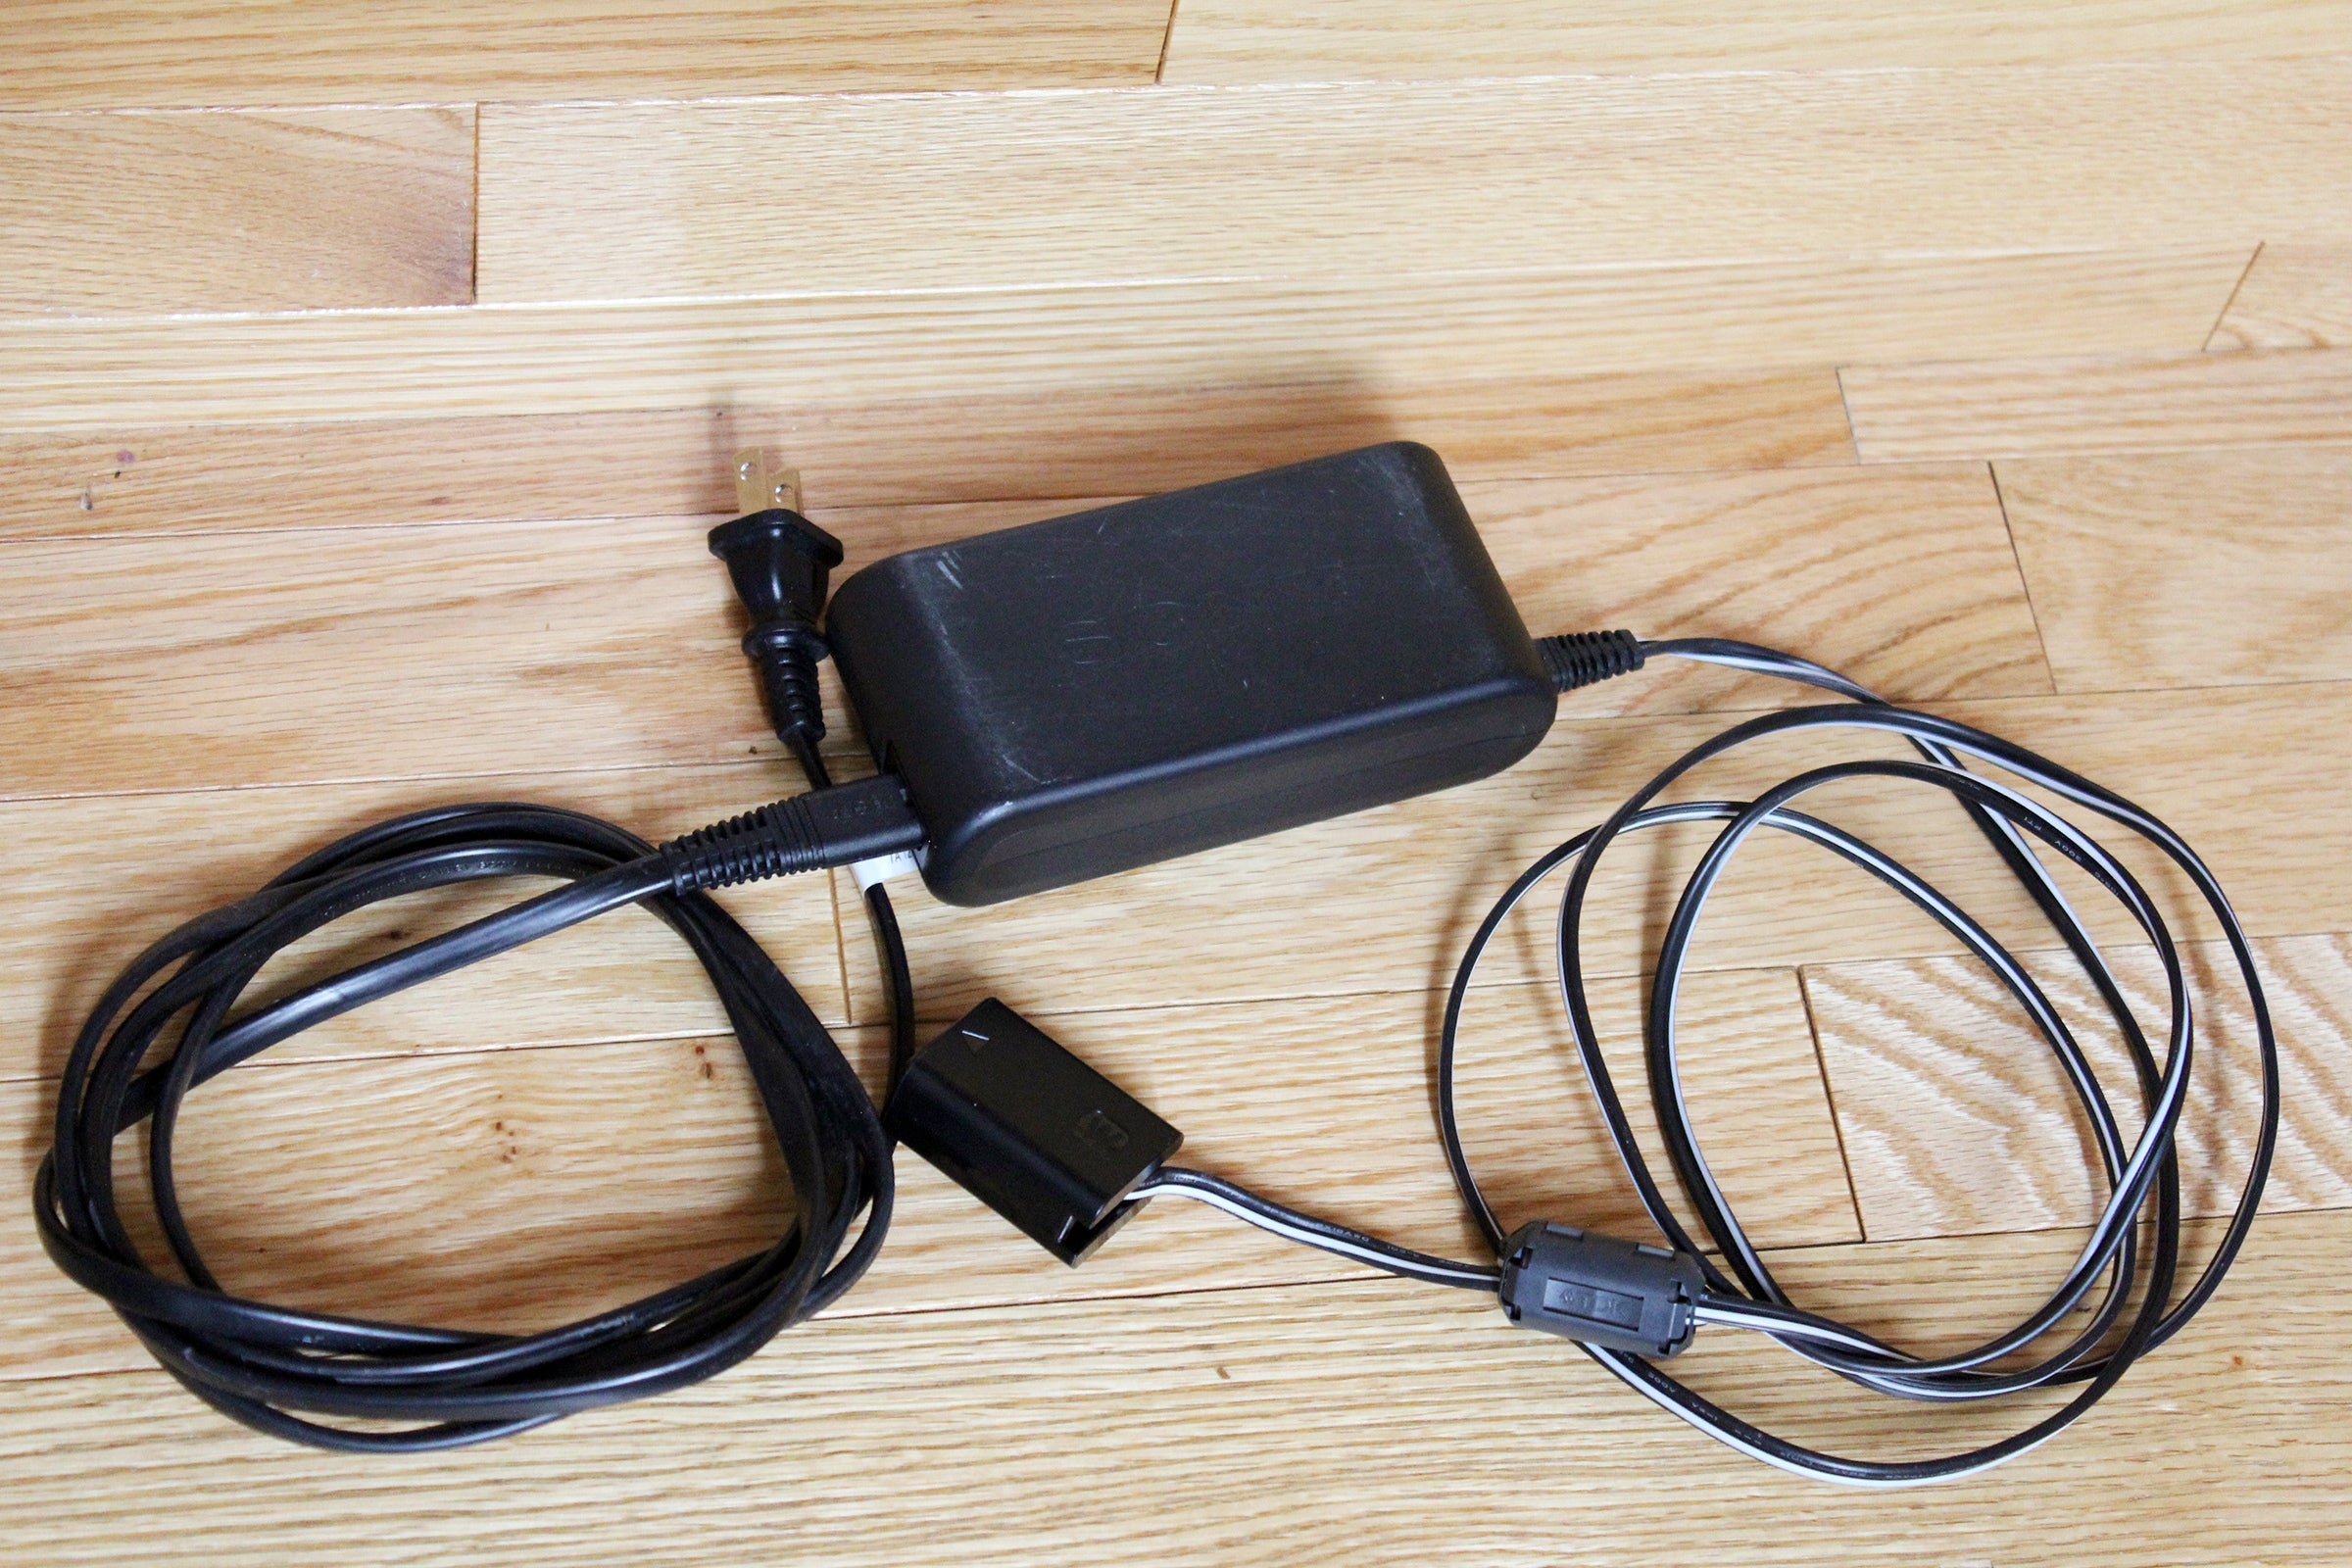
For very long calls or back-to-back sessions of video conferencing, buying an AC adapter for your digital SLR eliminates the worry of having enough juice. (Camcorders, action cams, and point-and-shoots should already come with a wall charger that works for continuous use.)
Note that some dSLR cameras don’t sit flat when using an AC adapter, as the wire comes out the bottom—eliminating the possibility of simply plopping the device onto a pile of books or boxes.
 Alaina Yee / IDG
AC adapters for dSLRs are sold separately.
Extra battery
Running off AC power may not be an option for your digital camera or camcorder, so having an extra battery can also help get you through long days full of conference calls (and allow you to charge one while the other one is in use).
How to set up your digital camera or camcorder as a webcam
We’ve structured this part of the guide to allow you to do the main setup first—in the event you find that the camera or camcorder doesn’t work as well as you expected, you won’t have wasted time on building and then tearing down an elaborate stack of boxes to create a stand for it.
Step 1: Install your capture device
For a USB-based device, you’ll simply plug it into a USB port on your computer. We recommend choosing the fastest one available. So if you have the choice between a USB 3.0 and a USB 2.0 port, definitely opt for the USB 3.0.
For an internal capture card, open up your computer and choose an appropriate PCIe slot for your card. (If you can’t already tell at a glance, consult your motherboard’s manual to determine the specs for each slot—x1, x4, x16, etc.) If your card doesn’t exactly match any of the slot lengths, you can install it in a longer one with no issue.
Step 2: Prep your camera
For your camera or camcorder, ensure that your battery has sufficient charge or plug it into the AC adapter. For a digital SLR, also make sure you have the correct lens attached.
Turn the device on. For digital SLR and point-and-shoot cameras, toggle it to Movie or Video mode.
 Alaina Yee / IDG
You must put your digital camera into movie or video mode for it to work as a webcam.
Step 3: Connect the camera to your capture device
Option 1: Plug the HDMI adapter into the micro or mini HDMI port on the camera or camcorder, and then connect a standard HDMI cable to the adapter. Plug the other end of the HDMI cable into the capture device.
Option 2: Plug your speciality HDMI cable into the camera and the capture device.
Step 4: Install and open your capture device’s software
Download instructions should be included with the device, but if not, search for the company’s product page and find a download link there.
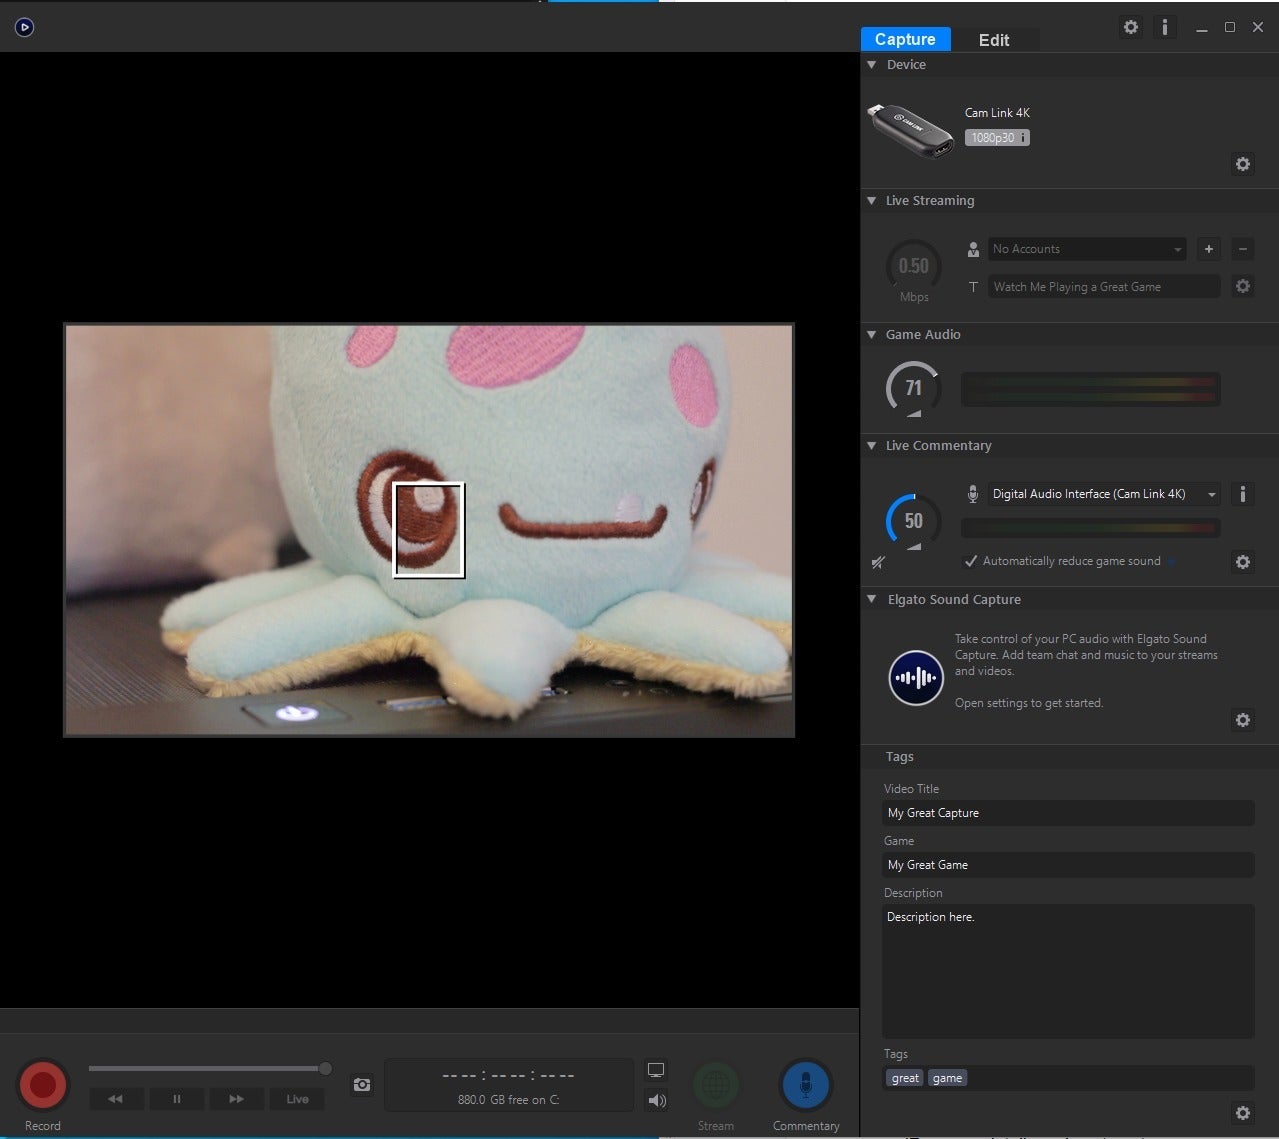
Once installed, open the program. Ideally, you should be able to see if it’s already picked up the video feed. If it has and you can see yourself, you’ve passed your first major hurdle.
 Alaina Yee / IDG
You should be able to see your feed if everything’s working as normal. (Tip: A brightly colored item can help you while setting a manual focus point.)
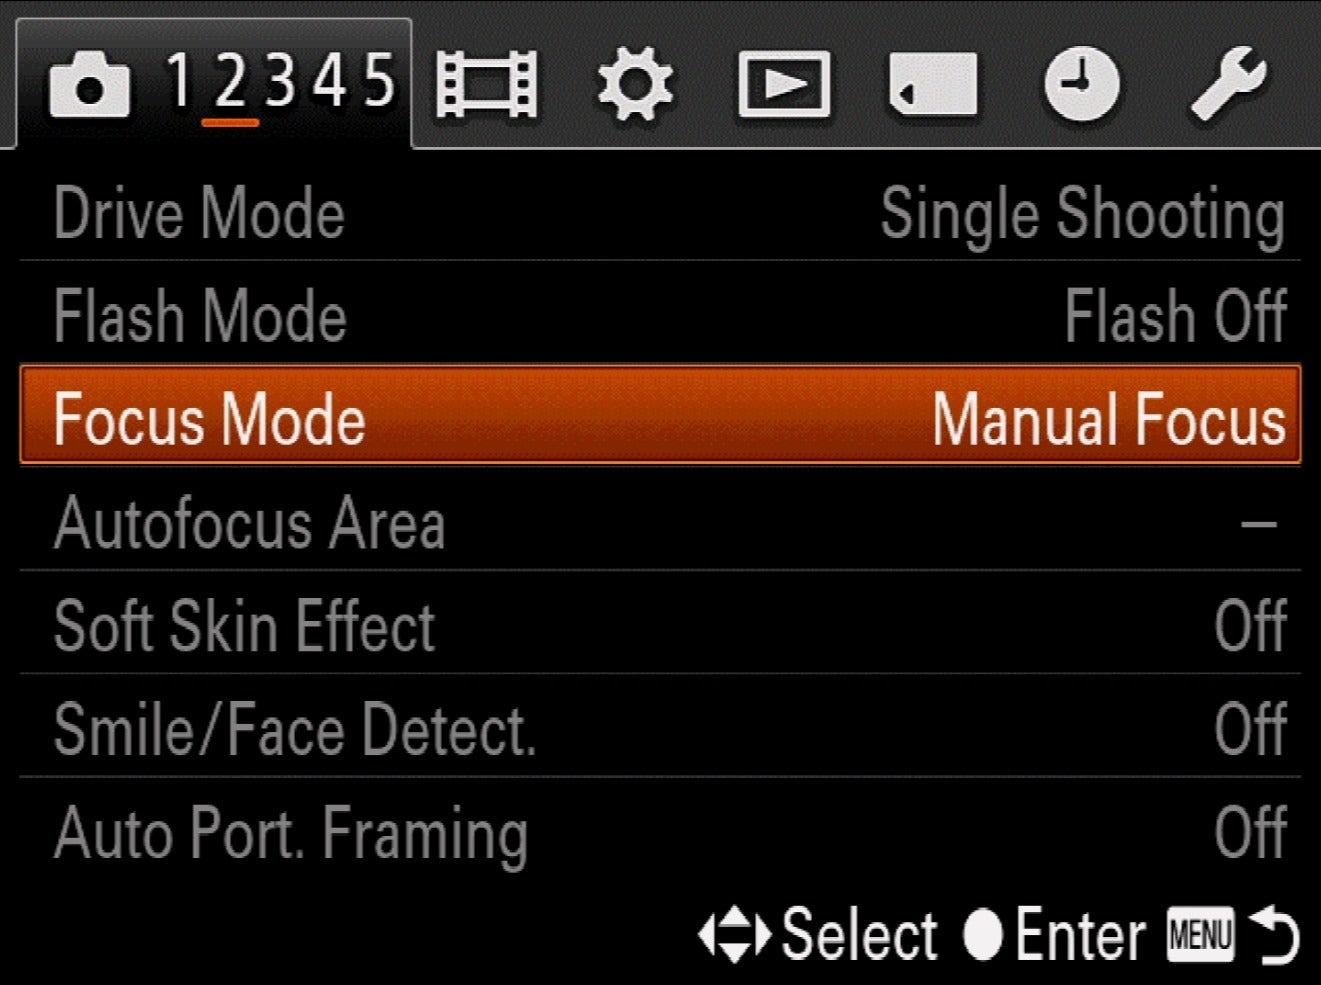
Step 5: Tweak the settings on your camera
Usually, your digital camera or camcorder automatically displays a wealth of info on its screen: ISO, aperture, shutter speed, exposure, color temperature, etc. It also often shows a focus box if a face appears in view.
Because the capture device grabs that exact output to the camera or camcorder’s built-in screen, you have to declutter it to get the same kind of effect as a webcam. Settings vary from model to model, but look for these:
- Display button: Pressing this button cycles between different preset views that show info on various camera settings. You want the one that presents a completely clean screen with no extra overlays.
- Menu button: Most of the settings in the following list are under the “Movie” section, but you may need to scroll around to find everything:
- Output at an appropriate resolution (720p, 1080p, or even 4K depending on your home internet upload speeds and the type of capture device you bought).
- Output at either 30 fps or 60 fps. (For reference, most webcams default to 30 fps.) If your camera doesn’t offer 30 fps, 24 fps works as well.
- Turn off focus boxes from showing.
- Optional: Switch from auto-focus to manual focus. (Only do this if your lens supports manual focus.)
- Optional: Switch to manual settings for ISO and aperture. (See Tips and troubleshooting advice below for more info.)
 Alaina Yee / IDG
A sample of the settings to adjust. Not every device’s menu will show through the feed; it’s easiest to use the built-in screen on the camera or camcorder.
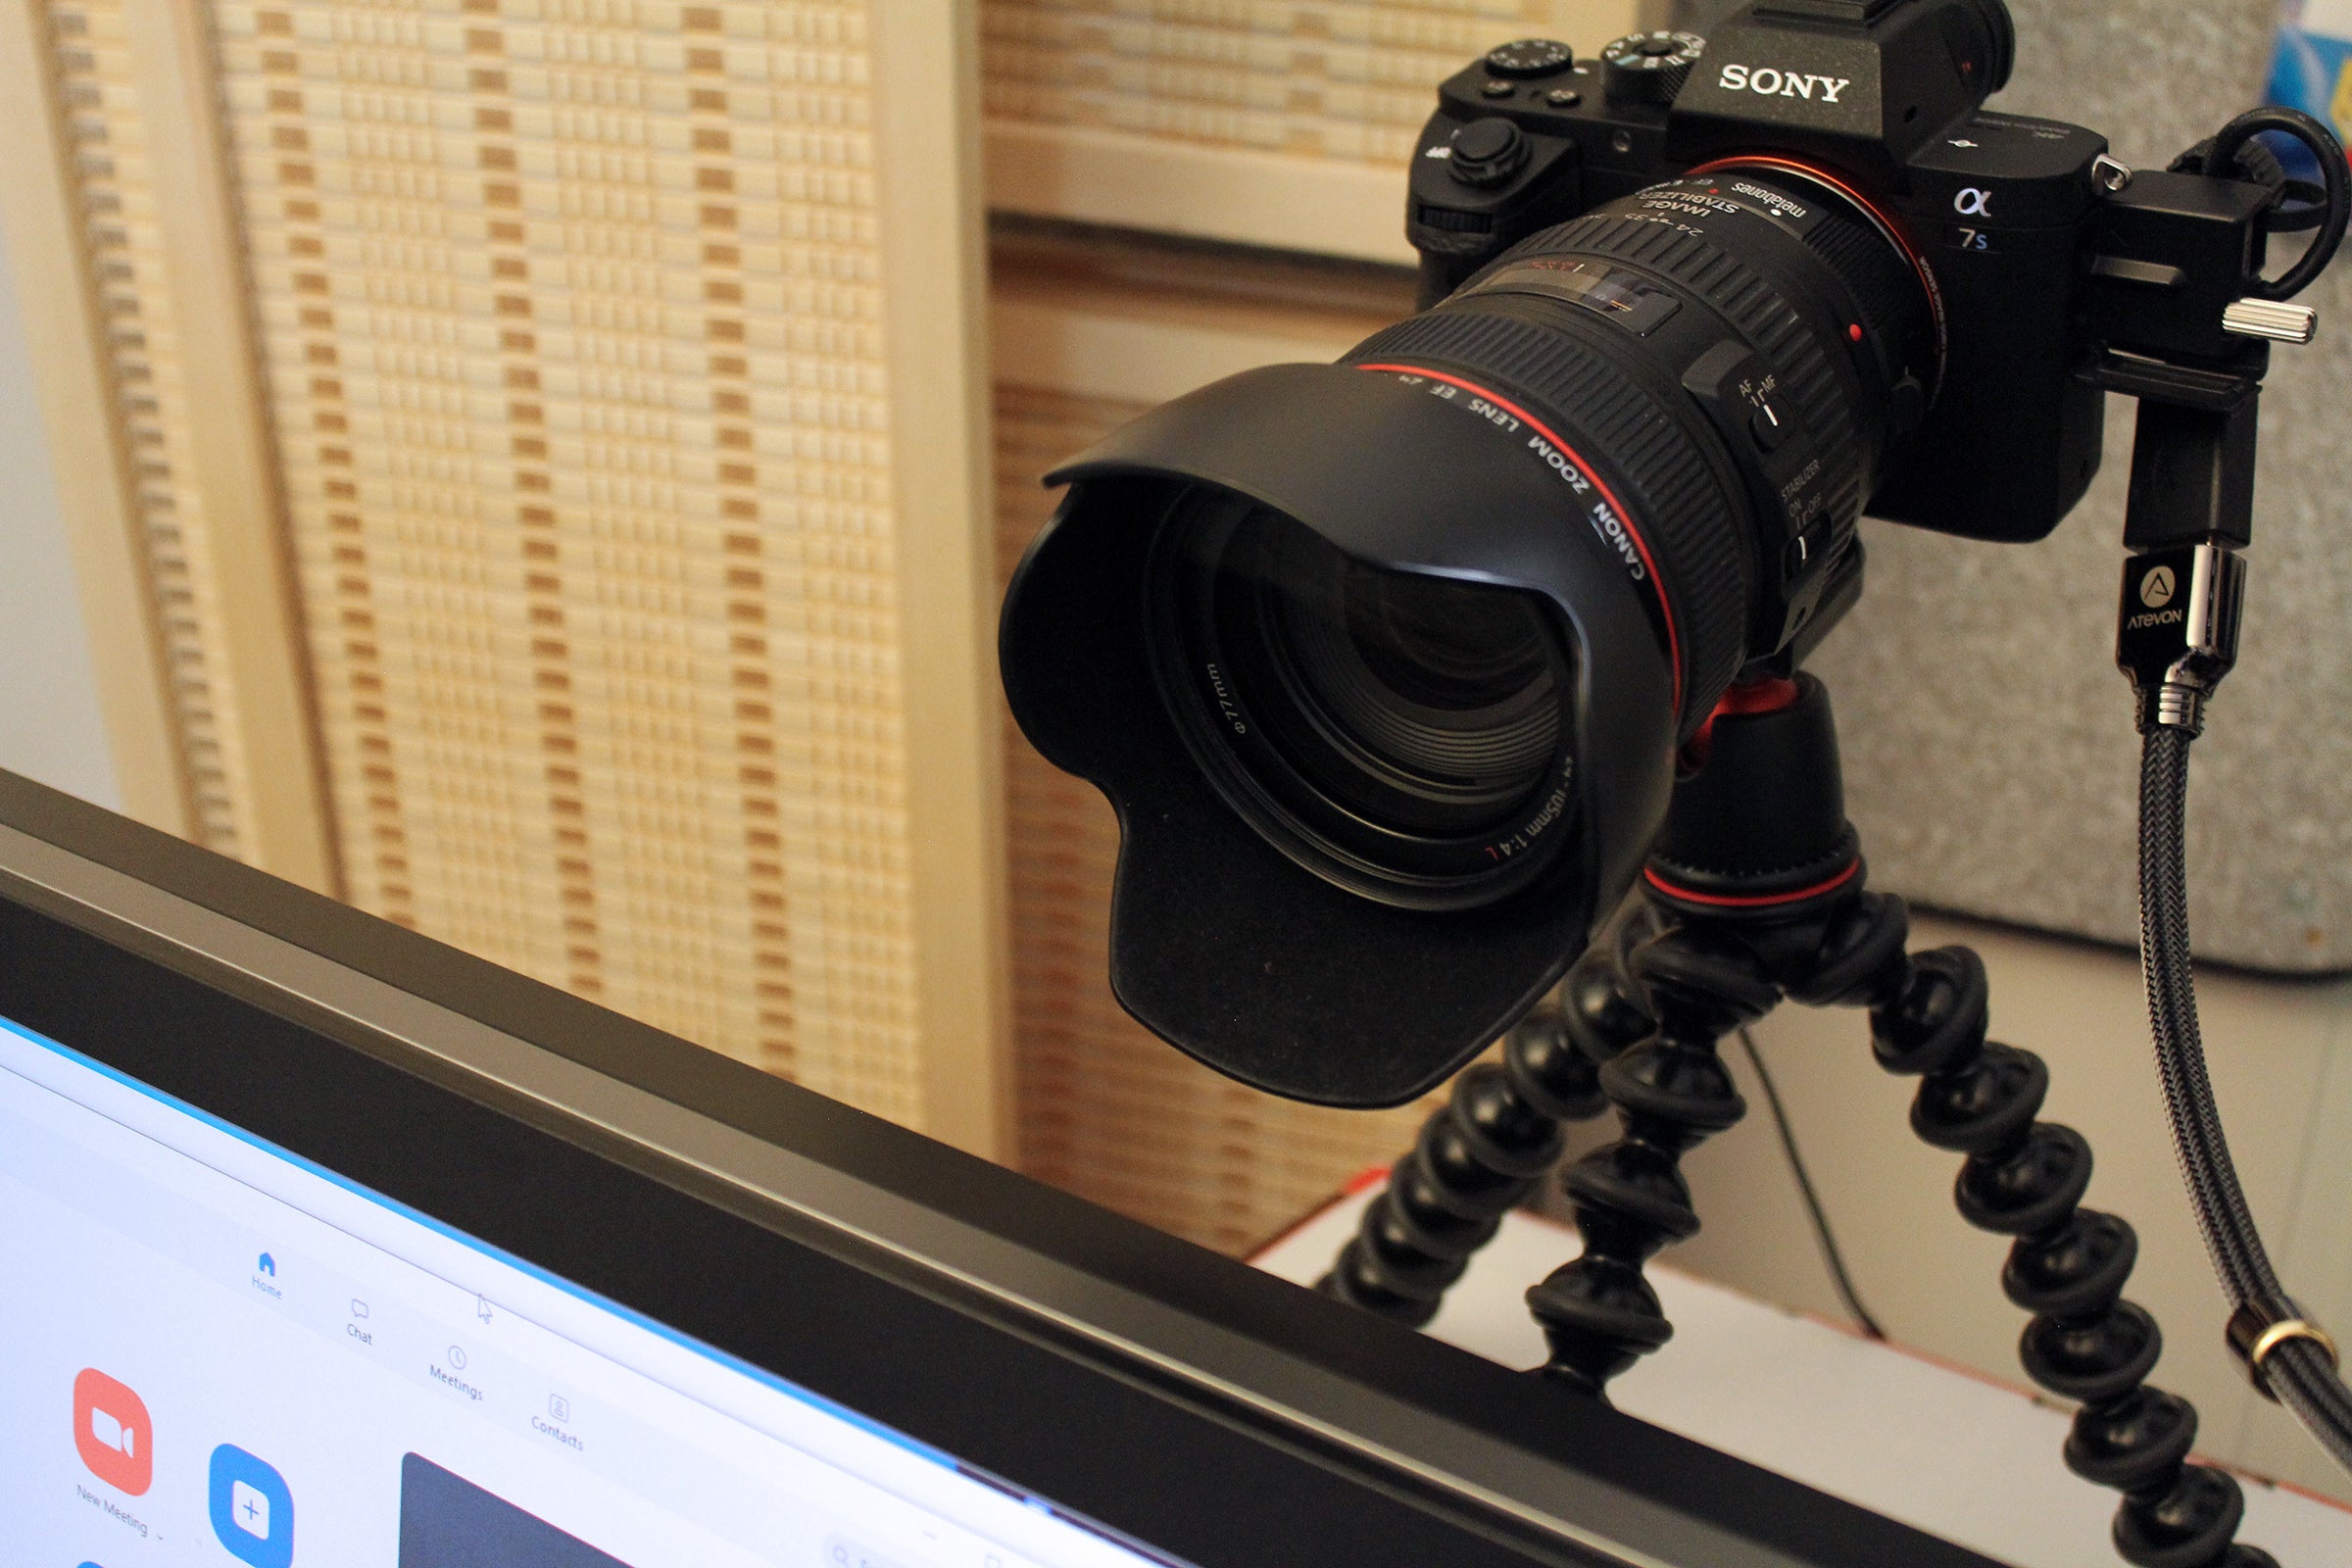
Step 6: Place your camera on a stand or tripod
Position the camera so that it sits just above eye level. You can create a stand from boxes or books; combine a mini-tripod with a pile of household items; or use a full-size tripod. If you’re using an AC adapter for a dSLR, the latter two options provide clearance for the wire and allow the camera to stay level.
Note: When constructing columns of boxes, books, or other household items, make sure they're sturdy and stable before putting your equipment on them.
 Alaina Yee / IDG
The setup we created for this article uses a combination of boxes and a mini-tripod.
Step 7: Plug in your microphone
As mentioned above, the onboard audio for your digital camera or camcorder doesn’t sound great, so you’ll sound clearer using an alternative input. Connect your earbuds, headset, or dedicated microphone to your computer using the correct 3.5mm jack(s) or a USB port. In Windows, you may need to click through some OS dialog boxes to confirm what you’ve just plugged in.
Step 8: Configure your chat software
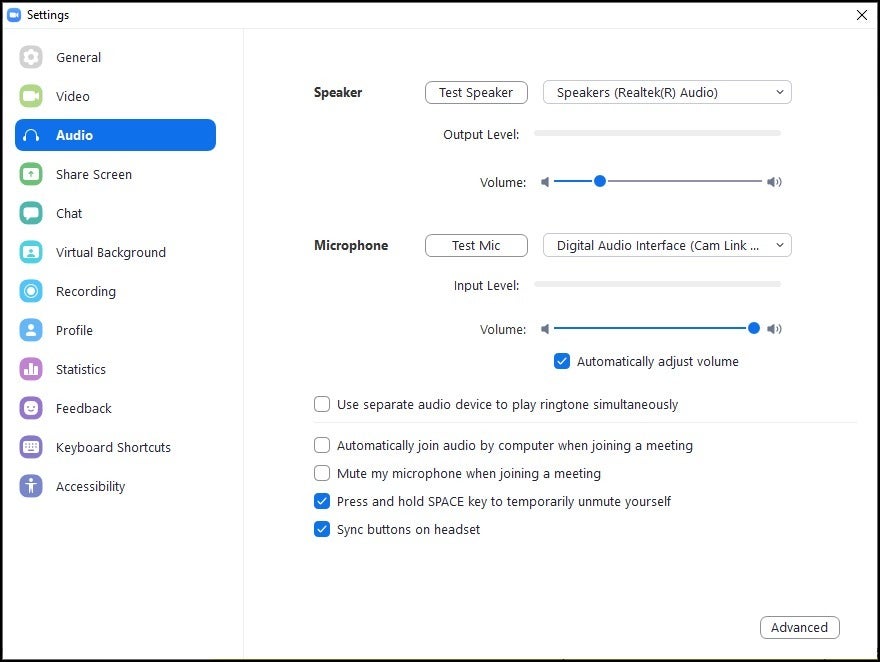
You should now be ready for video chatting in services like Skype, Hangouts, or Zoom—all that’s left is checking the desktop program or web app and ensuring it’s set to the correct input and output devices.
 IDG
IDG
An example of the audio options in Zoom. Skype, Hangouts, and other chat programs will look similar in both desktop and web app interfaces.
Go to Settings, and then find the Audio and Video sections. For audio, input is usually your system default if you’re using earbuds or a headset, or the name of the dedicated microphone (e.g., Blue Yeti). If you’re attempting the onboard video from the camera or camcorder, then it should be the name of your capture device. Output should be the system default; if you can hear your music or other programs, you’re good to go.
 IDG
IDG
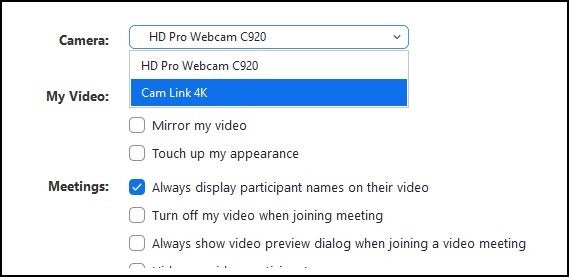
If you have a decent internet connection (5Mbps or more for upload speed), turn on HD (720p or more) for your video transmission.
For video, confirm that the camera input is the name of your capture device, as that’s what your computer sees as the video source. In our setup, that’s the Cam Link 4K.
You should be all set now! You can further tweak settings from here if you like, but otherwise your calls should work the same as with a proper webcam. You may also want to fine-tune your manual focus, if you chose that instead of auto-focus for your setup.
Tips and troubleshooting advice
HDMI cables can be a point of failure
Not getting a signal from your camera in your capture device’s software? Try swapping the cable and/or adapter first. In our tests, we had trouble getting the Cam Link 4K to find our Canon 60D with the first two cables we tried: a mini-HDMI to HDMI cable and a standard HDMI cable used with an adapter.
Your camera’s output settings can inhibit signal detection
If you’re using a program like Elgato’s Game Capture, you can literally see if your digital camera is passing through the signal. If it’s not, examine the settings on your camera to make sure its output is compatible with your device (720p or 1080p at 30 fps are your safest bets).
Fine-tune your picture with manual settings
Auto-focus and auto-settings for ISO and aperture will be fine for most everyone, but you can get a sharper, clearer look if your camera supports manual settings.
As a general rule of thumb, increasing the ISO to a higher number makes the camera more sensitive to light, but it’ll also increase the graininess of the image.
Likewise, decreasing the aperture to a lower number (like from f/4.0 to f/3.0) will do the same—it physically increases the amount of light entering the lens. Be aware that as you lower the aperture, background elements will decrease in focus.
Balancing ISO, aperture, and external light sources against the distance you’re sitting from the camera is highly specific to your situation, so you’ll need to play around with each element until you’re satisfied.


