 Credit: Matt Smith/IDG
Bumping up your resolution or screen size is great, but one of the most important aspects of gaming visuals come down to an essential issue: frame rates. The more frames your graphics card can push out each second, and that your monitor can display without tearing or stuttering, the better the gaming experience. Faster monitors provide a smoother experience during standard desktop usage as well.
But did you know that high refresh rate monitors on Windows often don’t maximize their potential out of the box? Even if your in-game frame counter is showing over 100 frames per second, your actual screen may actually be stuck at 60Hz, rather than the 144Hz-plus speeds you paid for. Higher frames coming from your GPU still offer visual improvements even at a regular monitor refresh rate, but that’s not why you bought that killer display.
You bought that sucker to rip through Cyberpunk 2077, taking in all of its glorious scenery at drool-worthy, buttery-smooth speeds. But to hit those heights you need to have your monitor configured correctly, and if you’re counting on Windows to tell you when there’s an issue, forget it. For all of its wonder, Windows 10 will happily let that high refresh rate monitor sit at 60Hz for its entire life without alerting you to the greater potential within.
Here’s how to change that.
Check your cables first
 Jared Newman / PCWorld
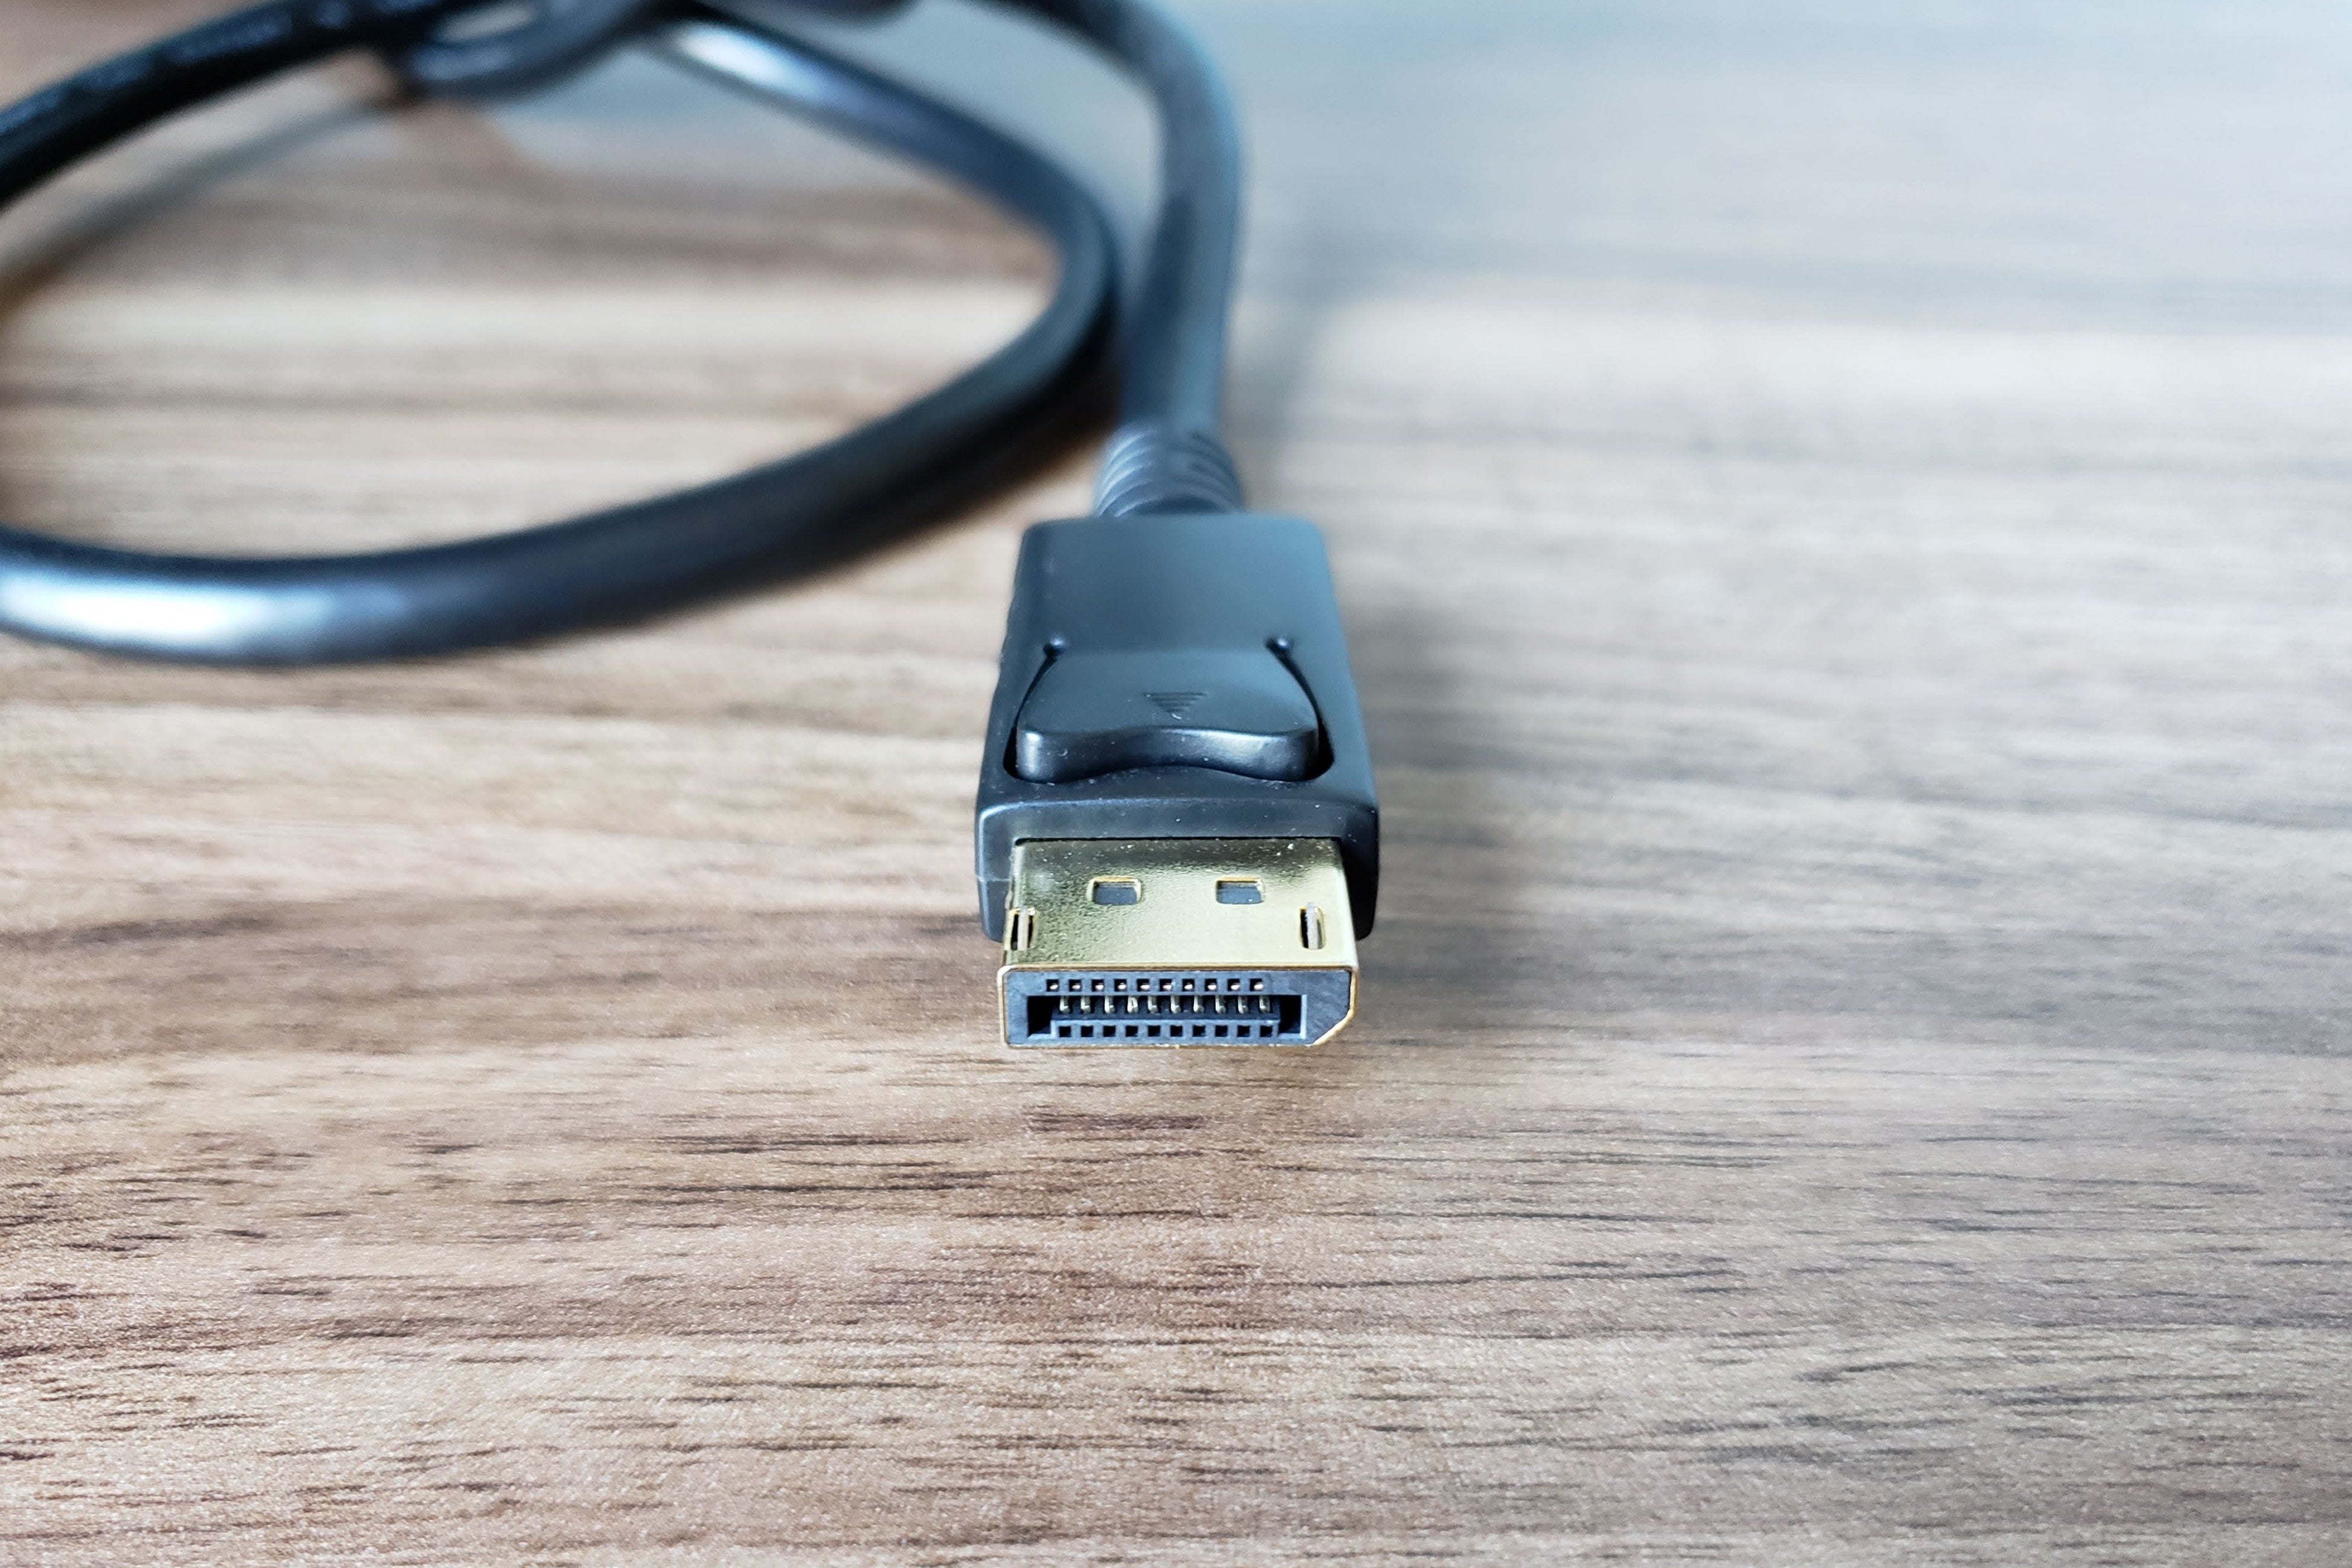
A DsiplayPort cable ready for action.
Before we get into the nitty-gritty, let’s talk about your monitor’s connection. Typically, high refresh rate monitors have two cable choices to connect to your graphics card: HDMI and DisplayPort. The trick is that quite often these two connections are not equal, and one will be capable of displaying higher refresh rates than the other.
If you have a newish 144Hz display then it’s likely that both connection types have equivalent capabilities. That’s not always the case, however, and if you have a monitor that can do 165Hz or 240Hz it’s even less likely.
For anyone with a FreeSync display, AMD makes it easy to figure out which connection supports which refresh rate. The company’s FreeSync website has an extensive list of AMD FreeSync monitors and their specs. This list isn’t exhaustive, but it’s rare to find a FreeSync monitor that isn’t covered.
If you have a G-Sync monitor Nvidia maintains a similar list, but you don’t really need it. G-Sync always uses DisplayPort.
How to change your monitor’s refresh rate
Now the moment you’ve all been waiting for: it’s time to check your display’s working speed, and change your monitor’s refresh rate if needed. This is actually an easy adjustment, and it’s scandalous that Windows 10 doesn’t help you figure this out, but here we are.
 IDG
IDG
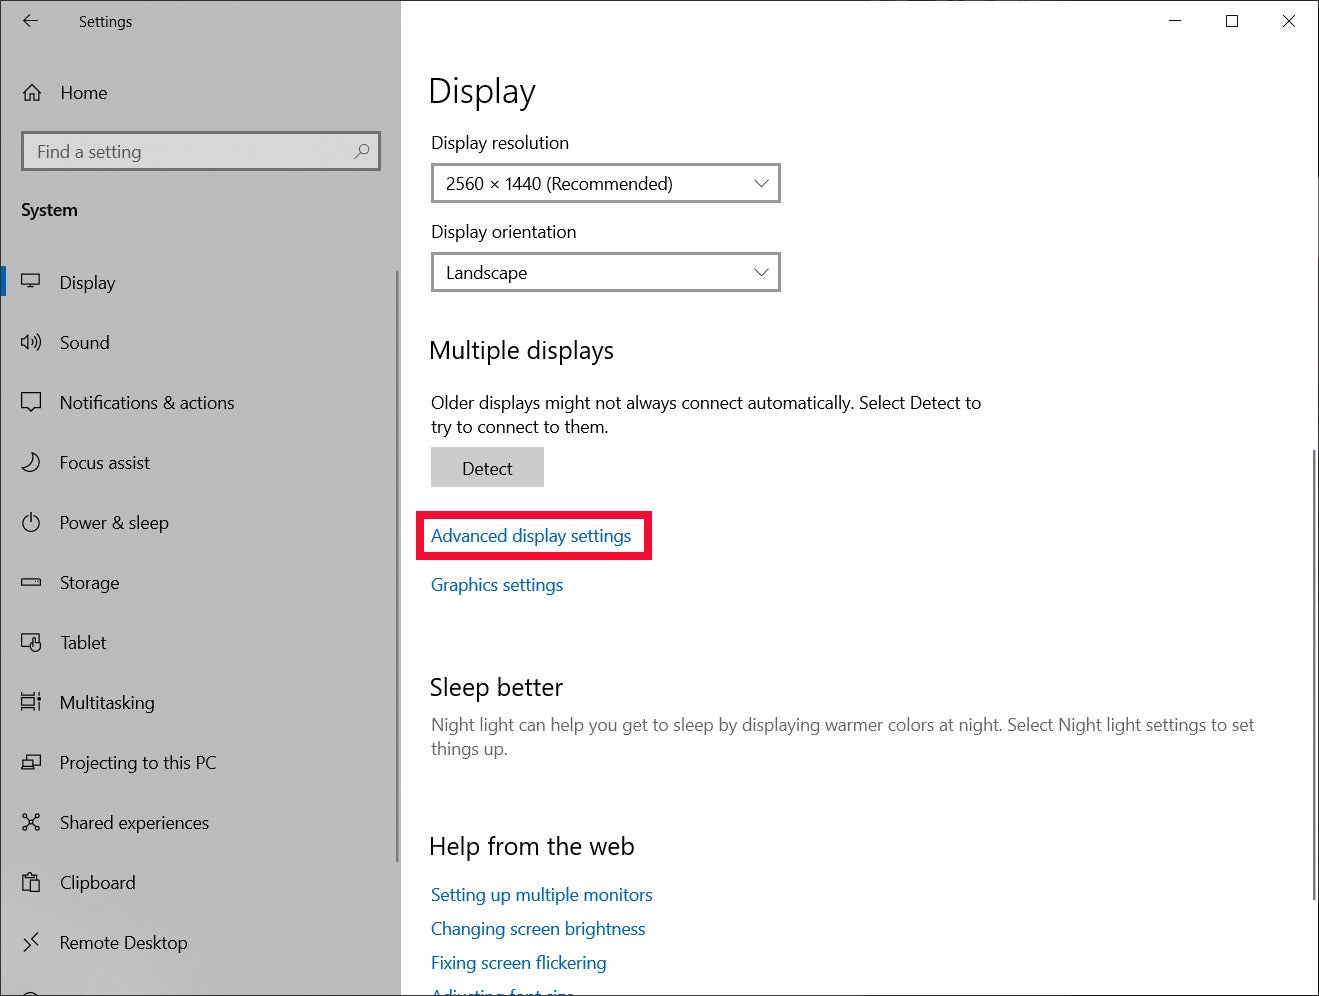
Start by selectin Advanced display settings.
To start, open Windows 10’s Settings by tapping the Windows Key + I or browsing to Start > Settings. Once the Settings window is open, go to System > Display. Then scroll down until you see the heading Multiple Displays and click the “Advanced display settings” link.
 IDG
IDG
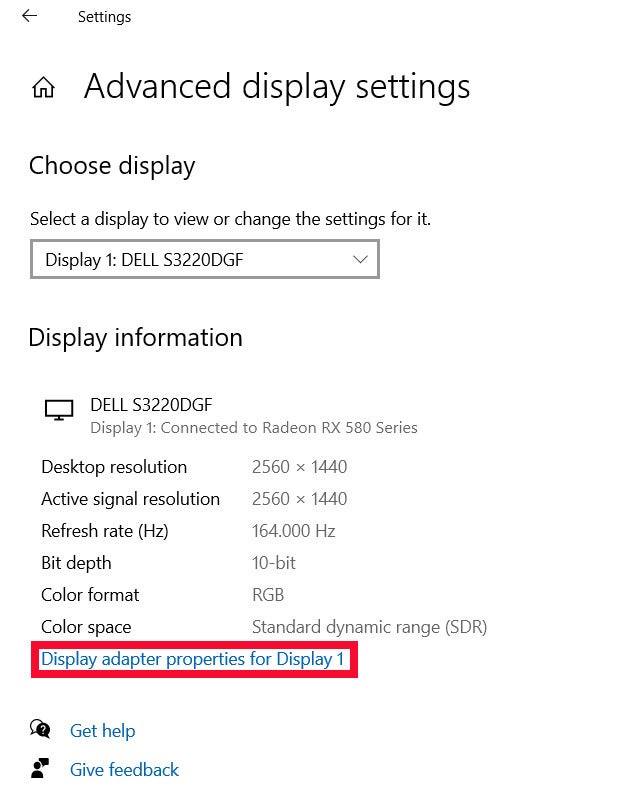
Settings shows basic information about your monitor.
On the next screen, make sure the drop-down list is showing the correct display if you have a multi-monitor setup. Then, towards the bottom, click on the link entitled Display adapter properties for Display 1. (This can also say Display 2, or Display 3 depending on your particular setup.)
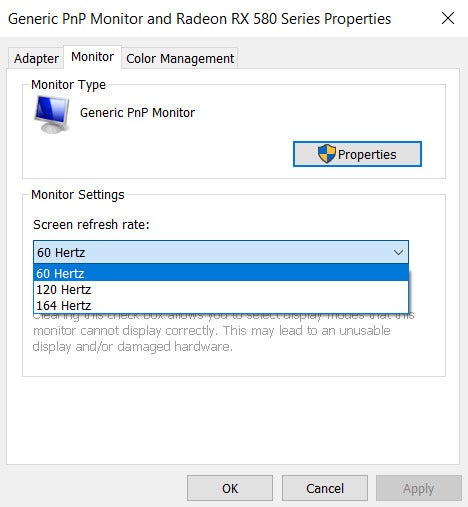
Clicking the link opens a small utility window with three tabs. Select Monitor, and then in the section under “Monitor Settings,” you’ll see a drop down box entitled Screen refresh rate. Select the maximum refresh rate for your monitor. If you don’t see the maximum setting, then it’s likely you have to switch display cables to see the higher rate.
 IDG
IDG
Select your desired refresh rate from the drop down menu.
Once you’ve selected the desired refresh rate, click Apply, and the screen will go dark for a moment. Windows will ask if you want to keep the desired settings. Click Keep changes, then click OK back at the utility window to close it, and you’re done!
As a final tip for gamers, FreeSync and G-Sync aren’t always enabled by default. You may have to activate those variable refresh rate features in the monitor’s onboard menu to get the most from your new display.
Enjoy the buttery-smooth visuals you’ve paid for!


