 Credit: Corsair
There’s a lot of debate about how important faster RAM is for gaming, and whether it makes a noticeable difference beyond a certain point. One thing is certain, however: If you’re running standard 2,666MHz memory, you’re going to notice an upgrade to something like 3,200MHz or more. But you need to manually enable a feature called XMP to actually unlock that performance. Those higher speed RAM sticks don’t work as advertised right out of the box.
That’s because high-performance RAM has to operate beyond the specifications for DDR4 memory, which is the current generation of RAM used in the vast majority of recent PCs. That’s set to change in late 2021 moving in to early 2022, when DDR5 is expected to roll out. At this writing, however, we’re all about DDR4.
Back to that high-performance DDR4. Because the RAM is operating beyond what DDR4 was officially rated for, you have to enable a special profile for your RAM called the eXtreme Memory Profile, or XMP. Doing so takes your faster RAM to 11 and lets you enjoy the glorious speeds you paid for. One thing to note is that enabling XMP can technically void the warranty on your processor; however, as we recently discussed, this is almost never a real issue of concern.
What is XMP?
 Corsair
XMP is a technology developed by Intel for both DDR3 and DDR4 RAM to squeeze more performance out of your memory. (You’ll also see the option on AMD motherboards.) Once you enable XMP, your motherboard detects the RAM’s optimal settings, and automatically applies the changes. It’s basically a one-click overclocking tool for RAM, and it’s perfect for users who don’t want to overclock manually.
To get to the XMP settings, however, you have to dip into your PC’s BIOS. Once there, enabling it is pretty simple. The problem is that we can’t provide step-by-step instructions that will work for everyone, since every motherboard’s BIOS handles things a little differently.
We can, however, provide a few basic guidelines to help you navigate your way through this process.
Check your current RAM speed
 IDG
IDG
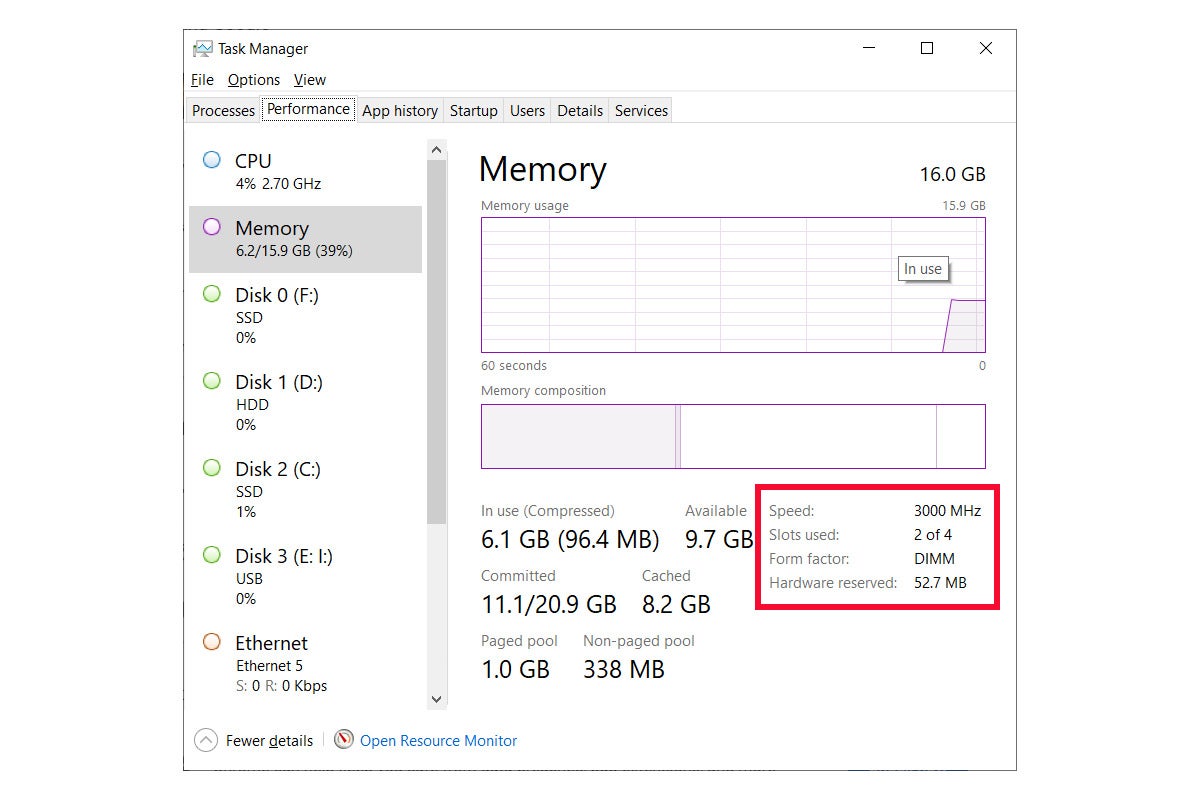
The Task Manager in Windows 10.
Before we start, let’s see how fast your memory is running now. Search for “Task Manager” in Windows 10 and then choose “Task Manager” from the results (or press good ol’ Ctrl + Alt + Delete to summon it instantly). Once Task Manager opens click the More details option at the bottom of the window to expand if necessary.
Next, click on the Performance tab and select Memory from the left rail. Then in the main part of the window you’ll see Speed (pictured above) showing your RAM’s current running speed in megahertz. If you haven't enabled XMP, it will likely be slower than the speed your memory kit is rated for. Let’s get into the BIOS.
How to enable XMP
To get to the BIOS, reboot your PC and wait for the initial splash screen. On a desktop PC this screen usually shows the logo for your motherboard such as Aorus, EVGA, Asus Republic of Gamers, etc. On this screen you’ll see instructions on how to enter the BIOS, which is usually by pressing either a function key, the escape key, or the delete key. Another alternative is to check your motherboard manual, which should have instructions on how to enter the BIOS.
 Ian Paul/IDG
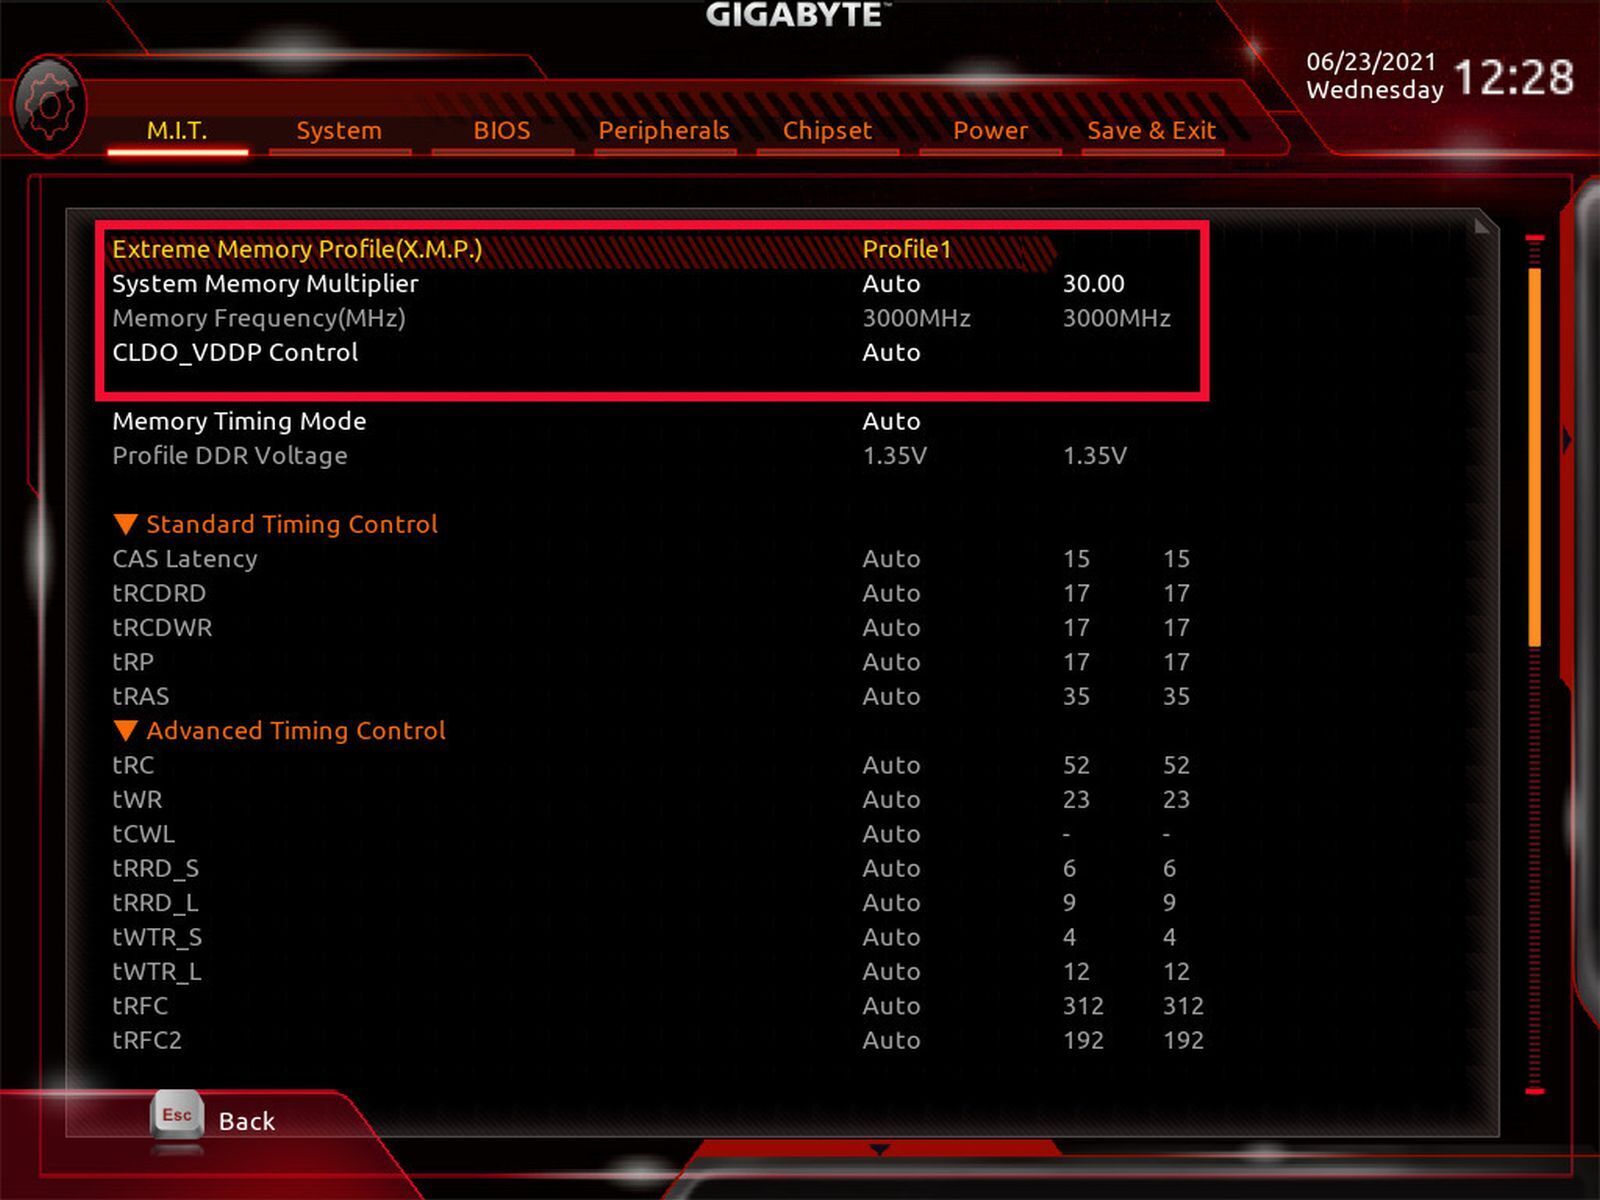
The BIOS for a Gigabyte Aorus AMD-compatible motherboard.
Once you see which key you need, press it. If, after pressing the right key, the PC boots into Windows then you didn’t hit the correct key fast enough. Just reboot, and once the screen goes dark, press down or mash the appropriate key until the BIOS appears. (If you’ve never entered your BIOS before, don’t be surprised if it takes a second try.)
Once you’re in the question is what to do next. Usually, the XMP profile is clearly marked. The Asus BIOS below, for example, shows it right on the first page. Gigabyte, on the other hand, usually puts it under Advanced Memory Settings > Extreme Memory Profile(X.M.P.), and EVGA usually has it under Memory > Memory Profiles.
 Ian Paul/IDG
An Asus BIOS example.
Whatever the menu item is called the next step is to activate XMP. Either click on your memory settings, or look for a drop-down menu next to something that says “XMP” or “Memory Settings” or the like. In the case of my Aorus BIOS, clicking Extreme Memory Profile (X.M.P.) brings a pop-up window with two options: Disabled and Profile 1, with the latter being the option we want.
Some RAM kits with extremely fast speeds may have more than one profile, giving you multiple options. After choosing the option you want, you should go back to the main screen of your motherboard BIOS, where it usually shows what speed your RAM is now set at as well as the voltage it’s using.
Now it’s time to get out of the BIOS and return to Windows. To do this, most motherboards show a “Save & Exit” option. Select that, save your changes, and your computer will boot back into Windows 10.
Now open up Task Manager again, and you should see that the Performance > Memory > Speed entry has changed. If it hasn’t, you may have selected the wrong profile or forgot to save before you exited the BIOS.
Now you’re free to enjoy your RAM at the speeds you paid for.


