Got an iPhone 6s or 6s Plus? Do these 10 things first
- 26 September, 2015 02:15
The wait is finally over: Your iPhone 6s or 6s Plus is in your clutches. Woohoo! Sure, you’re probably eager to download some cool games or test out that new 3D Touch interface, but before you go crazy, there are a few housekeeping details you should tend to first.
1. Back up your old phone
Backups are never fun, but they’re essential to avert disaster down the road—plus, you’ll need a recent backup if you want your new iPhone to behave like, well, a better version of your old iPhone. While you can back up your iPhone via iCloud or iTunes, we prefer the iTunes method since it’s a little faster. Tether your iPhone to your Mac with the appropriate USB cable and launch iTunes, then select your iPhone, and under Backups, choose This Computer.
Checking Encrypt local backup is a good idea, not just for privacy reasons, but also because that way your account passwords are stored and you won’t have to enter them all again. Click the button to Back up now.

iCloud, eye-schmoud. Backing up and restoring with iTunes is so much faster.
2. Restore your new iPhone from that backup
Keep that Lightning cable out and plug in your new iPhone 6s, then tell your phone you want to restore from an iTunes backup. Once your iPhone is up and running and everything’s how you like, then you can switch back to iCloud backups if you prefer, in Settings > iCloud > Backup. But it never hurts to run a backup on your own Mac every now and then. (And if you’re coming from an Android phone, there’s a new Move from iOS Android app that can assist you.)
Also, creating an encrypted backup will also ensure any Health app data is carried over to your new phone. It won’t get saved in unencrypted backups.
3. Finish the setup
There are a few remaining steps to finish up the setup process. You’ll enter your iCloud account password, enter a second security code if you’re using two-factor authentication on said iCloud account, agree to the iCloud terms and conditions, and set up how people can reach you over iMessage and Face Time. With the exception of a couple of other matters, you’re on your way.

If you’ve never used Touch ID before, welcome to the future. It’s a great feature.
4. Set up your Touch ID
Yes, you should use Touch ID for maximum security. Apple promises that its fingerprint reader is even more accurate and quicker with the iPhone 6s, so take the few moments to repeatedly press a finger on the Home button to register it. If you trust another human to enter your phone, you can add their finger (or more of your own digits) by going to Settings > Passcode.
Since you need to have Touch ID enabled in order to use Apple Pay, this would be a good time to jump into Apple’s Wallet app (formerly known as Passbook) to set that up. If you’re new to Apple Pay, just follow the instructions within Wallet to add a credit card or two. If you previously had an iPhone 6 or 6 Plus, you’ll notice that your credit cards have disappeared on your new iPhone. Why? For your security, of course. Your Wallet history will still be there, but you’ll have to re-enter any payment cards you’d like to use with Apple Pay.

Bonus: If you go with Standard view, you get room for an extra row of icons.
5. Pick a size with Display Zoom
If you didn’t have an iPhone 6 or 6 Plus, this will be a new feature to pay attention to. You can enlarge the default view on your iPhone, which will zap away a row of icon space but makes everything easier on the eyes. Apple helpfully gives you a three-panel preview, including how the home screen would look with each setting, as well as a sample Messages screen and a sample email in Mail.You can always change this up in the settings if your first choice isn’t to your liking.
6. Peruse the settings
The settings aren’t all that much different in iOS 9 (your device should arrive with iOS 9.0.1 ready to roll) but there are a few new things to consider. Check out our settings guide to see what is located where so you don’t get lost. And don’t forget, you can now search now for any items located in the iPhone Settings app.
7. Update your apps
You’ll want the latest versions of all of your apps in order to take advantage of all of the cool, new tricks that come with iOS 9. Several apps take advantage of Spotlight indexing, which allows you to find information inside of them with a simple search. A few apps also got an early invite to the 3D Touch party, like Instagram. Here’s a whole batch of apps that are ready for iOS 9.
You can have all your apps auto-update by flipping the Updates switch in Settings > iTunes & App Stores > Automatic Downloads. Or, you can manually update your apps one by one and check out the “What’s New” release notes to see what has changed.
8. Try a Live Photo
A Live Photo is a photo that also serves as a mini three-second video. Essentially, the iPhone captures 1.5 seconds of video before and after you snap your pic. To take a Live Photo, go into the Camera app and switch to Photo mode (it won’t work in Square or Pano photo modes). In the top row of icons (or the side if you’re shooting horizontally), you’ll find a new, bull’s-eye-like icon. This is the Live Photo icon, and if it’s orange, it’s on; if it’s white, it’s off. Tap it to turn it on or off.
When shooting a Live Photo, remember that the iPhone is recording video before and after you take the pic. You need to hold the phone steady for a couple of seconds before and after your shoot.
To see your Live Photos in action, you’ll find them among your regular photos in the Photos app. When you swipe through your pics, the Live Photo animation will show and then stop. To see it again, perform a 3D touch on the Photo by pressing firmly and holding on the pic. You can share your Live Photos, but iOS 9, watchOS 2, and El Capitan (coming soon) are required to see the animation; otherwise, you’ll just see the still pic.
9. 3D Touch everything
3D Touch offers a way to use your apps without actually opening them. A 3D Touch is performed by pressing down firmly (but don’t hold down!) on an app’s icon on your Home screen. A contextual menu pops up with a selection of tasks you can do. For example, 3D Touch the Phone app, and contacts you frequently call pop up; tap the one you want to call. Try 3D Touch on your apps on your Home screen; if you don’t want to perform any of the functions, just tap away from the contextual menu. If an app doesn’t have 3D Touch support yet (mostly third-party apps), the screen will blur and you’ll feel haptic feedback, but then the screen will go back to normal.
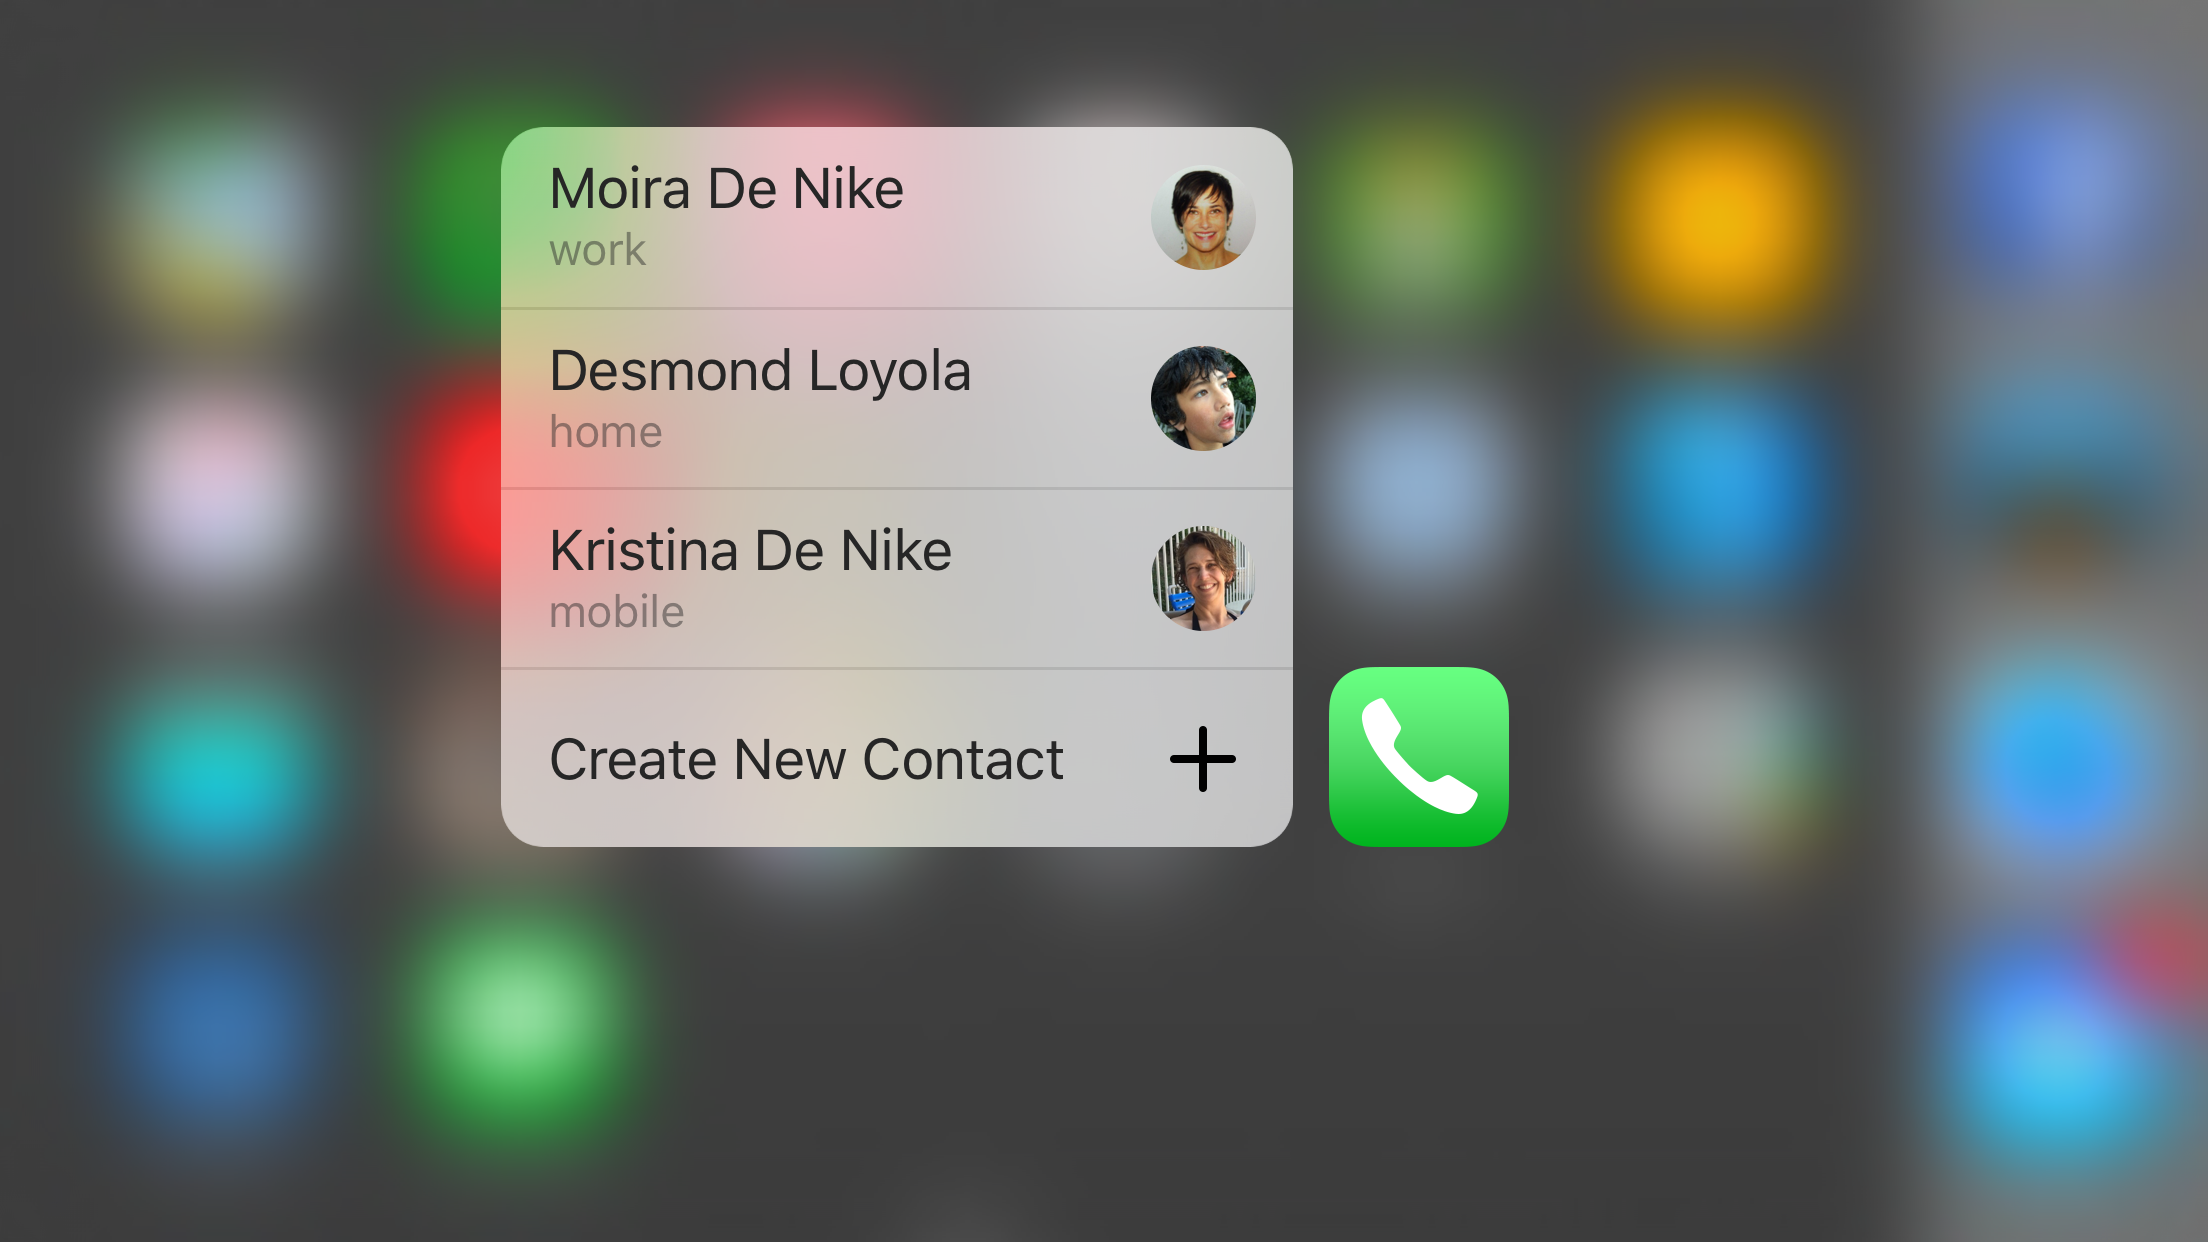
With 3D Touch, you might not even have to launch an app to access what you need.
You can do 3D Touch within some apps, too. Try doing a “peek and pop” in Mail, which lets you preview and open a message. Open Mail and go to an inbox. Press down firmly and hold it on an email: This is a “peek” where a preview of the message appears. Now press down more firmly on the email preview: This is the “pop” and opens the message in Mail. Peek and pop works in Messages, Music, Calendar, and other apps. Open up an app and give it a try.
10. Check out News and Notes
Apple completely revamped two of its core apps, making them tremendously more exciting. First is News, which ditches the ugly layout of Newsstand and replaces it with an elegant, Flipboard-style news feed.

News uses RSS feeds to pull together stories from different publishers in a magazine-style layout.
Notes also got a ton of love, with new capabilities to sketch notes with your finger, use more complex formatting, and embed content from other apps.
11. Call your mom
I’m sure she’d love to hear from you.
What did we leave out? What’s the first thing you’re always itching to do with a shiny new iPhone? Let us know, and have fun with your new phone.


