How to install an SSD in a PC
- 25 February, 2021 22:01

Installing an M.2 or SATA SSD in your desktop is an essential part of every PC build, or an easy upgrade to make your PC feel faster. Luckily, installing an SSD is easier than finding the best one (we have a roundup for that!) or even understanding how they work. I’m not going to cover any of that here, but I’ll walk through installing both kinds.
The steps below should apply to almost any model. I’ll start with the M.2 SSD because it’s a bit more tricky to install, and there are some things to research before you do it. Click this link to jump to the section on SATA SSDs.
How to install an M.2 SSD in a desktop PC
An M.2 SSD looks like a stick of chewing gum with chips on one side, a label on the other, and gold contacts at one end. Some will install just like that. Some will come with their own heat sinks and look more like a pack of gum than a stick of gum. Some motherboards will have a shield for the M.2 slot, and you’ll have to shimmy the drive underneath it. We’ll cover all the forms below.
Step 1: Find the M.2 slot
 Adam Patrick Murray/IDG
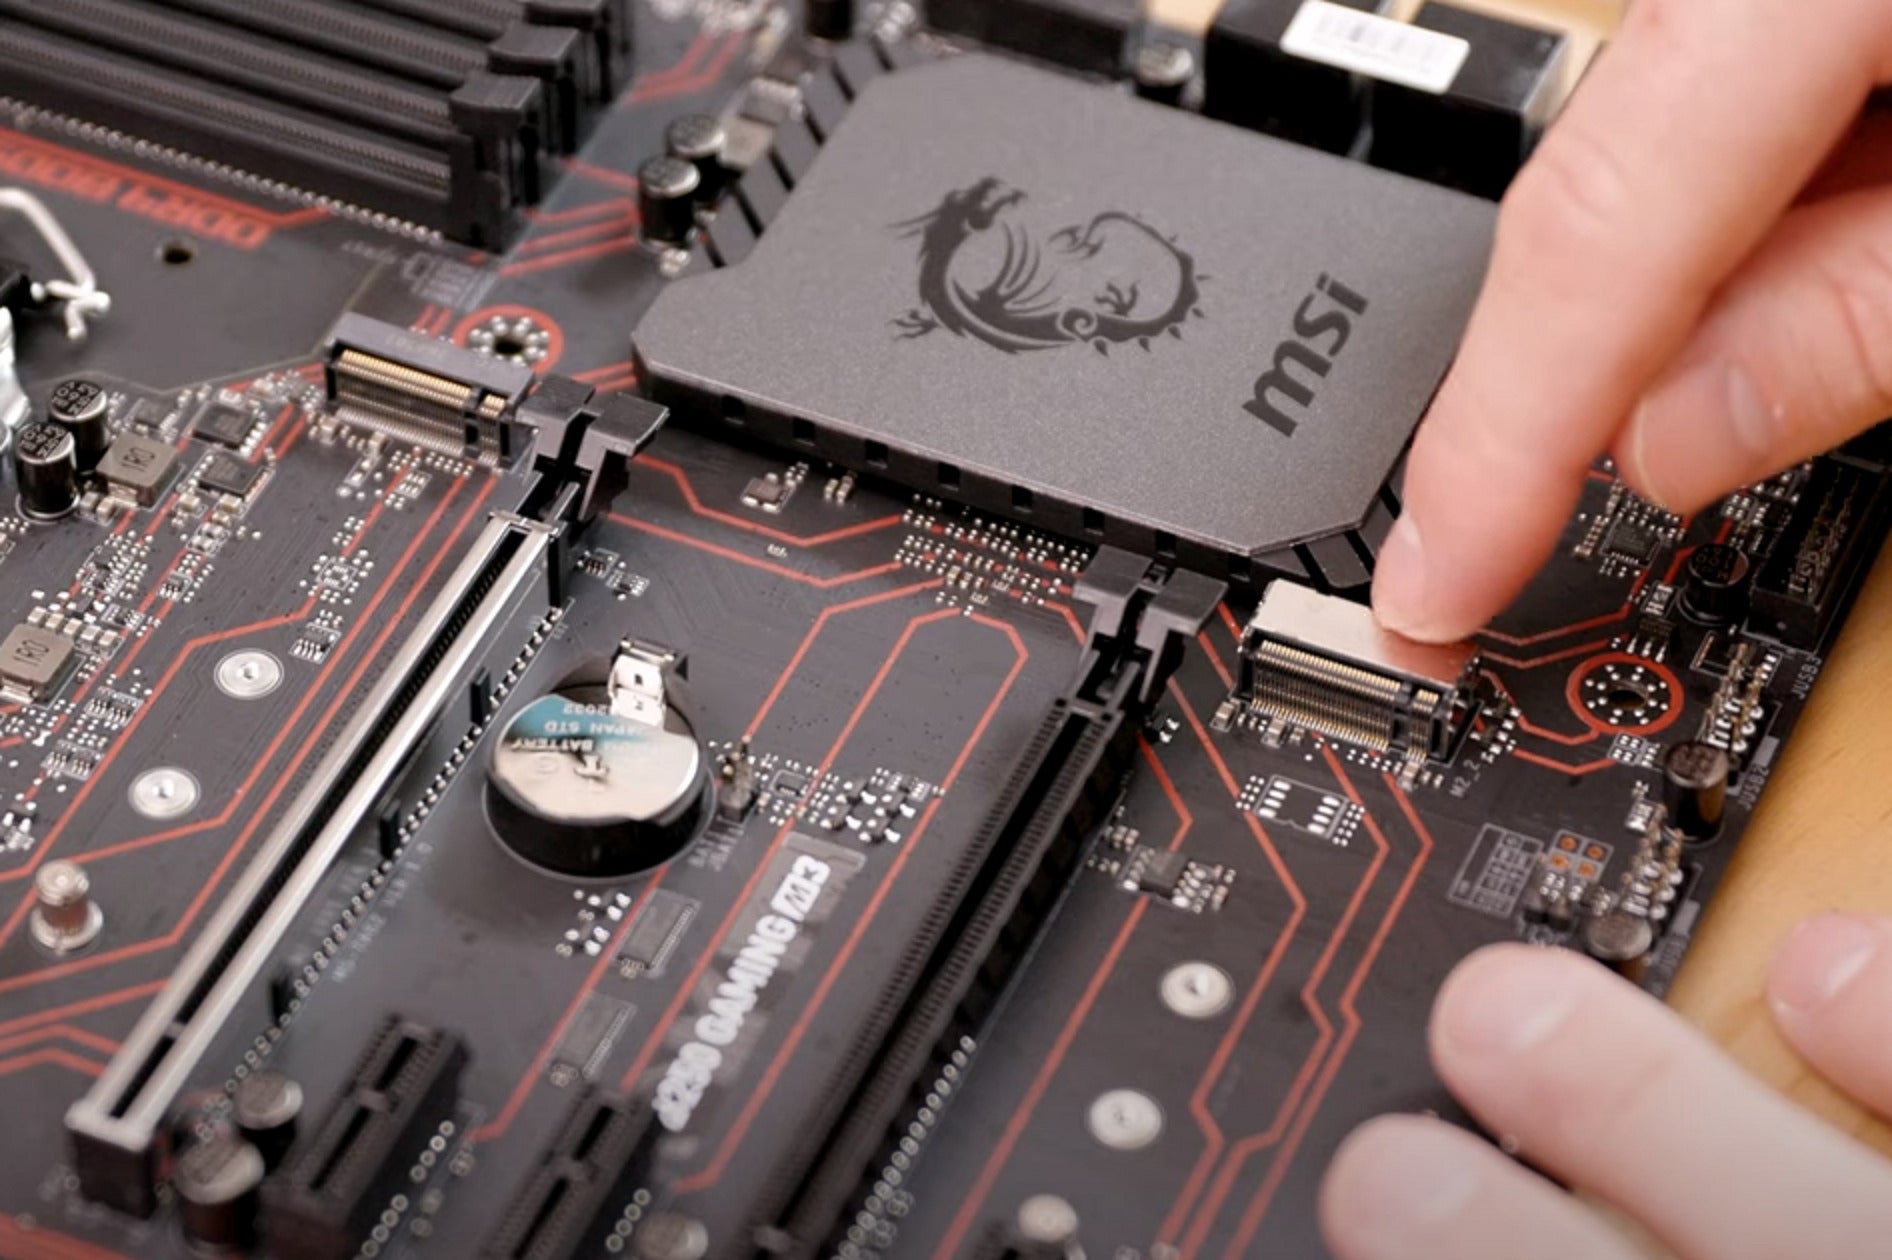
Before installing an M.2 SSD, identify the M.2 slots on your motherboard. They may be in different locations: On this board, there’s a black one at the left, and a chrome-plated one on the right. Each slot’s specs will be in the motherboard manual.
The first thing you want to do is find where the M.2 slot is on your motherboard. Look for a slot about one inch wide that protrudes from the motherboard about a quarter of an inch. Every motherboard is different, but the most common locations are below the CPU and around the PCIe slots in the lower half of the board. Check the manual if you have trouble finding it.
Some motherboards have a pre-installed shield in place that serves as a heat spreader but also can provide a nice piece of visual flair. This will obviously have to be removed before you access the M.2 slot.
If your motherboard supports two M.2 SSDs you’ll need to consult your manual to see which slot is the recommended one for installing your boot drive. Each slot might offer different performance levels, while others might turn off a PCIe slot if used. In short, read the manual first!
Step 2: Find the M.2 Mounting System
 Adam Patrick Murray/IDG
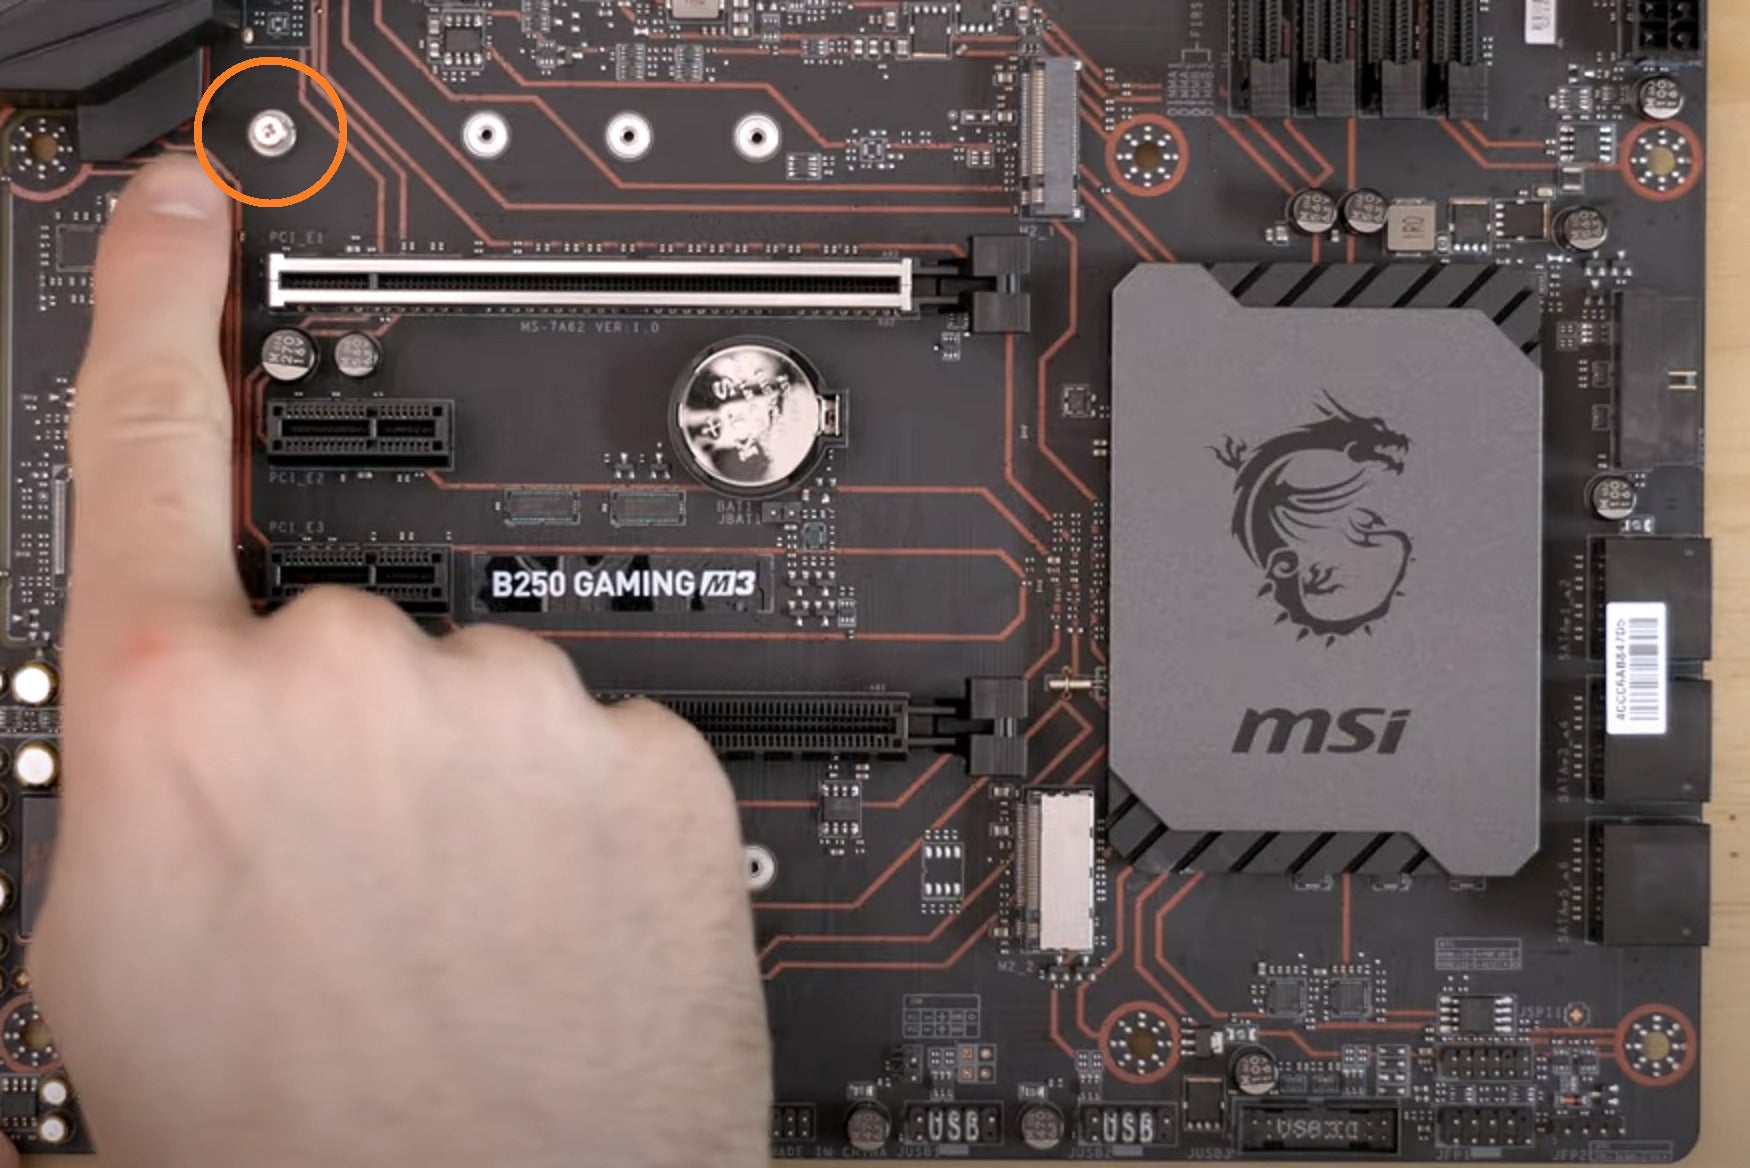
The M.2 slot will have a mounting system, such as the standoff with a screw shown here (see orange circle we're pointing to, above), which keeps the SSD straight when it’s installed on the motherboard.
Once you’ve found the right slot, find the screw about three inches to the left that is inserted into a standoff. The standoff is there because when the drive is inserted, there will be a gap between the SSD and the motherboard. The standoff plays the crucial role of keeping the drive flat.
If your motherboard doesn’t have the screw or standoff, look in the box—it might be in a small plastic bag. If your motherboard features an M.2 shield, you’ll need to find two screws that mount it to the motherboard.
Step 3: Prep for M.2 SSD installation
Now it’s time to touch something metal, like a metal furniture leg, in order to ground yourself, then grab a screwdriver. Unscrew the screw from the standoff and place it somewhere safe—you do not want to lose a screw, or have it roll around on your motherboard.
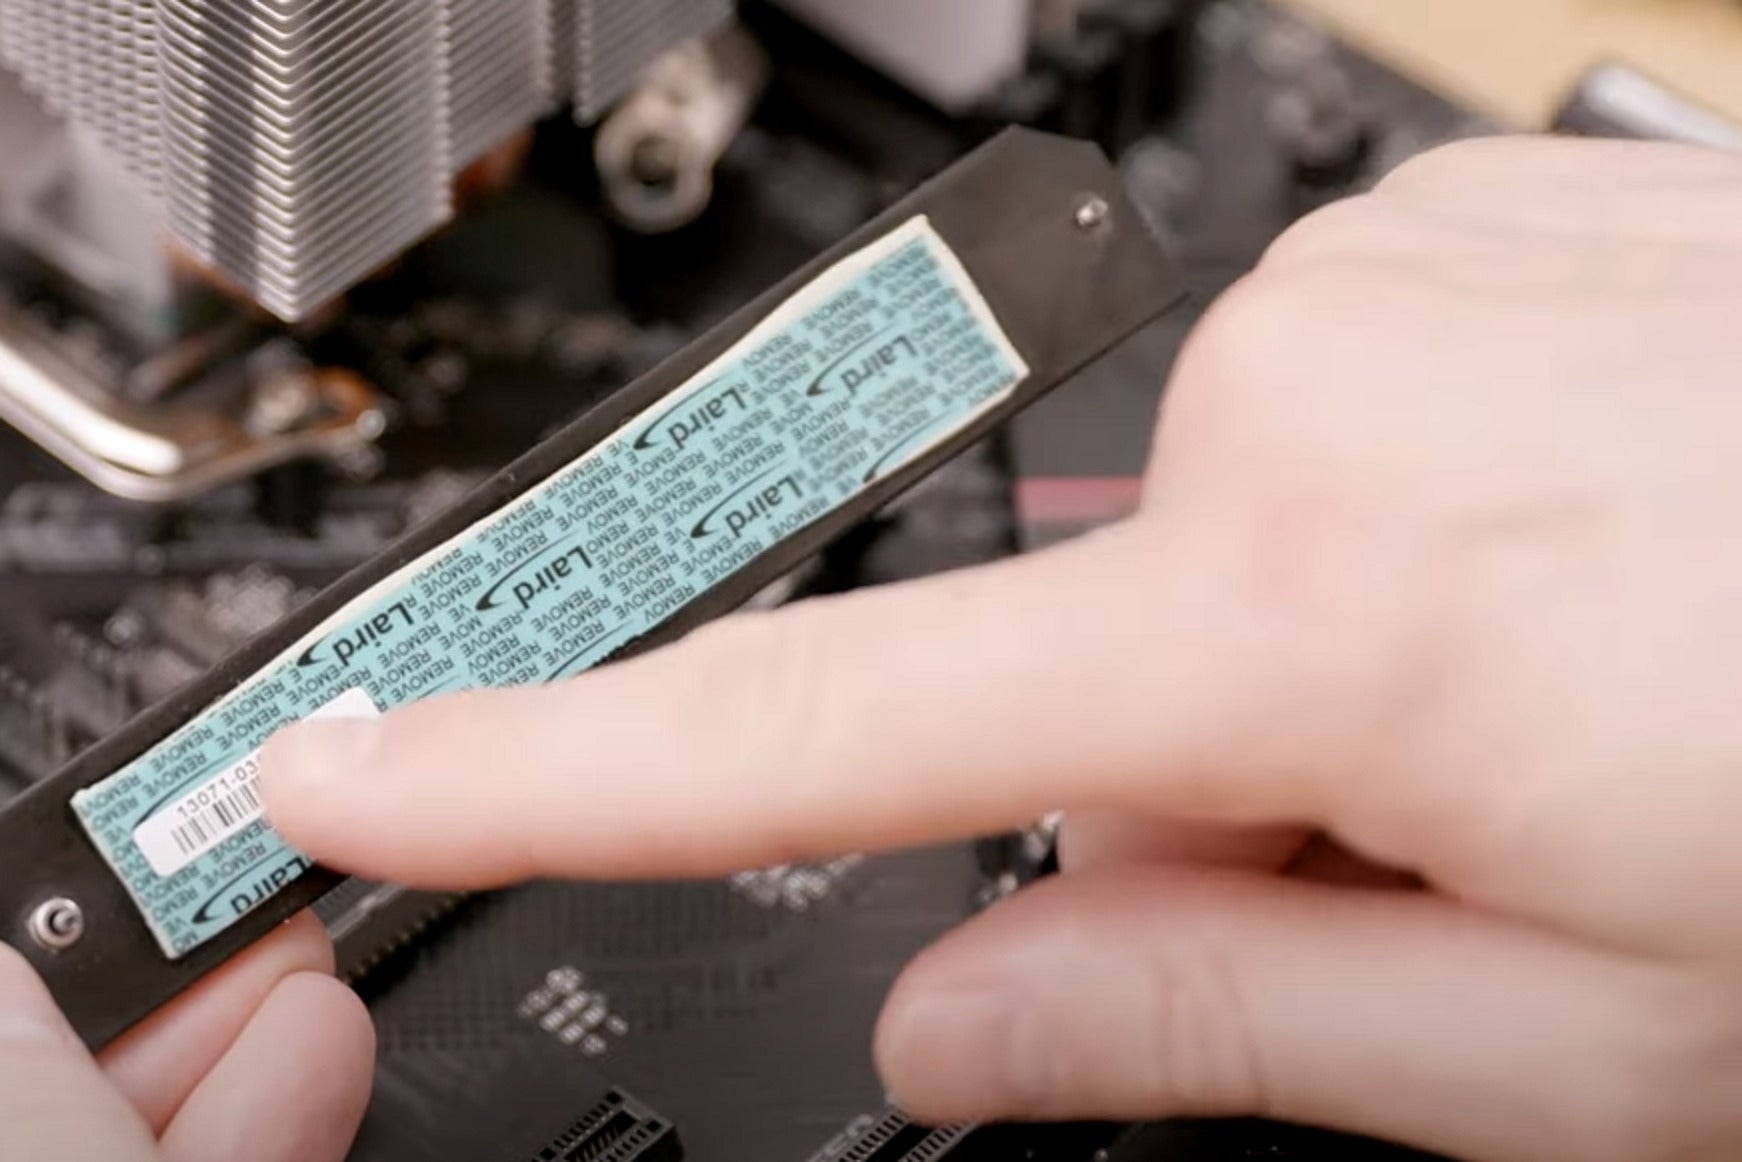
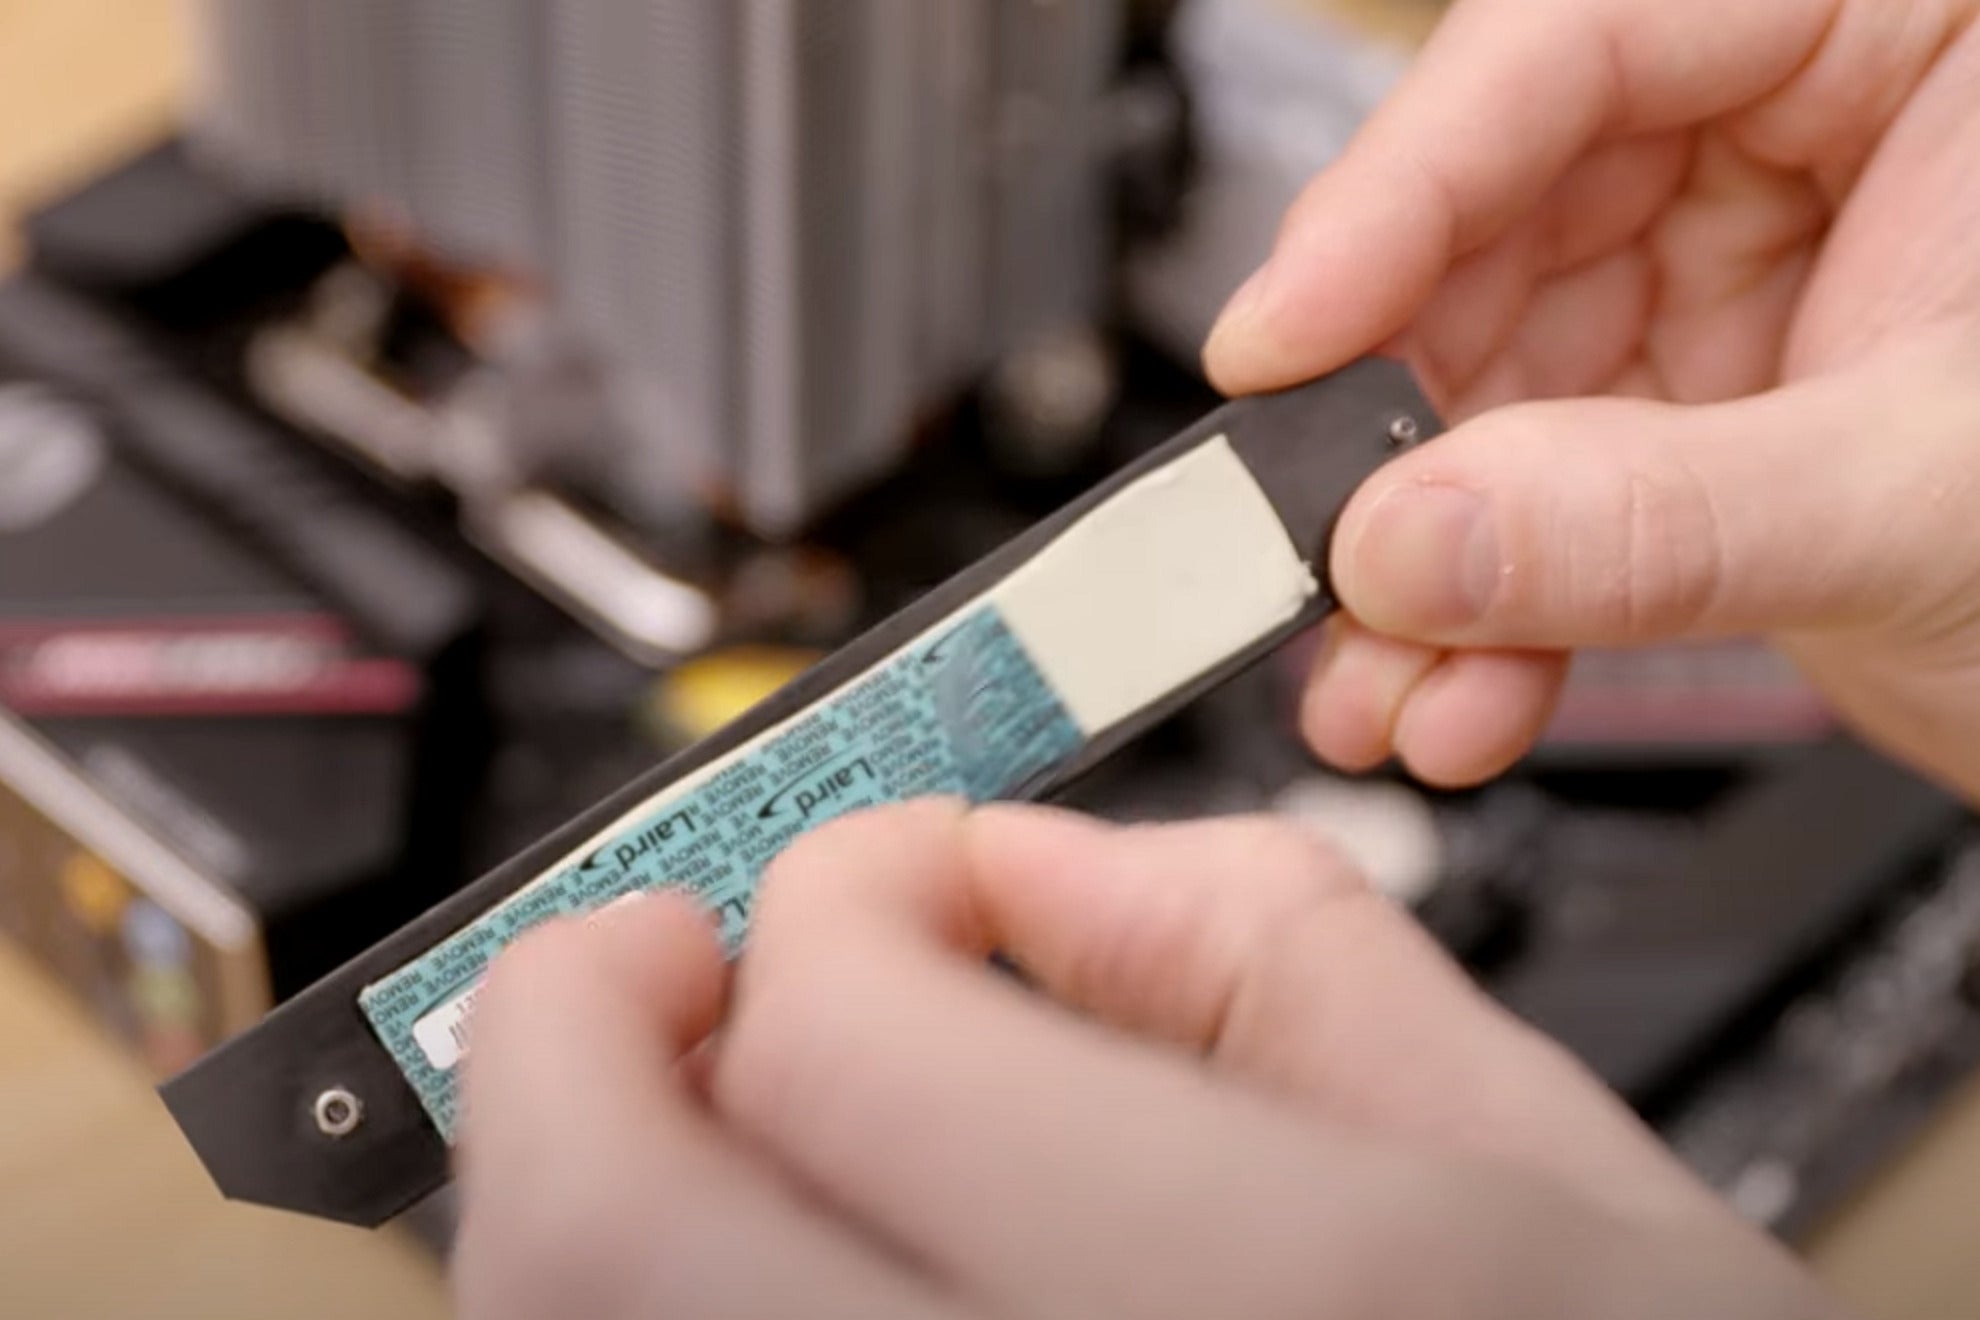
For those of you with a shield, unscrew it from the motherboard but take note of the underside, where there should be a thermal pad with a piece of plastic over it. Do not remove the plastic yet—just place the shield somewhere safe.
 Adam Patrick Murray/IDG
If your M.2 slot has a shield, check the back for a layer of thermal paste, covered by a small sheet of plastic. Leave that alone for now, and set aside the shield in a safe place for later use.
The most common M.2 size is 80 millimeters, but in any case you need to make sure the standoff is positioned correctly for your size of drive. Hover the drive over the slot and take note of the length. If necessary, use pliers to loosen the standoff and move it to the appropriate length position. Make sure the standoff is screwed in fully--not too tight, just snug. You don’t want it spinning while we are trying to install the screw.
For those of you with shields, you most likely don’t have a standoff. Instead there should be a squarish brace of some sort for the drive to rest on while the shield holds it in place.
Step 4: M.2 SSD installation
 Adam Patrick Murray/IDG
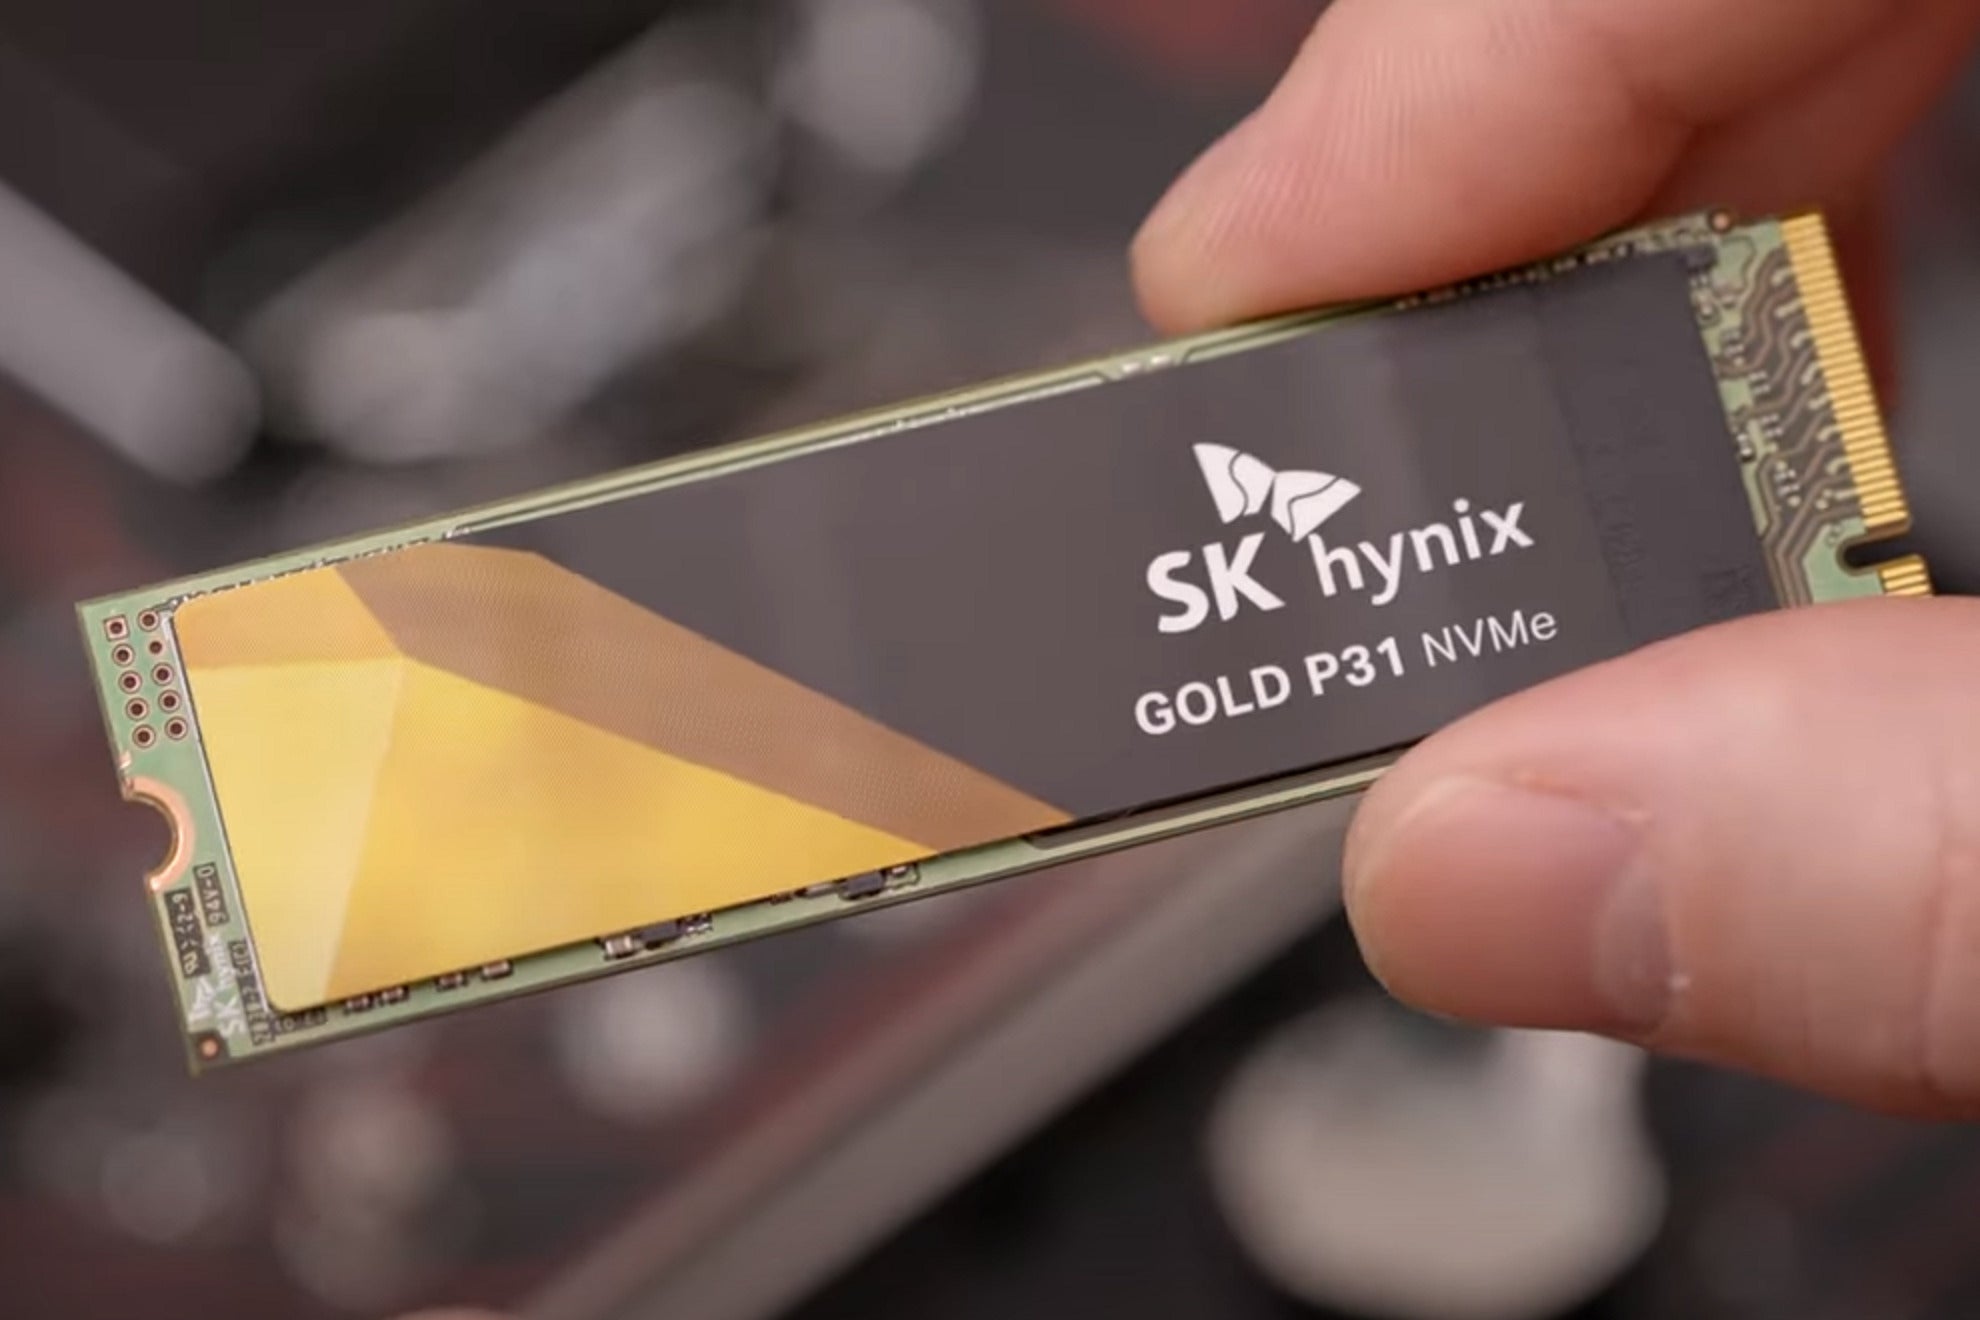
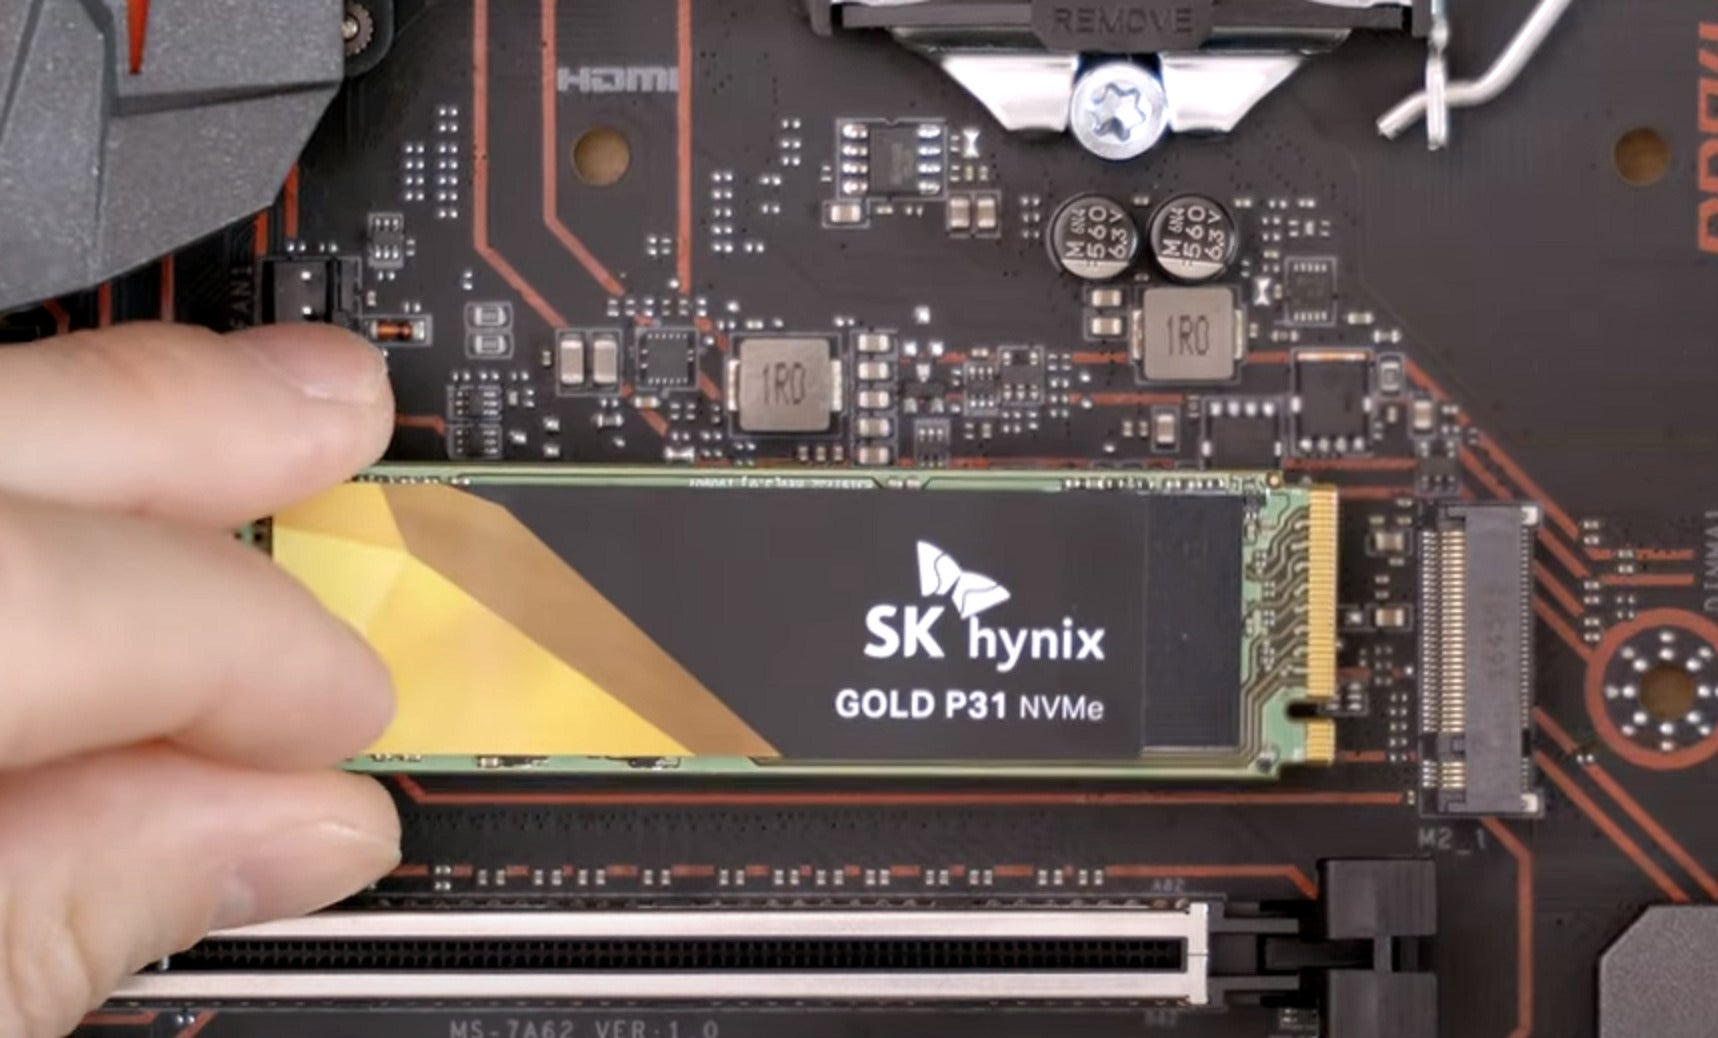
The top of the M.2 SSD is the side with the label on it. At the left, you can see the semi-circular notch for the motherboard screw. At right, you see the gold contacts for the M.2 slot.
The next step is to insert the drive. Consider the “top” of the drive to be the side with the brand’s label or sticker. The edge with the semi-circle notch is what’s going to be held in place by the screw. The edge with gold contact points is what we insert into the M.2 slot.
There’s a tiny notch dividing the contact points into two sections. You’ll want to line up that notch with a notch inside the M.2 slot, with the top of the drive facing up. Insert the drive firmly at about a 15-degree angle until there’s no more give, and let go.
 Adam Patrick Murray/IDG
Line up the contacts on the SSD with the contacts on the M.2 slot. Note the tiny notch, which also needs to line up with the slot.
If you have a screw and standoff-based system you’ll want to press down on the drive so that it lies flat, and the semi-circlular notch lines up with the standoff. While holding the drive flat, insert the screw and tighten to a comfortable point. Take care not to overtighten, or you risk damage to the drive, the screw, or the motherboard. If you’ve installed it correctly, the drive should not shift in place at all.
 Adam Patrick Murray/IDG
Align the semicircular notch on your SSD with the standoff, and tighten the screw carefully into the standoff so the SSD doesn’t move. Do not overtighten, or you could damage something important!
For those of you with shields you’ll have a bit more to wrangle, so take your time through these next steps.
Because there is no screw to keep the drive flat, you’ll have to hold it down while you place the shield over it, or get help from someone who can hold it flat while you handle the shield. It might help to do a dry run before you remove the plastic sheet from the thermal pad—just be sure to not leave that plastic on permanently!
 Adam Patrick Murray/IDG
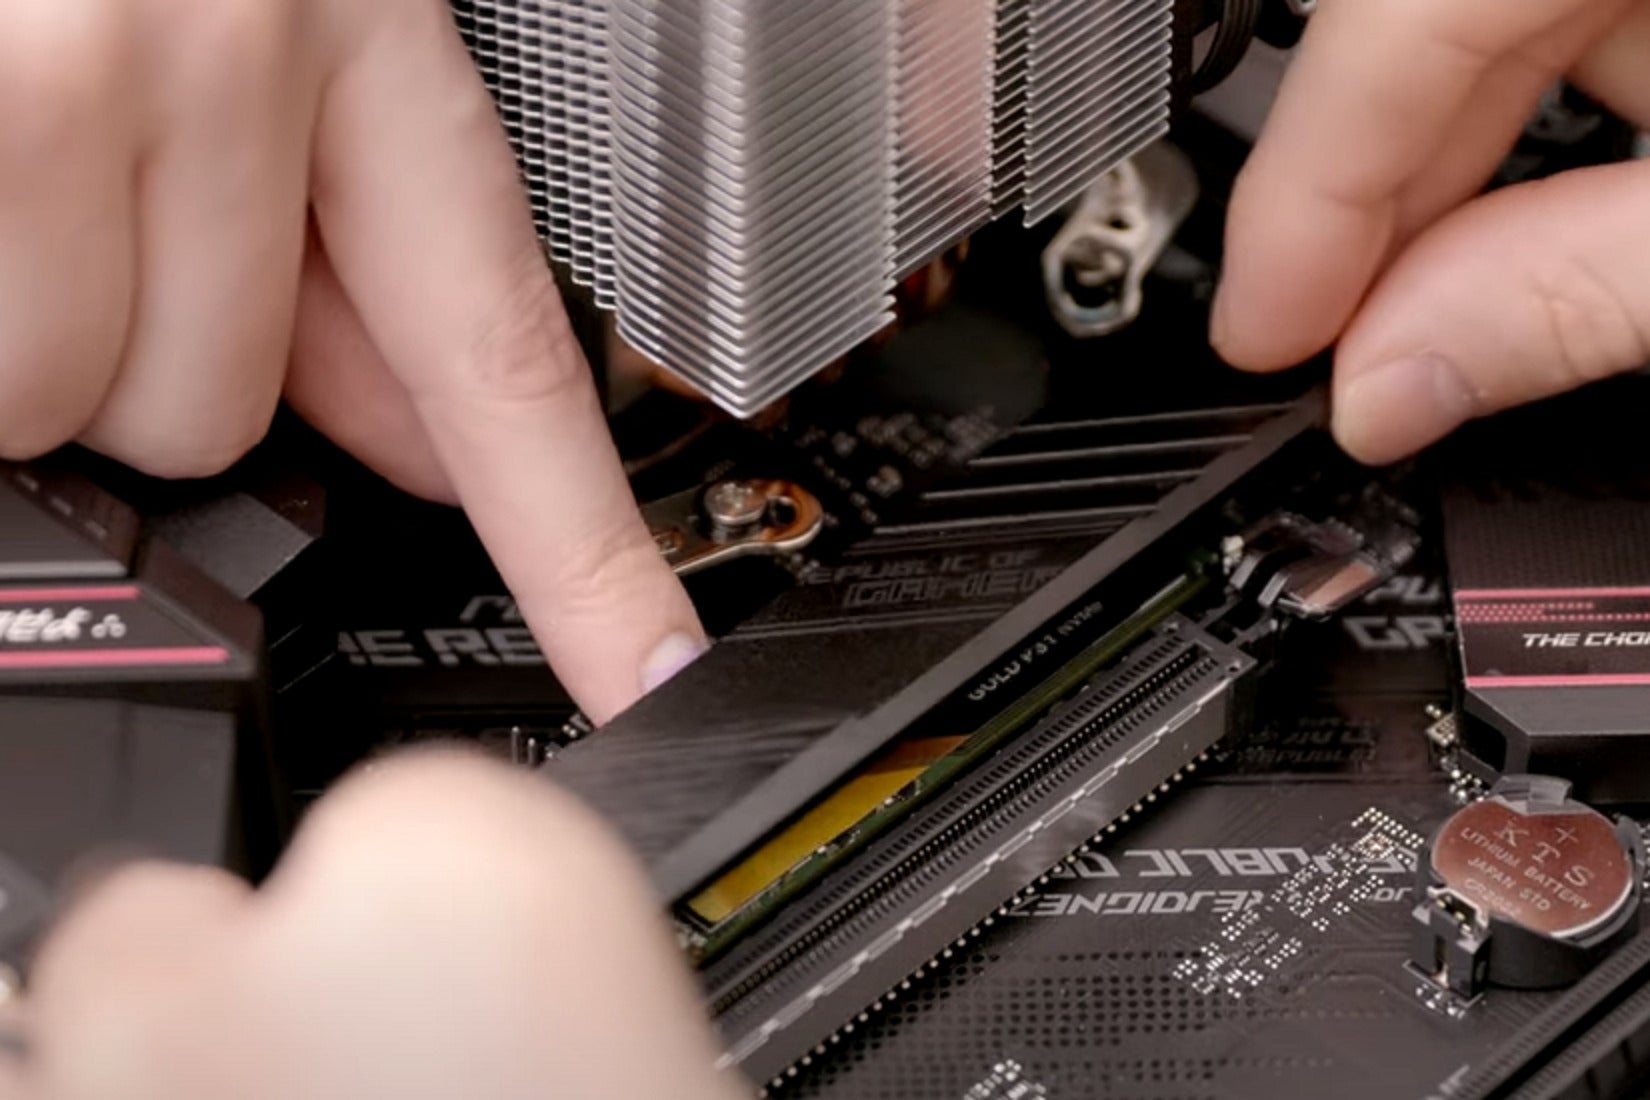
Remember to remove the plastic sheet from the thermal paste before you install the shield over the SSD.
When you are ready, take the plastic off and lower the shield straight onto the drive. It’s important to lower it straight onto the drive, because the thermal pad is tacky and may cause the drive to slide out of its slot if you shift it after it’s adhered to the shield. If that does happen, don’t panic: Carefully remove the SSD from the thermal pad and start over.
The hardest part here is lining the screws up to the standoffs. One trick is to hold the screws in place on the shield as you lower it. This allows the screws to touch the standoffs before the thermal pad touches the drive.
 Adam Patrick Murray/IDG
It helps to have a friend hold the SSD flat while you pay attention to lowering the shield over it and carefully aligning and tightening the screws. Feel free to practice a few times before you expose the thermal paste and do it for real.
Once the screws are lined up, lower the shield into place and tighten the screws. Again, no need to overtighten them--it just needs to be snug.
M.2 SSD Install: Final Notes
 Adam Patrick Murray/IDG
Some M.2 SSDs come with their own heat sink.
The last thing to note here is that some M.2 SSDs feature their own built-in heat sink. An Adata XPG Gammix S70 drive we reviewed had a heat sink so big, it made the drive a challenge to install. Most of the ones we’ve tested are less obtrusive.
If your motherboard has a shield you don’t want to place that over the included heat sink. Just store the shield somewhere safe in case you need to use it in the future.
Next, we dive into installing a 2.5-inch SATA SSD.
Page Break
How to install a 2.5-inch SATA SSD in a desktop PC
 Adam Patrick Murray/IDG
A 2.5-inch SATA SSD can be installed in a desktop PC in a variety of ways.
Now let’s move on to installing a 2.5-inch SATA SSD. This installation is much more dependent on the PC case you are using and where you want to place it, so there’s an endless variety of possibilities.
Instead of an exact step-by-step guide, we’ll cover the basics that will always apply to every installation. Once again I’m assuming you already have a drive in hand, if not check out our roundup of the best SSDs.
 Adam Patrick Murray/IDG
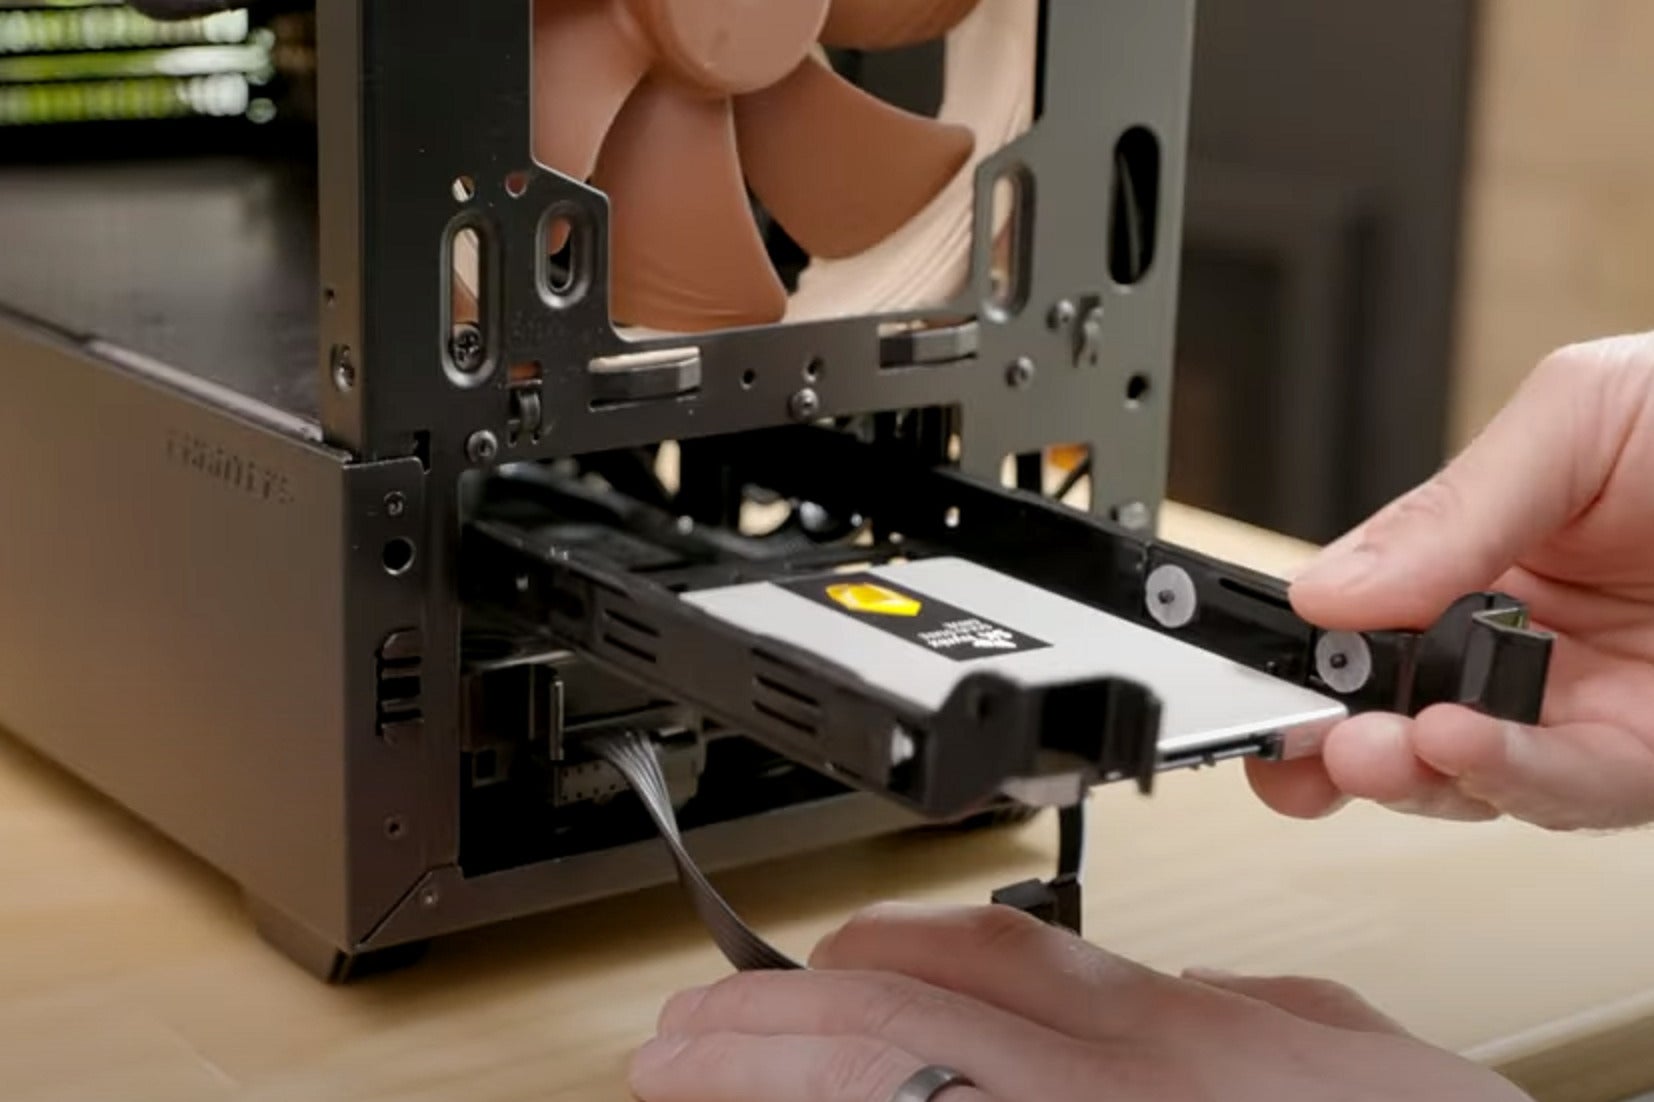
If you install a 2.5-inch SATA SSD in a drive bay, you can usually jut slide it into the PC.
The two most common options for installing the drive in a PC is either to put it in a drive cage or to secure it to the case itself. Drive cages usually have some sort of method to attach the drive to the tray, and the tray slides into a cage.
 Adam Patrick Murray/IDG
You can attach a SATA SSD directly to your desktop case.
Mounting it to the case can involve either screwing the drive to the metal, or putting the drive into a tray first and then attaching it. Either way take care to make sure you have enough cable length to safely route the cables inside the case.
Installing a 2.5-inch SATA SSD: Required cables
 Adam Patrick Murray/IDG
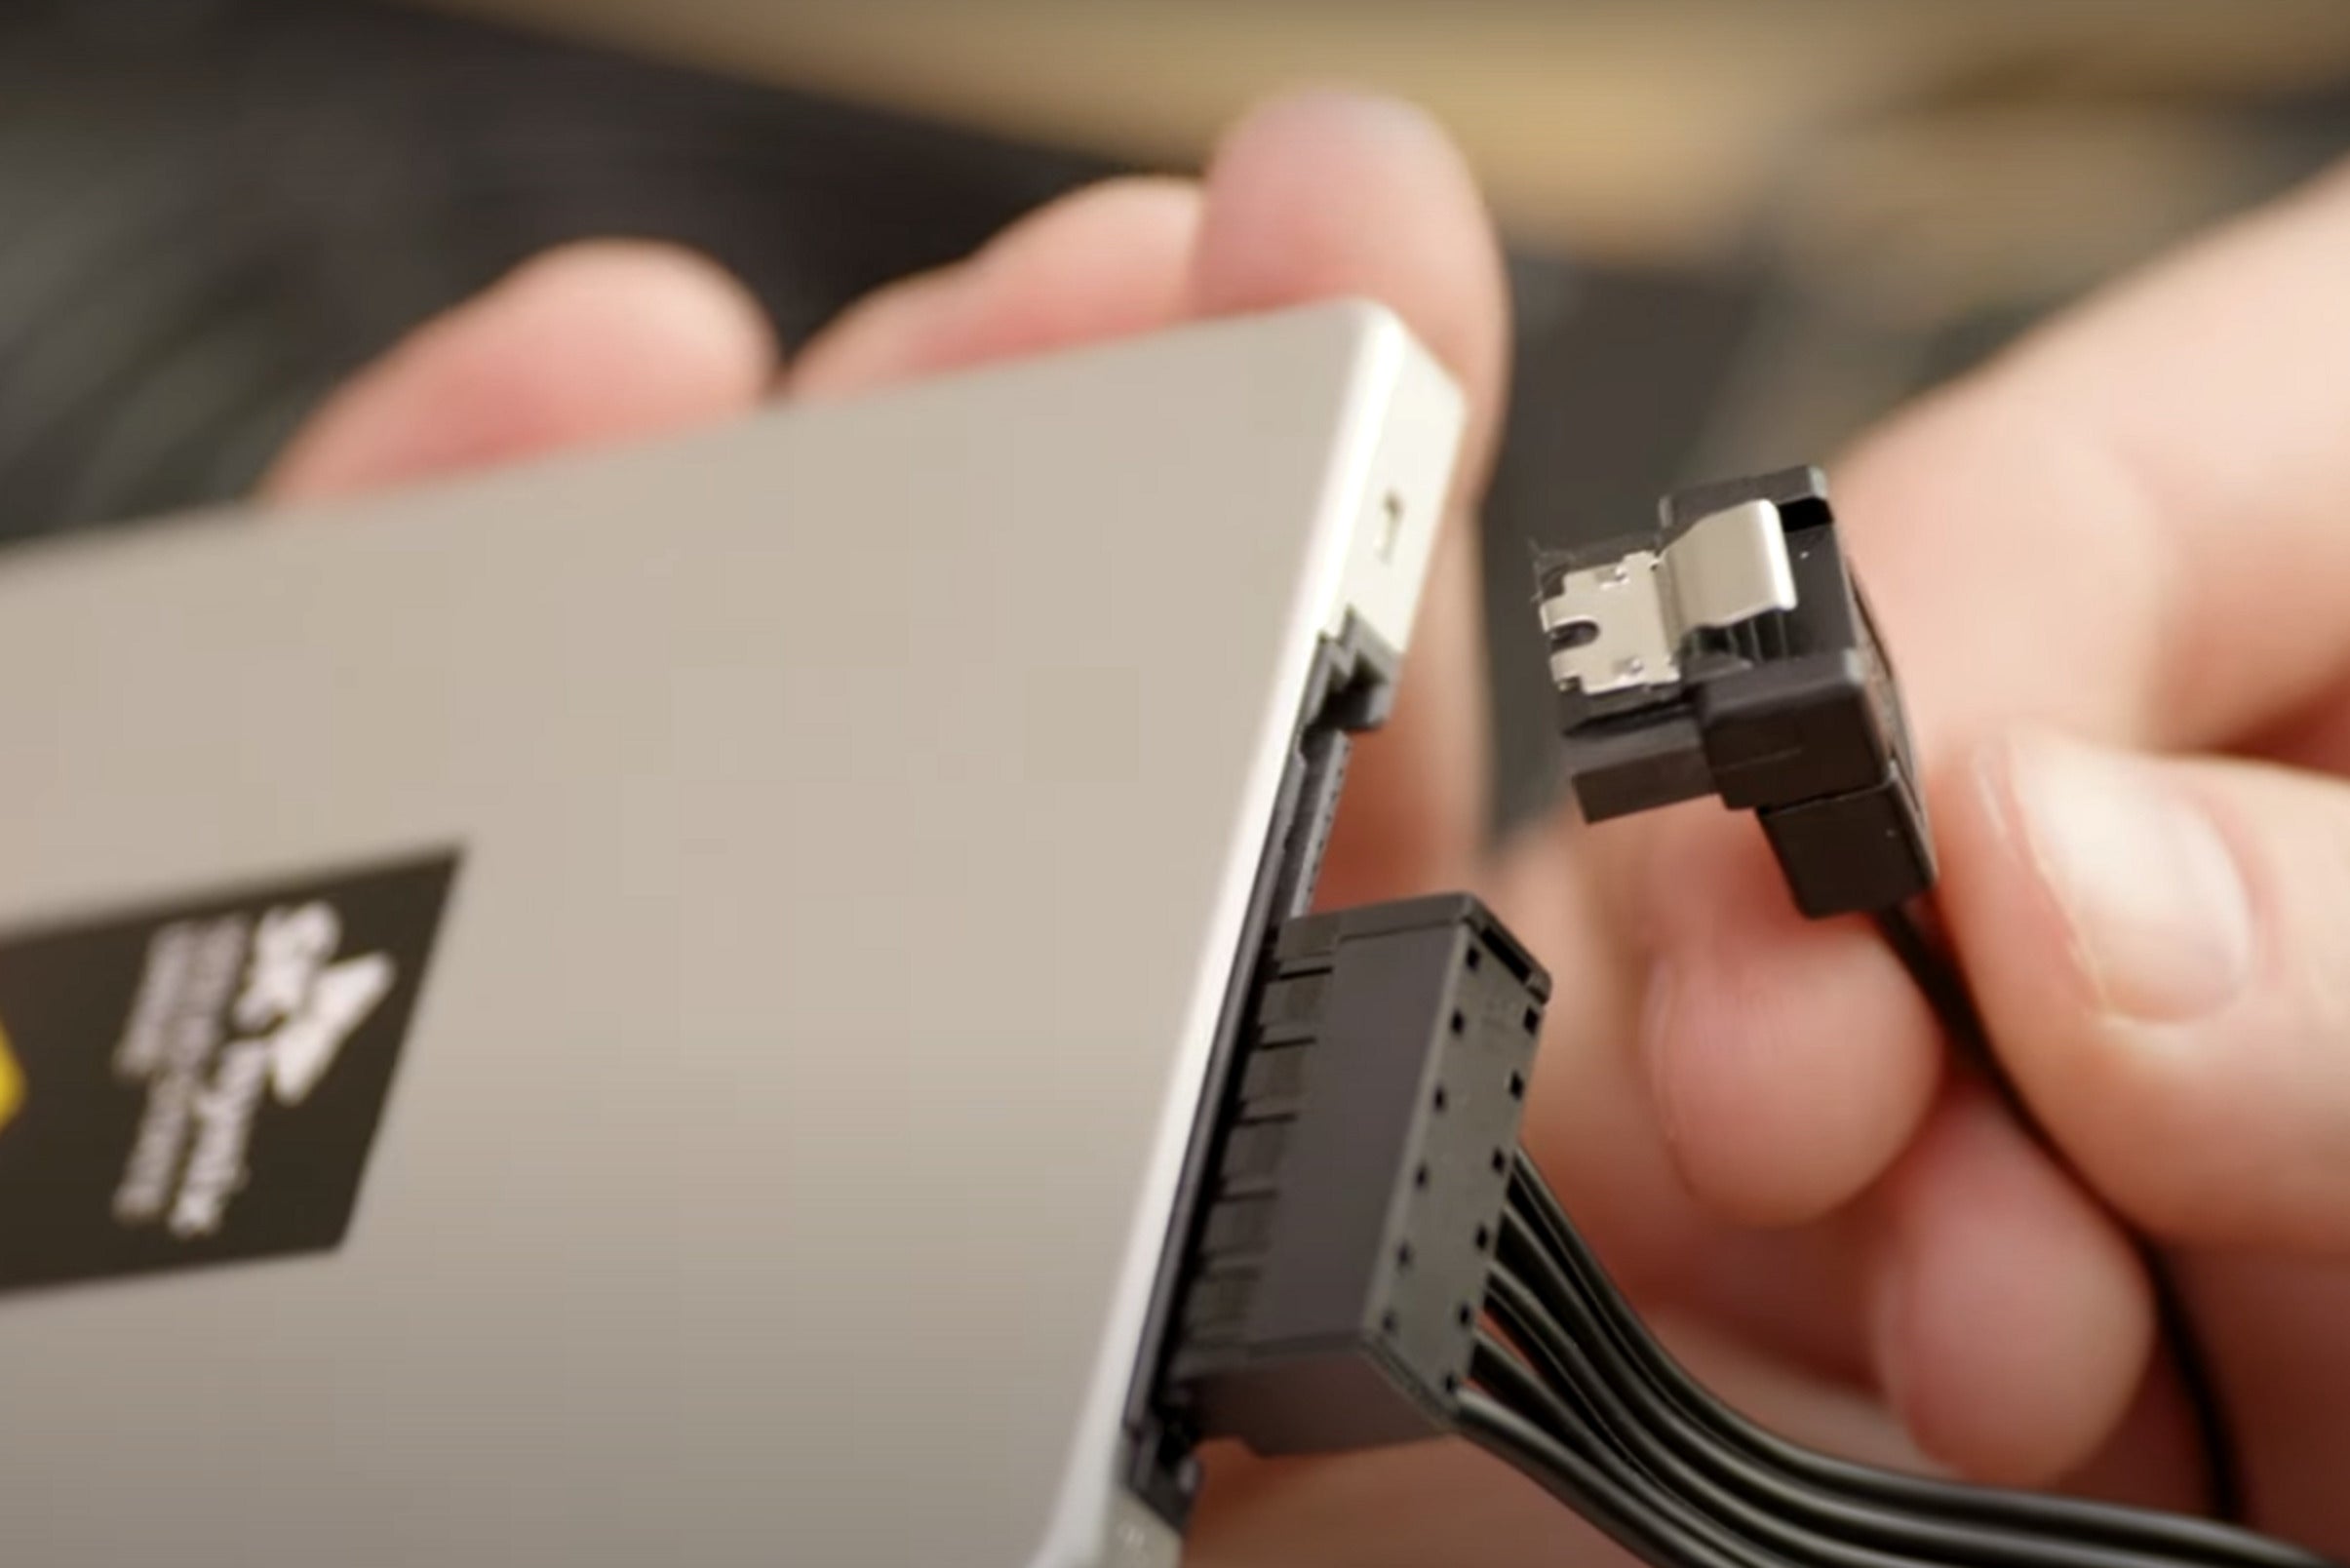
A SATA SSD needs two cables: One for data (top) and one for power (bottom).
When installing a 2.5-inch SATA SSD you will always need two things: a SATA data cable and access to a SATA power cable. Most motherboards include a SATA data cable, which is used for data transmission from the drive to the motherboard. Look for a long, thin, and flat cable—sometimes with an L-shaped connector at the end.
The SATA power cable, which provides power to the drive, will be included with the power supply. It usually has multiple connectors.
Installing a 2.5-inch SATA SSD: Attaching the cables
 Adam Patrick Murray/IDG
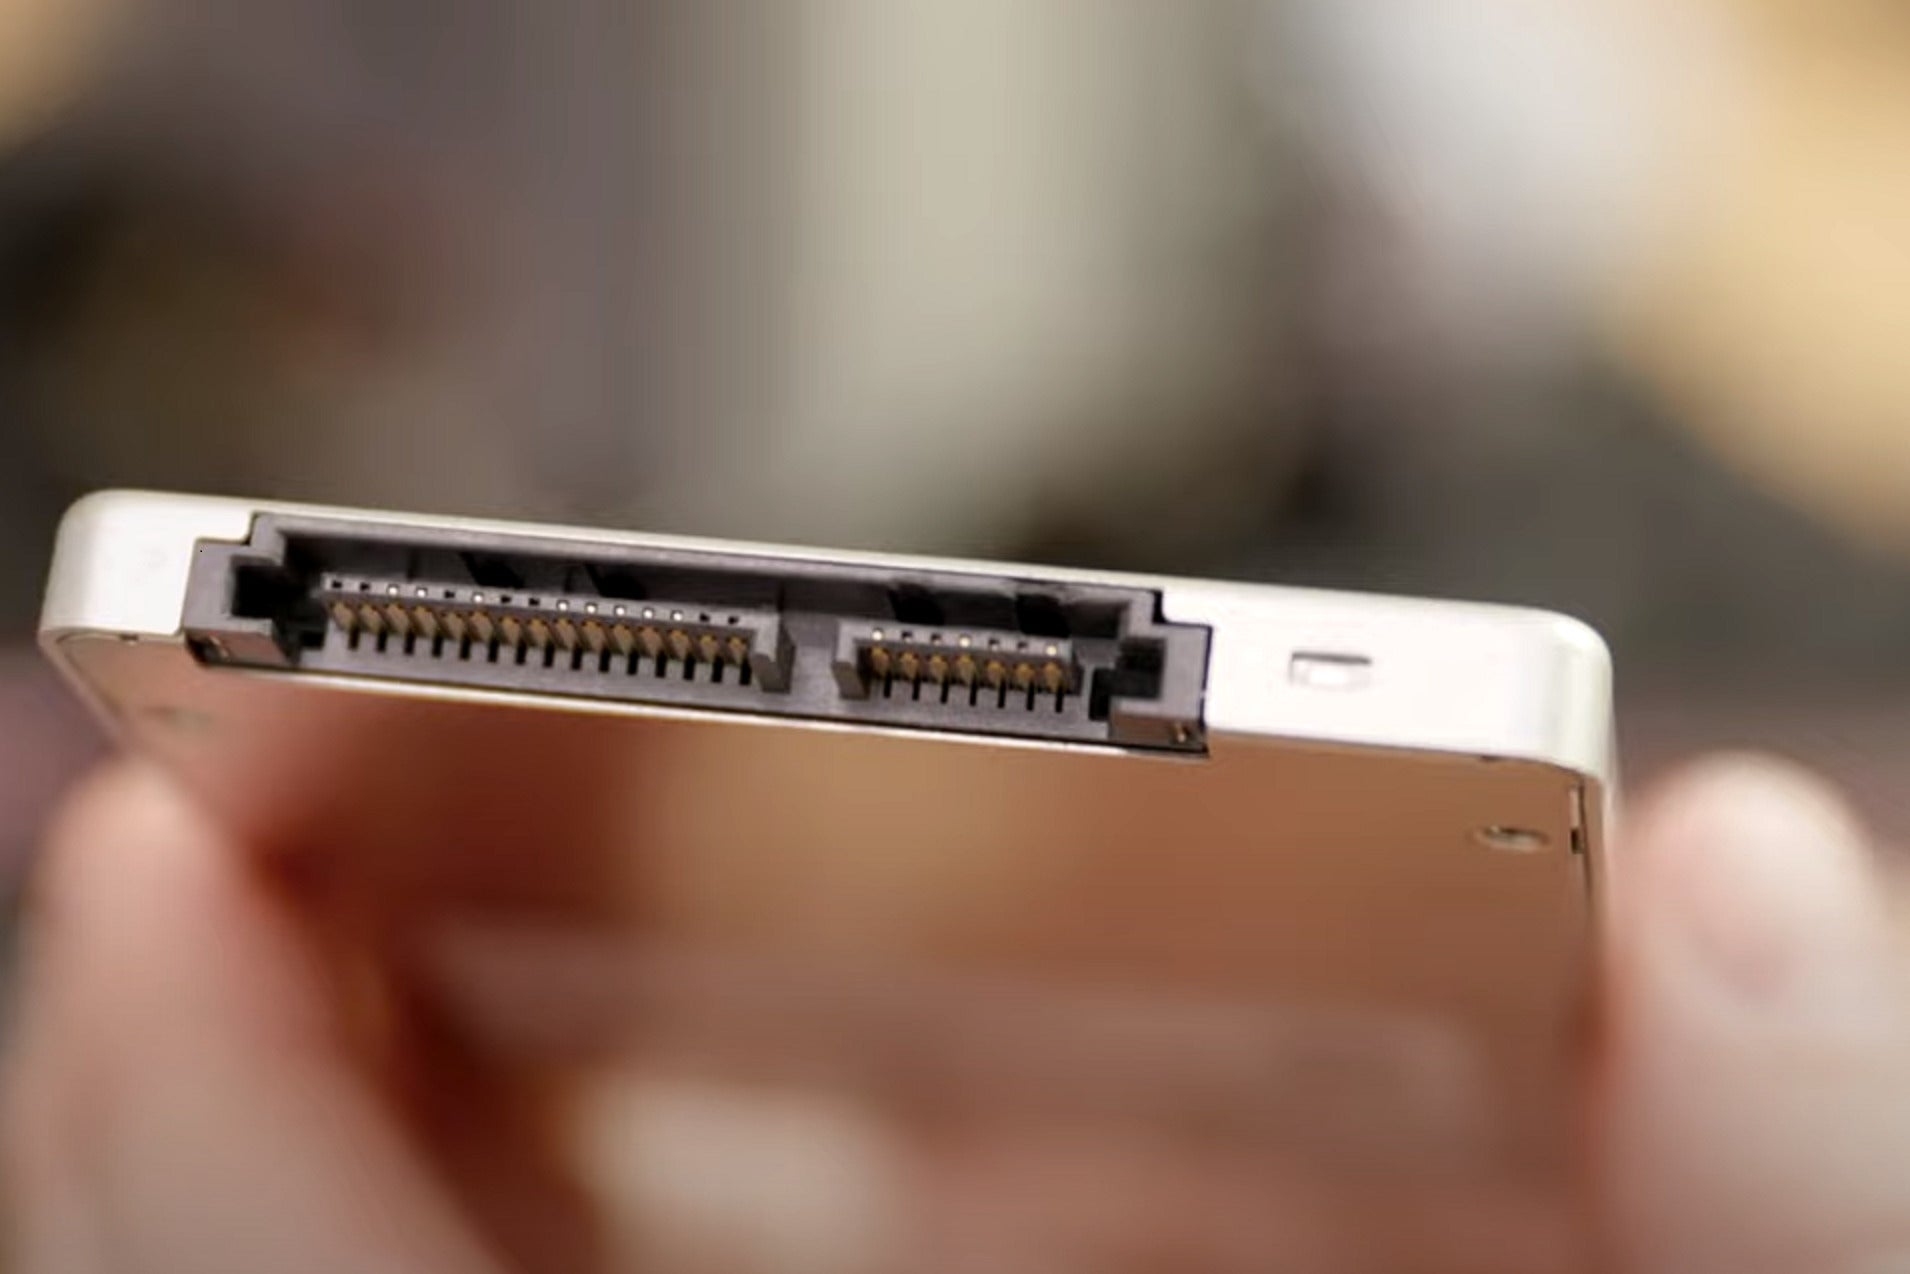
The SATA SSD has connections for power (left) and data (right) cables.
In order to use the SSD you will need to have both cables attached and secured to the drive at all times. Depending on where you install the drive in the case it might be easier to plug the cables in before you mount the drive.
Plugging in both cables is simple: Look for the end of the drive that has the connections, and note there are two. The shorter port is for the interface cable, and the longer port is for the power cable. If you look closely, each port is keyed with a tiny notch that indicates the correct orientation for the cable to plug into.
Because of this there is only one way to install the cable, so line them up and insert firmly. The interface cable includes a primitive locking mechanism that gives a subtle click when inserted. The power cable does not lock in, so be sure to press it in all the way for a secure connection.
Installing a 2.5-inch SATA SSD: Connection to Motherboard
 Adam Patrick Murray/IDG
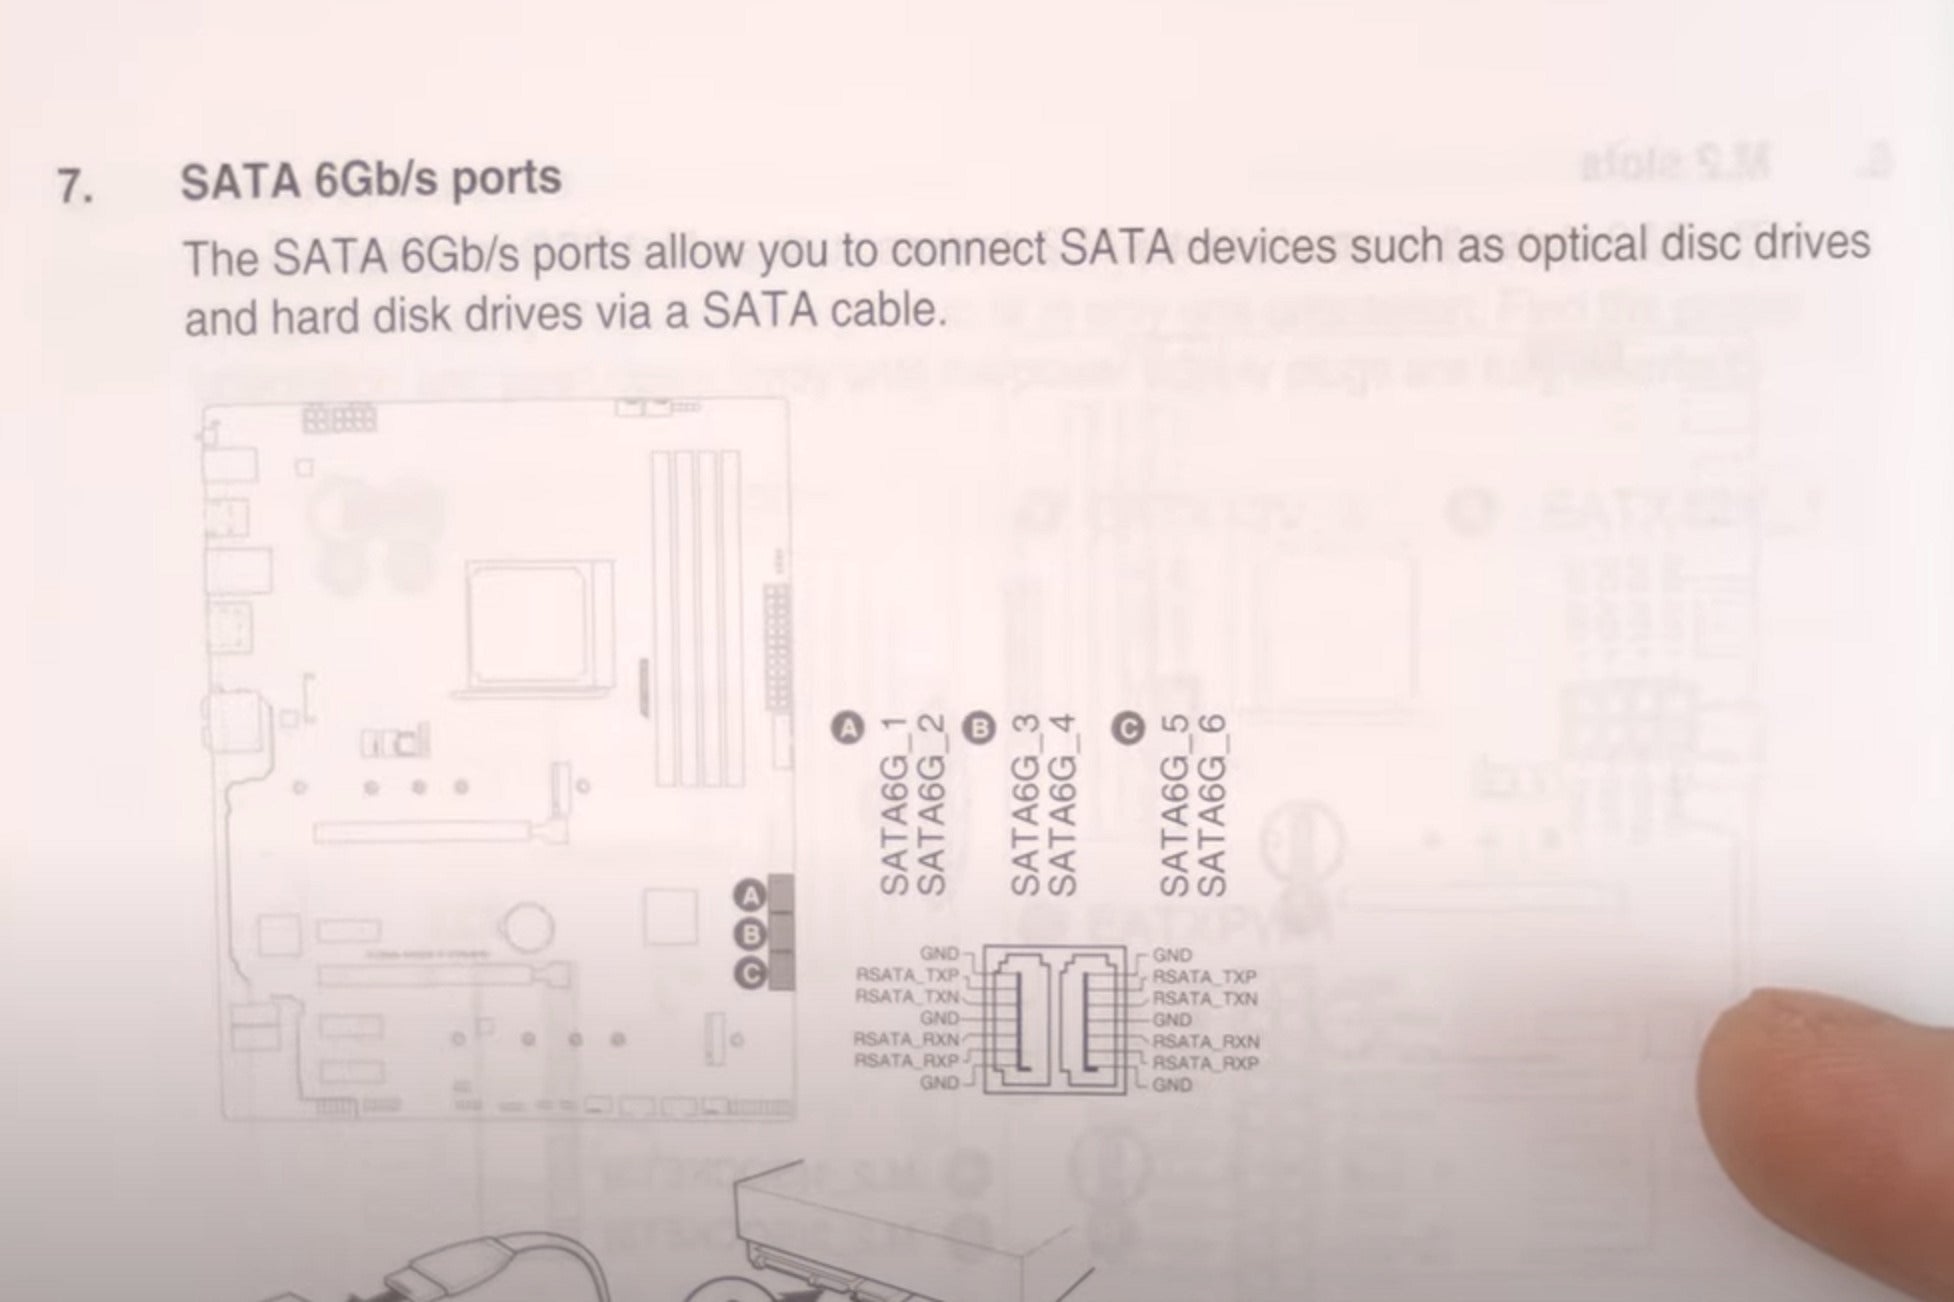
The SATA ports are detailed in the motherboard manual. You'll likely want to plug into the SATA-1 port.
The interface cable will then need to be plugged into the motherboard. There will most likely be multiple ports to choose from, so now is another time you should consult your manual.
You’ll need to find where the manual refers to the SATA ports on your motherboard. To get the maximum bandwidth out of your SSD you’ll want to connect to the SATA 6Gbps ports, but the slower 3Gbps ports will work fine as well.
 Adam Patrick Murray/IDG
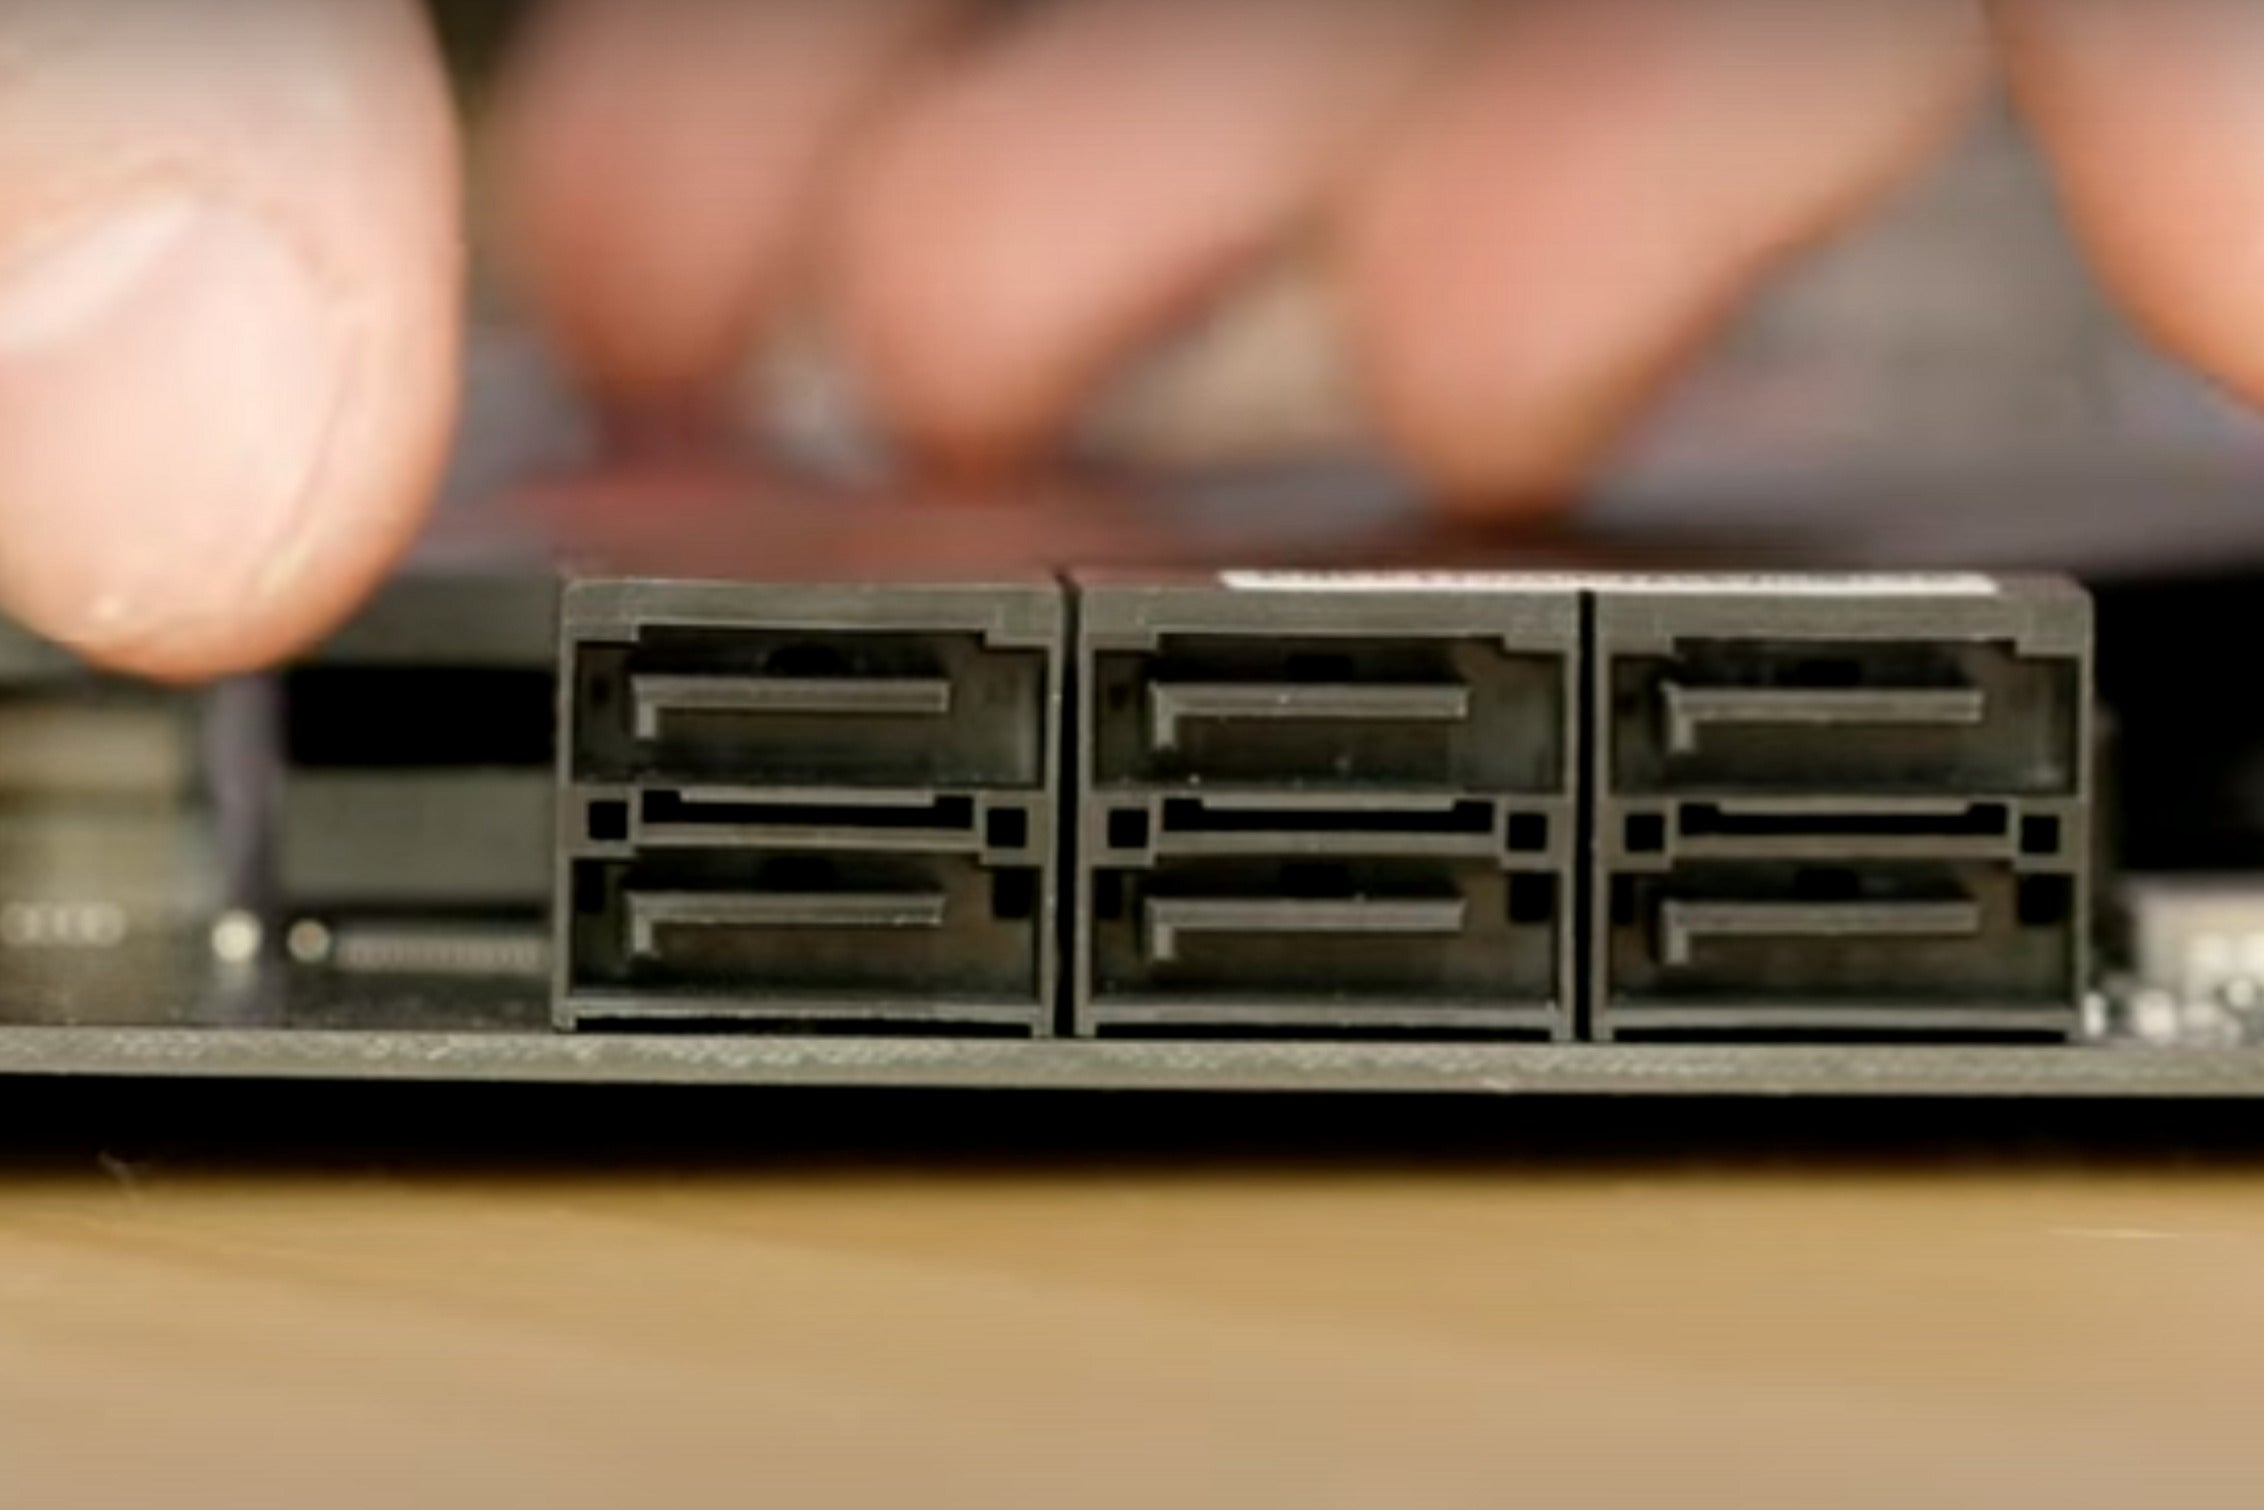
Your motherboard might have a stack of SATA ports. Check your manual to confirm which one is the SATA-1 port, the one you'd normally want to use for your SSD.
In this example you can see that this motherboard features six SATA 6G ports, and they are stacked into three columns of two ports. Typically you’ll want to use the ports in order, so if the numbering starts at one, choose that and identify which port it is on the motherboard itself.
 Adam Patrick Murray/IDG
This detail shows the data cable from the SSD plugged into the SATA-1 port on the motherboard.
On any remotely modern PC, the performance should be the same, but on an older PC the first port is usually the highest-performing. When the ports are stacked like this sometimes it can be a bit confusing knowing which number is which, so just take your time and look closely. This cable will lock into place, so after you insert it in enough you will hear a subtle click to know you are secure.
Installing a 2.5-inch SATA SSD: Final notes
As we close out SATA SSD installation, a few useful notes.
Some of the SATA data connectors feature an L-shaped plug, shown below.
 Adam Patrick Murray/IDG
When you install a SATA SSD, you might need to use the L-shaped data cable from your motherboard to fit into a tight space. It performs identically compared to the straight cable.
The L-shaped plug is useful for situations where you need to keep a low profile so the cable doesn’t get pinned somewhere. Both the L-shaped and the straight cables offer the same performance.
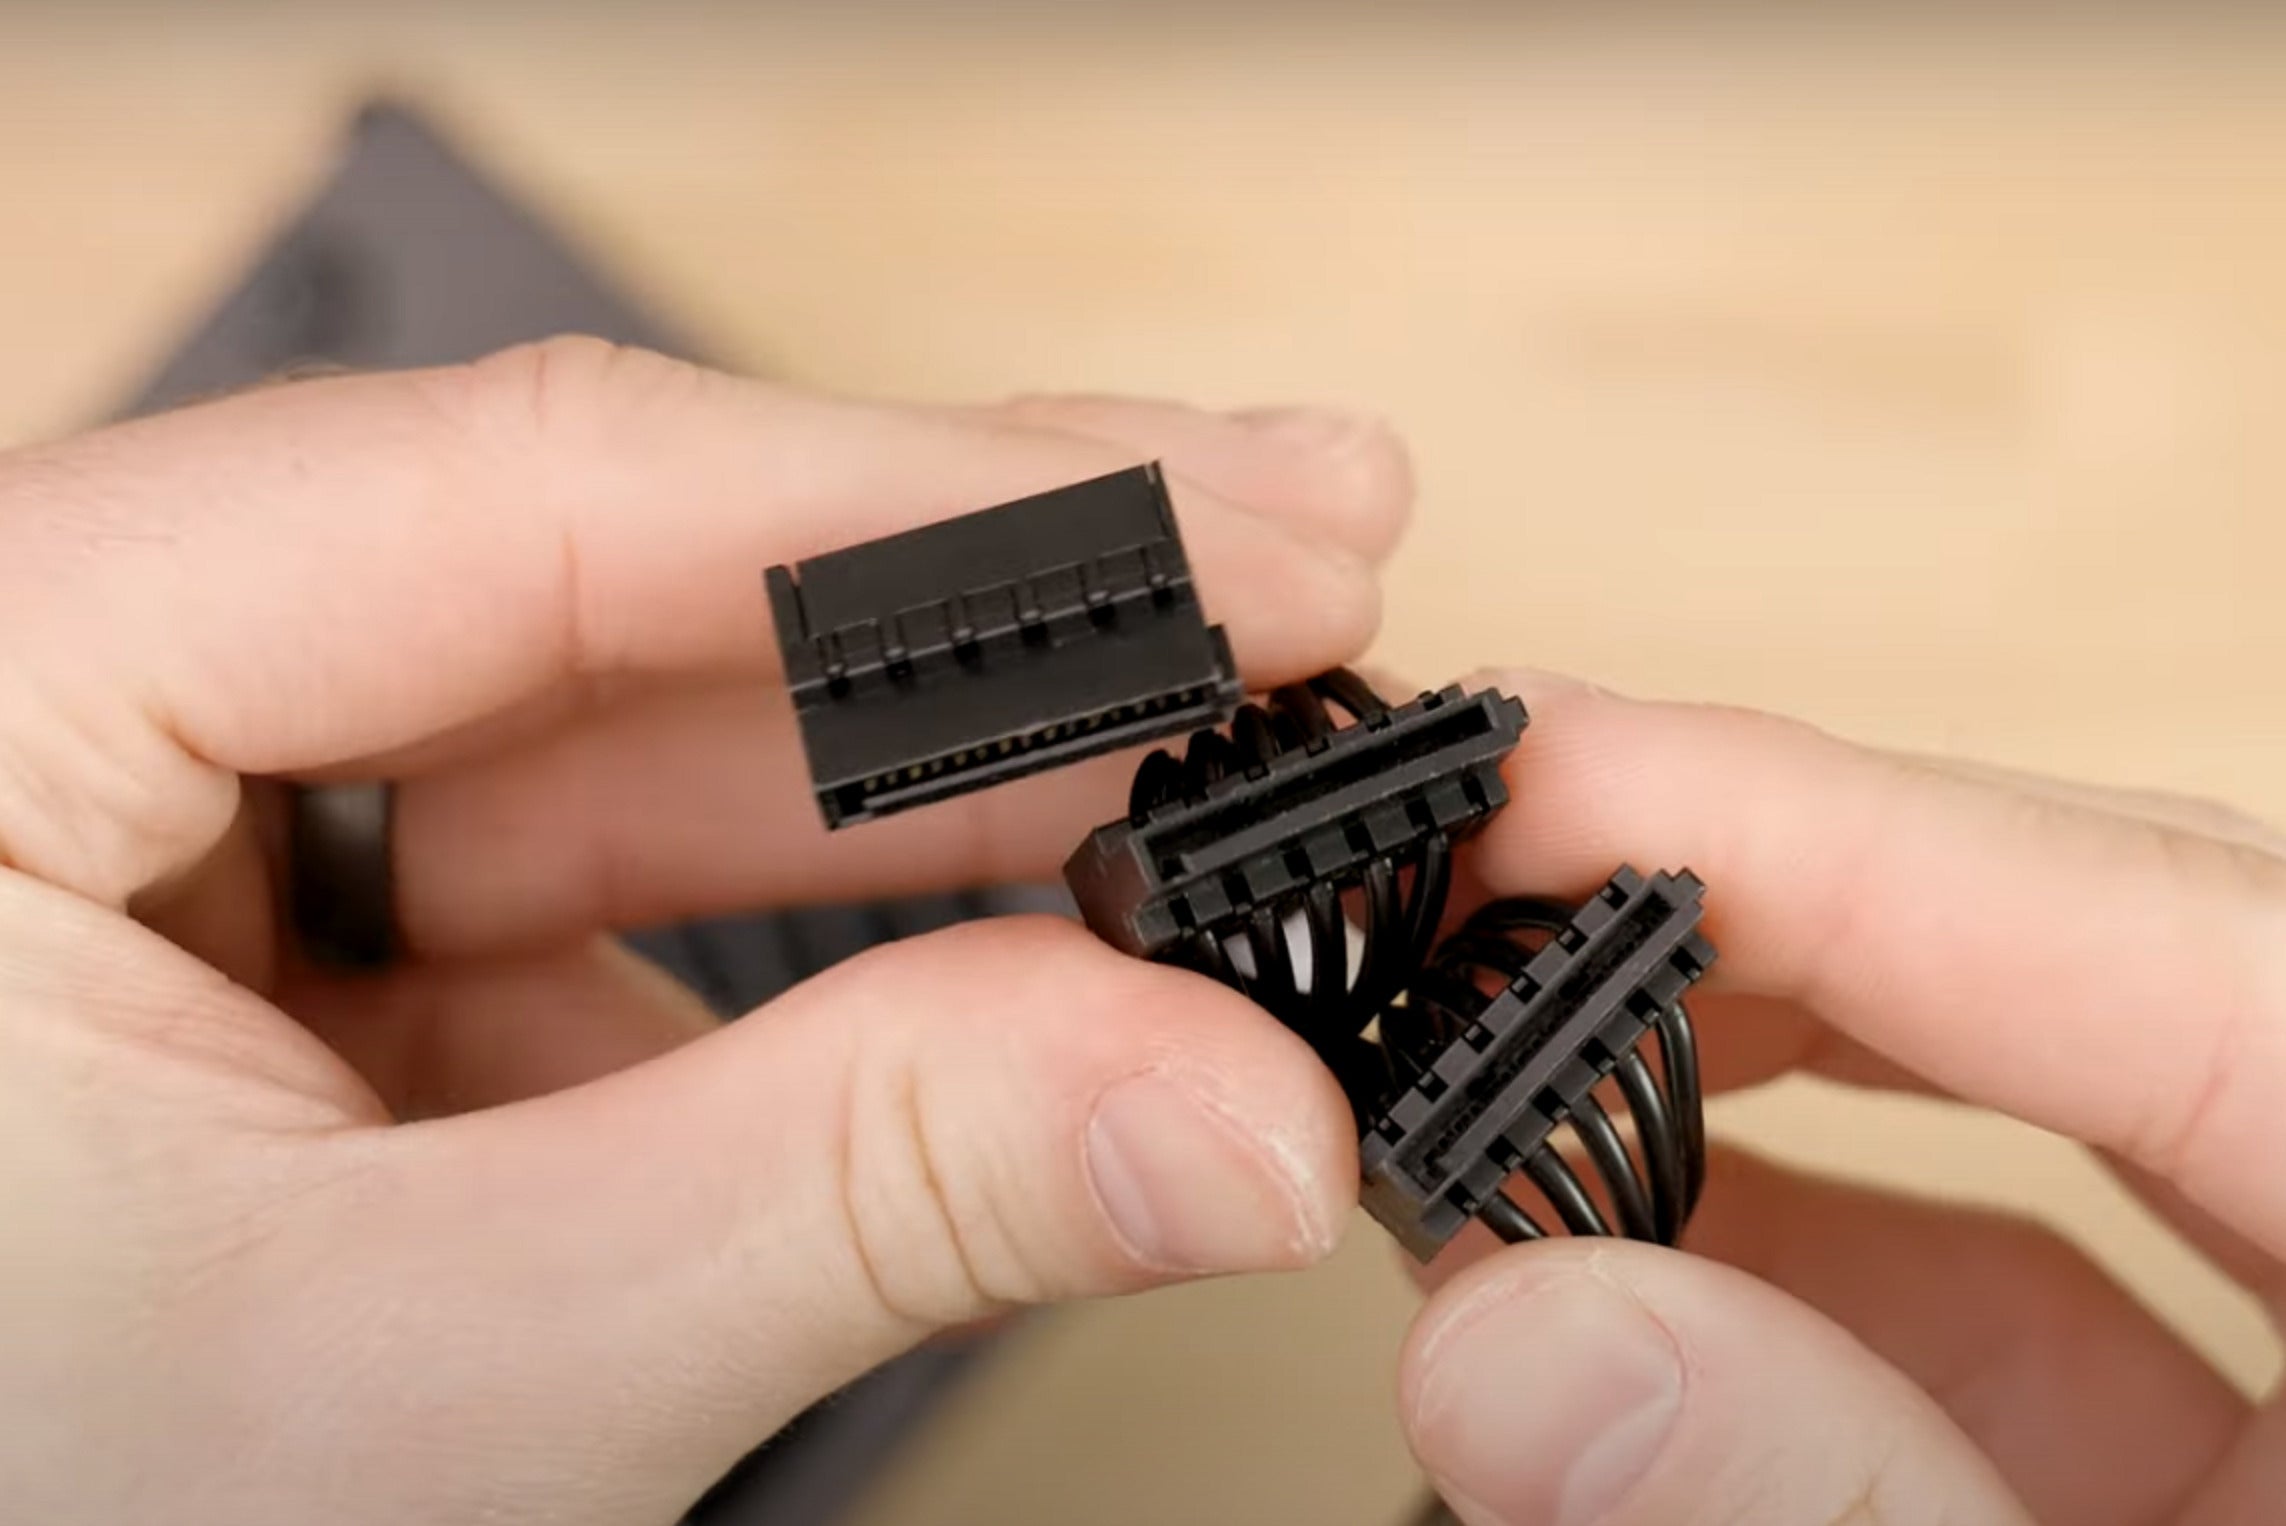
The SATA power cable will most likely have multiple ports on it. This is to allow you to attach multiple drives or peripherals onto the same cable.
 Adam Patrick Murray/IDG
The SATA cable from your power supply will likely have several ports so you may connect multiple drives via the same cable.
Which plug you use will depend on the length you need to reach to plug in the drive and whether that cable also needs to reach other ports. All the plugs will work just the same.
Finally, a Windows 10 tip! If you are installing both an M.2 and SATA SSD you might be confused as to which drive is which when it comes time to install Windows.
One way to get around that is to keep the SATA SSD unplugged while you're going through the installation process, so there's no option for installing Windows other than the higher-performance NVMe SSD. After you're up and running, plug the SATA drive back in, format it, and you're ready to roll.


