DotPDN's Paint.net is a free photo-editing software program with a lot to offer, especially for the zero price tag. I know it’s not Photoshop, Paint Shop Pro, Corel Painter, or Affinity, which have so many hundreds of features, it takes years to learn them all. But it does have the basic skill set to edit your photographs, it’s intuitive, and it’s easy to use.
Note: be sure to click the link to getpaint.net provided here and above. Searching for Paint.net online could lead you to sketchy downloads that might have bloatware or worse hitchhiking on the file.
The editing features include:
- Red eye removal
- Add or Reduce Noise
- Sharpen or soften images
- Input/Output Histogram for managing the tonal values of your image
- Adjustments for Brightness, Contrast, Curves, Hues, Saturation
- Invert Colors
- Posterize
- Black and White, and Sepia toned images.
- The Special Effects filters clock in at 35, which can be combined to create additional effects.
The one big problem is the Lasso tool. Unlike Photoshop and its cousins, Paint does not have a Polygonal or Magnetic Lasso, so selecting objects is NOT an easy task.
 JD Sartain / IDG Worldwide
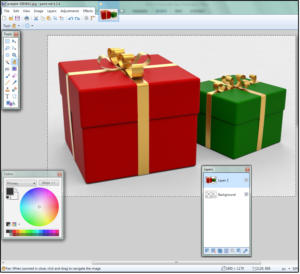
Paint.net desktop canvas and menus
Using the Lasso Tool
With a little practice, you can master the Lasso tool using the Crtl and Alt keys with the mouse.
Press and hold the Ctrl key while you outline the target object. As long as the Ctrl key is pressed, you can start and stop the Lasso until the entire object is selected. If the selected area exceeds the object’s boundaries (in other words, if you have “drawn” outside the lines), press and hold the Alt key with the mouse to deselect the unwanted areas.
Use the Magic Wand
Use the Magic Wand to select large areas, then use the Lasso to refine the selection. If the Wand selects too much, decrease the Tolerance Level from 50 down to 40, 30, 20, etc., until the selected area is smaller and more manageable. If the background is less cluttered than the foreground object, use the Magic Wand to select the background, then select Edit > Invert Selection (Ctrl+I) to make the foreground object active.
Working with layers
If you cut the foreground object out of the background, you have to choose Layers > Add New Layer (Ctrl+Shift-N) before you paste the object back onto the canvas. Unlike Photoshop and its cousins, which automatically create a new layer as soon as you choose Paste, Paint requires you to add new layers for each object you cut out and then paste back in.
To reselect a previous layer, click/select the layer in the Layers palette, then click anywhere on the canvas. The selection outline surrounds the entire canvas, so it’s hard to determine exactly what’s selected. Choose the Move Selected Pixels tool (top right on the Tools palette). When the cursor changes to a cross with arrow points on the ends, position the cursor anywhere on the selected object, then hold down the mouse button, and drag the object to its new location.
 JD Sartain / IDG Worldwide
Use the Lasso tool or the Magic Wand to select target areas
Backgrounds
To edit the background (change the color, add a pattern or design, or just remove it), click the background layer on the Layers palette, then choose a new background. Select a color from the color palette or use the Color Picker to choose a color from the existing image. Select the Paint Bucket from the Tools palette and click the background to fill with the new color.
Notice the background layer is not a solid canvas. There’s no color on the area behind the foreground object. So what if you want to move or resize the foreground object? You have to select and fill the entire canvas.
First click the background layer on the Layers palette. Choose Edit > Select All (Ctrl+A), then choose the Paint Bucket again and click the canvas background.
Resizing tips
Resize the foreground object without resizing the entire image is another tricky task that’s nothing like the other photo-editing programs.
First you have to select the layer in the Layers palette, then use the Rectangle Selection tool to draw a selection outline around the foreground object. Select the Move Selected Pixels tool and notice that eight circular handles appear in the corners and mid sections of the selected area. Move the cursor (which turns into a hand) to one of the corners, then click the mouse, and drag the foreground object up or down to resize larger or smaller.
Working with text
Text is also a challenge. You can’t just start typing the text without adding a new layer first, else it will become part of the layer that’s selected in the Layers palette. With the text in its own layer, you can move it, size it, duplicate it, rotate or flip it (through the Layers menu), but you cannot change the font, the color, or modify the existing text. (One forum mentioned changing colors under Adjustments> Hue/Saturation, but I could only manage to change it from black to white and back.) So if you hate the text colors or misspell a word, you have to delete the layer and reenter the text.
When the text layer is selected, you can use some of the Special Effects Filters to enhance the text, such as Effects > Distort > Bulge. You can also change the Blending Mode after the text is entered. Select the text layer in the Layers palette, click the Properties button (bottom right of the Layers panel)—looks like a wrench, then choose a Blending Mode from the drop-down list, such as Color Burn, Reflect, Overlay, and more.
 JD Sartain / IDG Worldwide
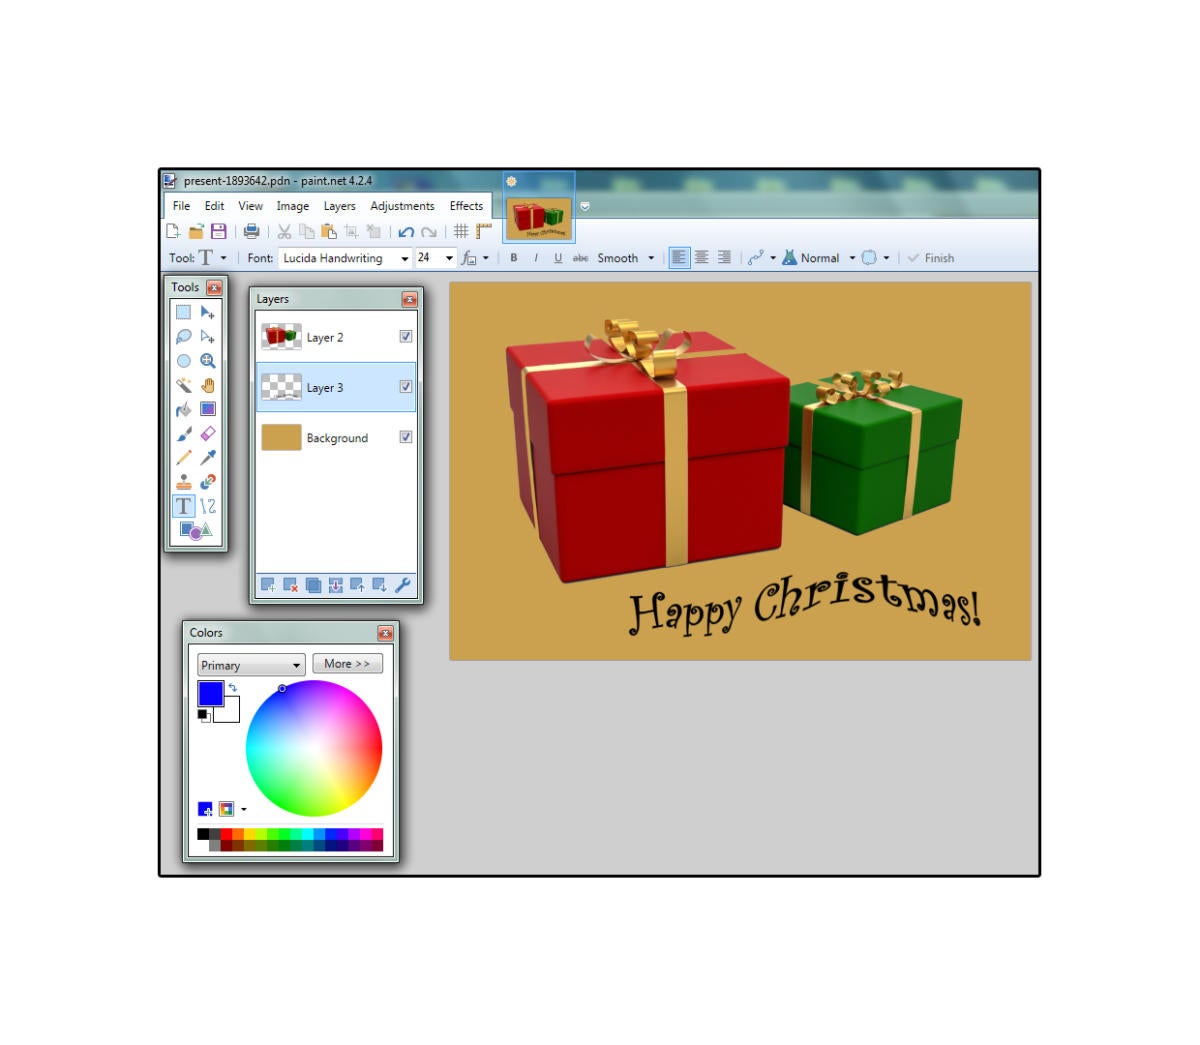
Change the background color, enter text, and add some special effects
My best advice: Play around with it and have fun. Just remember to download Paint.net from the legitimate getpaint.net URL. Beware of download links in other places that might have hitchhiker files attached to the Paint.net download. They could dump bloatware or junk files onto your system.


